Cursed Friendship logo

Project Overview

Project Size: 6 Student Team

Project Duration: 12 Weeks

Cursed Friendship is a cooperative third-person adventure game developed by a multidisciplinary team of six students over a 12-week production cycle at Fanshawe College.

Players control a Wizard and a Monster who have been magically bound together by a curse. Acting as a spring-like connection between both characters, the curse serves as the game's primary gameplay mechanic, requiring players to coordinate movement, solve puzzles, and overcome traversal challenges through cooperation.

As Project Owner and Unity Specialist, I oversaw project development while implementing the majority of the game's technical systems. My responsibilities included the player controller, puzzle implementation, gameplay scripting, character rigging and animation integration, animation systems, audio implementation, lighting, UI systems, and the development of a custom vertex-painting shader used throughout the environment.

Beyond technical implementation, I managed the project's backlog, coordinated development priorities, and contributed to level design across multiple areas of the game.

Cursed Friendship — Full Game Demo

This showcase presents the complete game experience, including the Curse tether mechanic, player movement, cooperative traversal, rock climbing, puzzles, and level progression.

01 — Core Mechanic: The Curse

Design Goal

The Curse mechanic was designed as the central gameplay system of Cursed Friendship. By physically linking the Wizard and Monster through a spring-like connection, players were encouraged to coordinate their movement, communicate effectively, and solve puzzles collaboratively throughout the game.

The mechanic was intentionally designed to create both limitations and opportunities. While the curse restricted player movement and required cooperation, it also became a gameplay tool that players could strategically use to launch one another across gaps, assist with traversal, and introduce additional complexity to climbing sections and environmental puzzles.

Implementation

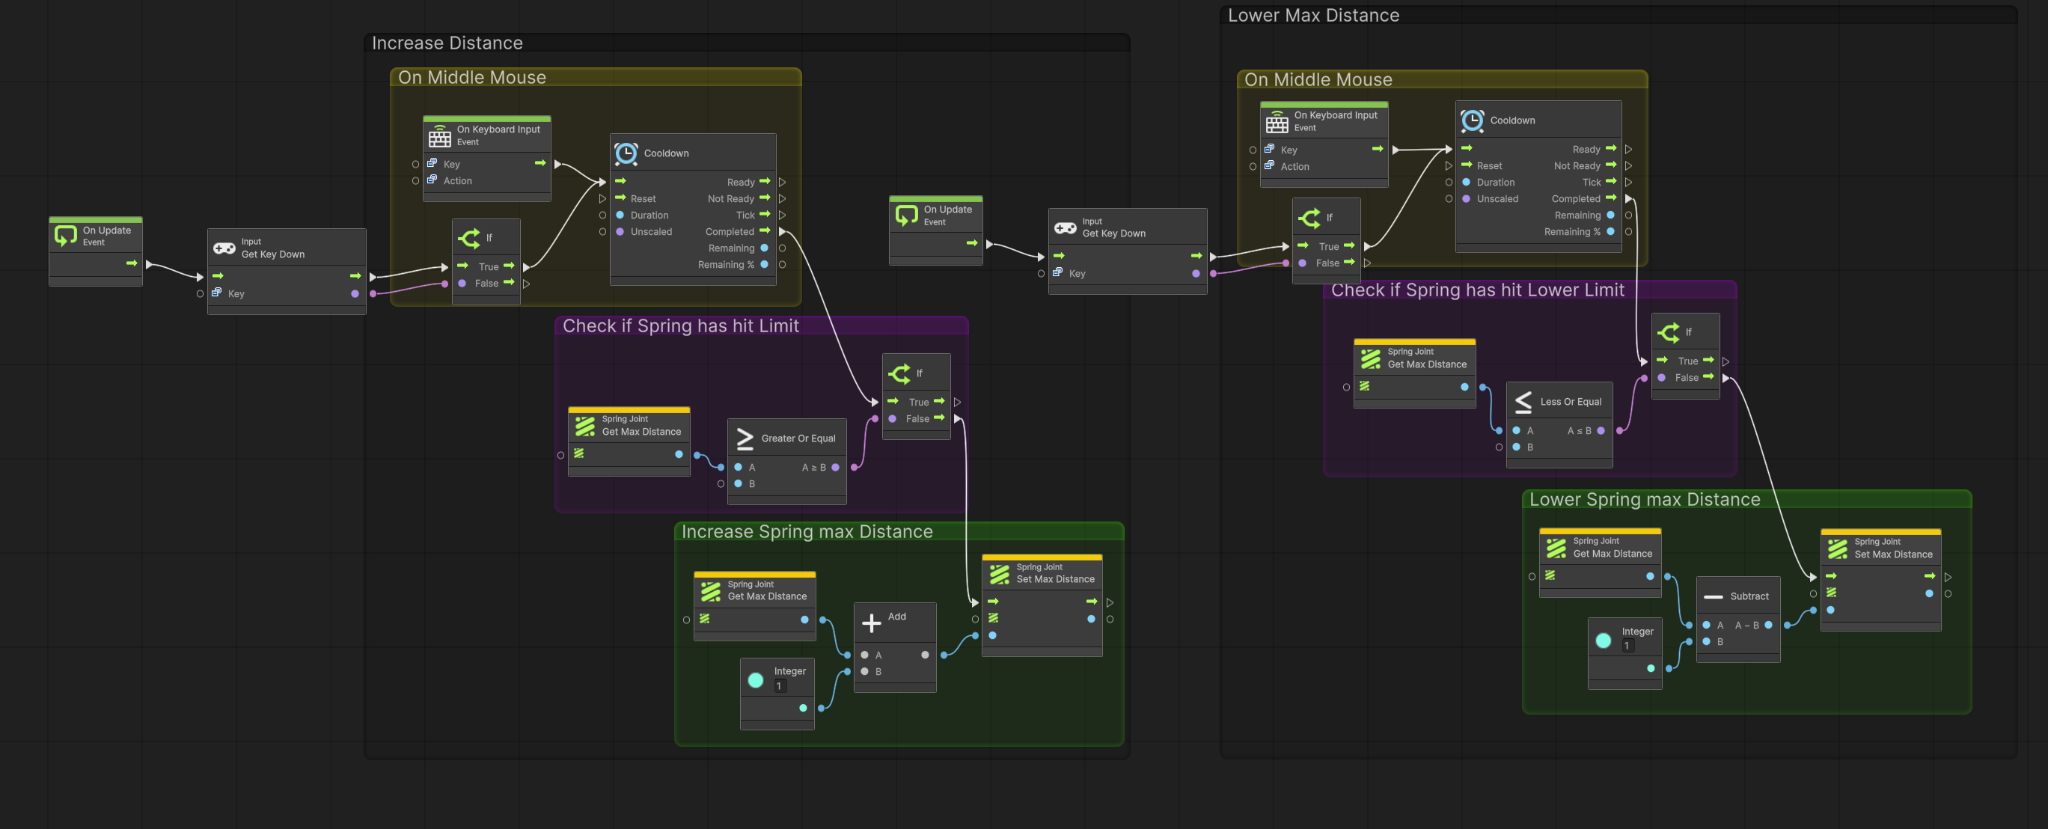
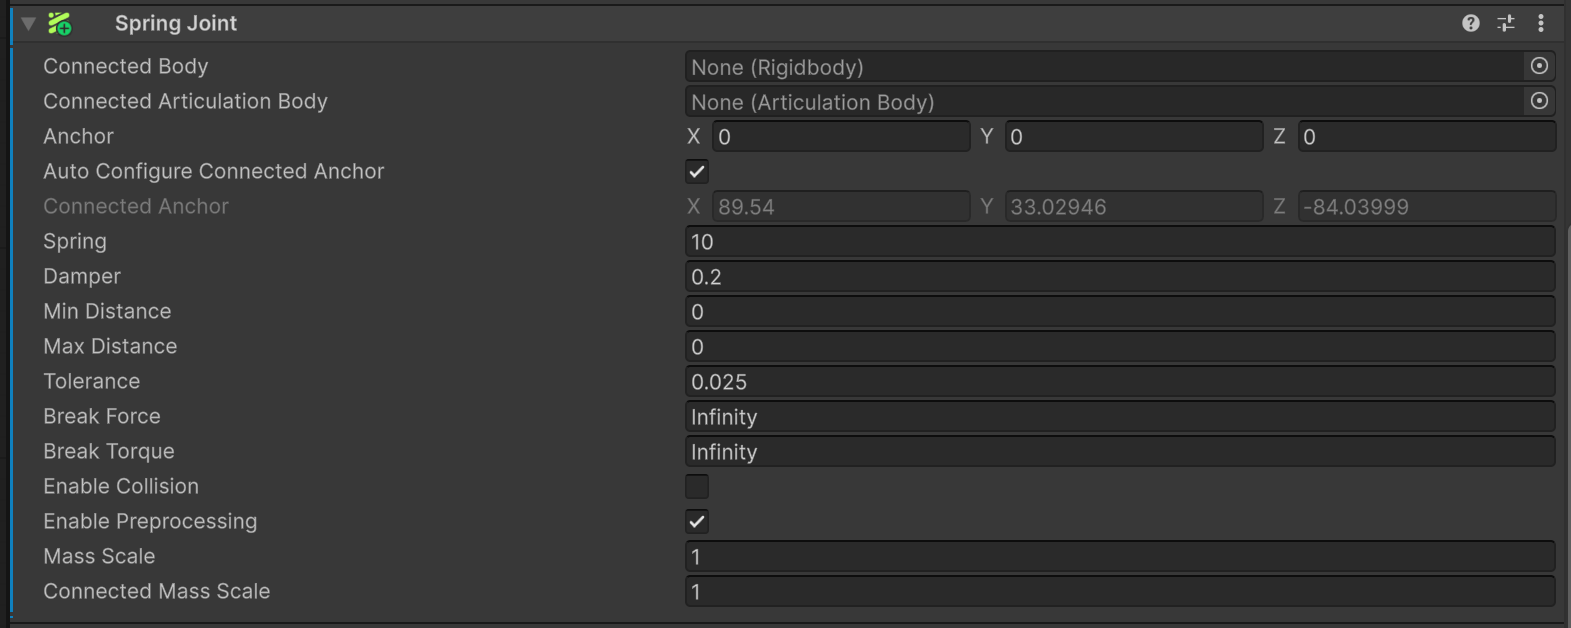
The initial implementation used Unity's built-in Spring Joint component alongside Visual Scripting to create the physical connection between both characters. While functional as an early prototype, the system introduced several technical issues that negatively impacted gameplay stability and performance.

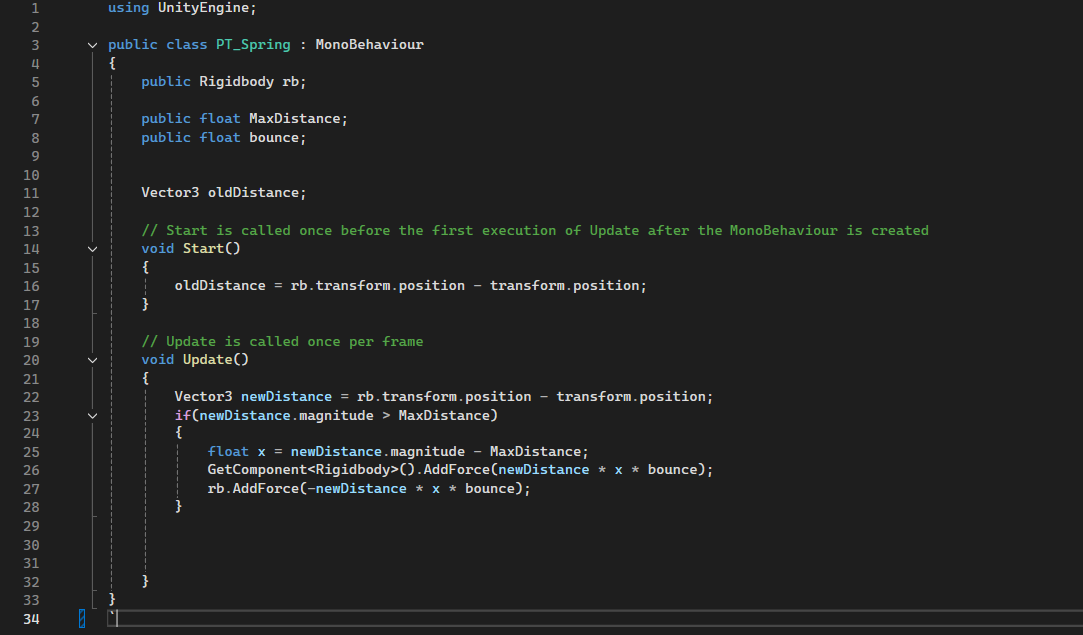
To address these problems, I collaborated with another developer to redesign the mechanic using a custom C# implementation. Replacing the built-in Spring Joint provided significantly greater control over the behavior of the connection while improving stability, responsiveness, and compatibility with the game's other systems.
Technical Breakdown

The custom controller continuously compares the current distance between the linked rigidbodies with a configurable maximum distance. When the connection stretches beyond that limit, the script calculates the excess distance and applies equal and opposite forces to pull both characters back toward the valid range.

Runtime Distance ChecksOpposing Rigidbody ForcesConfigurable BounceDistance LimitsInput Cooldowns

Challenges

Because the Curse mechanic interacted directly with many of the game's core systems, it became one of the most technically challenging features to develop.

  • Conflicts with the Player Controller.
  • Frame-rate dependent behavior affecting gameplay consistency.
  • Interference with the Rock Climbing system.
  • Character clipping and unintended movement.
  • Conflicts with mantling and other traversal mechanics.

Resolving these issues required extensive debugging, profiling, and iterative testing. Through investigation and collaboration, we identified the built-in Spring Joint implementation as the primary source of many system conflicts. Replacing it with a custom C# solution eliminated the majority of these issues and significantly improved gameplay stability.
02 — Player Controller

Controller Architecture

Cursed Friendship uses two distinct playable-character controllers. The Wizard focuses on cooperative support mechanics, including the Anchor and Back Hook systems, while the Monster focuses on movement and its player-controlled Slash attack. Both controllers connect movement, animation, audio, interaction prompts, and the shared Curse mechanic. The Monster's custom C# Rock Climbing system is documented separately in the next section.

Wizard Controller — Player 1

Wizard Player Controller state machine

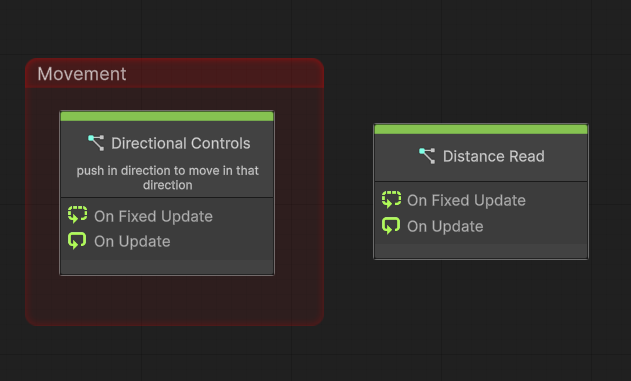
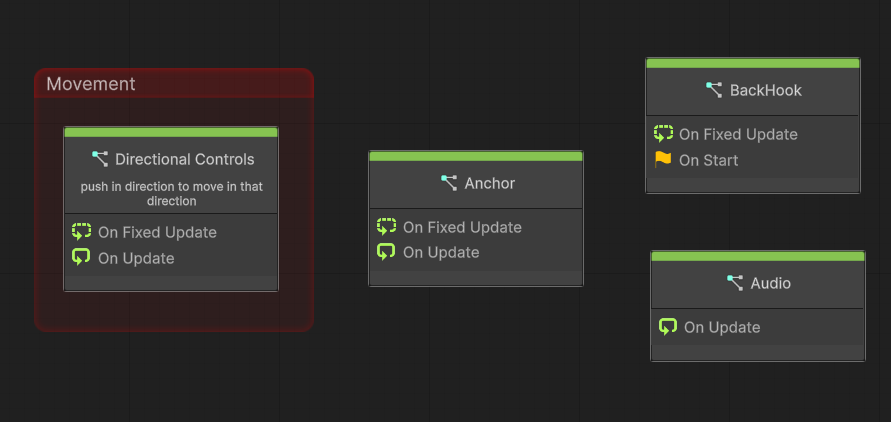
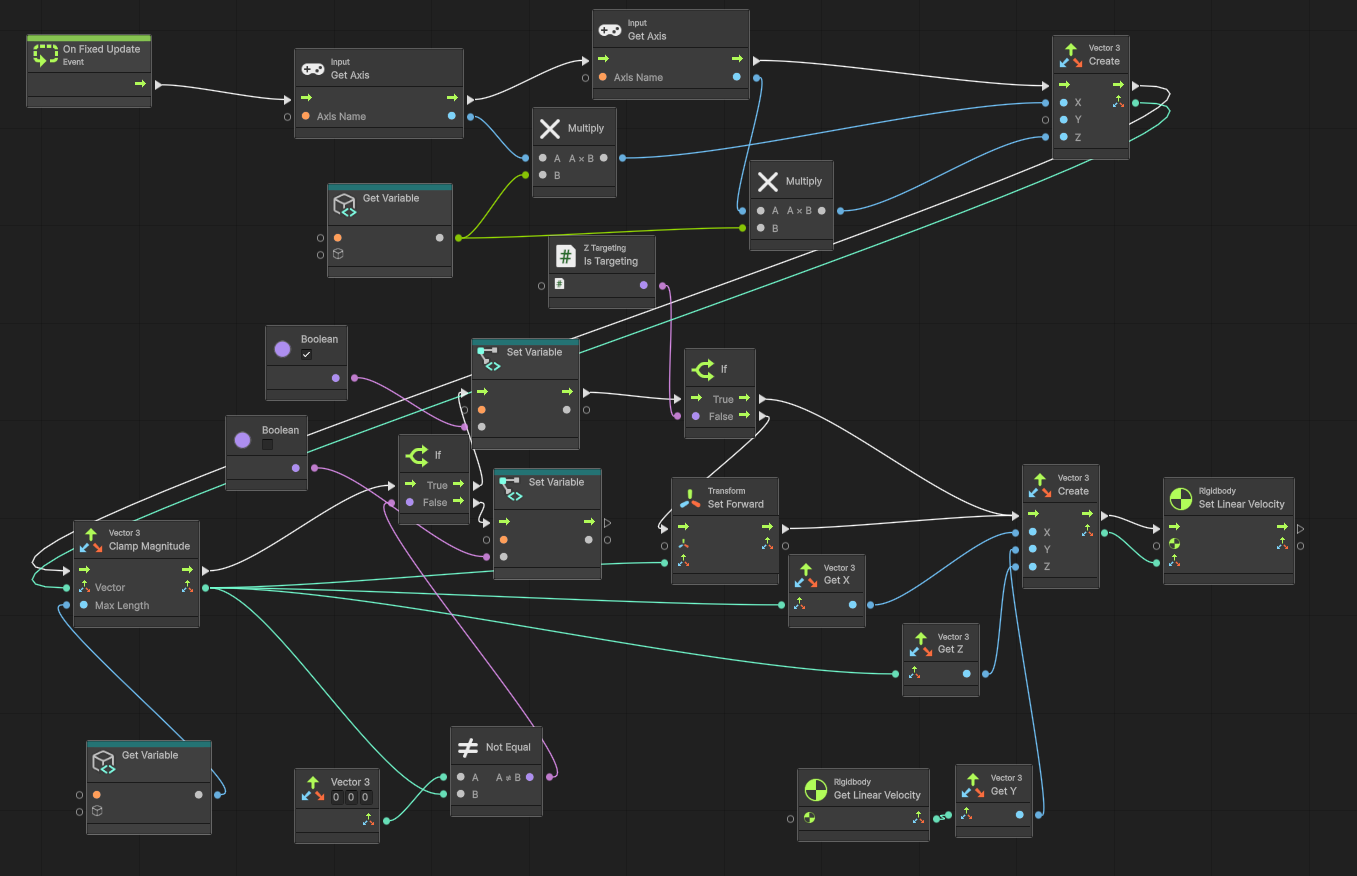
The Wizard controller handles standard movement and the cooperative systems used to support the Monster. Its Visual Scripting graphs are divided into focused modules so movement, presentation, and interaction logic can be debugged and iterated independently.

Movement

Anchor System

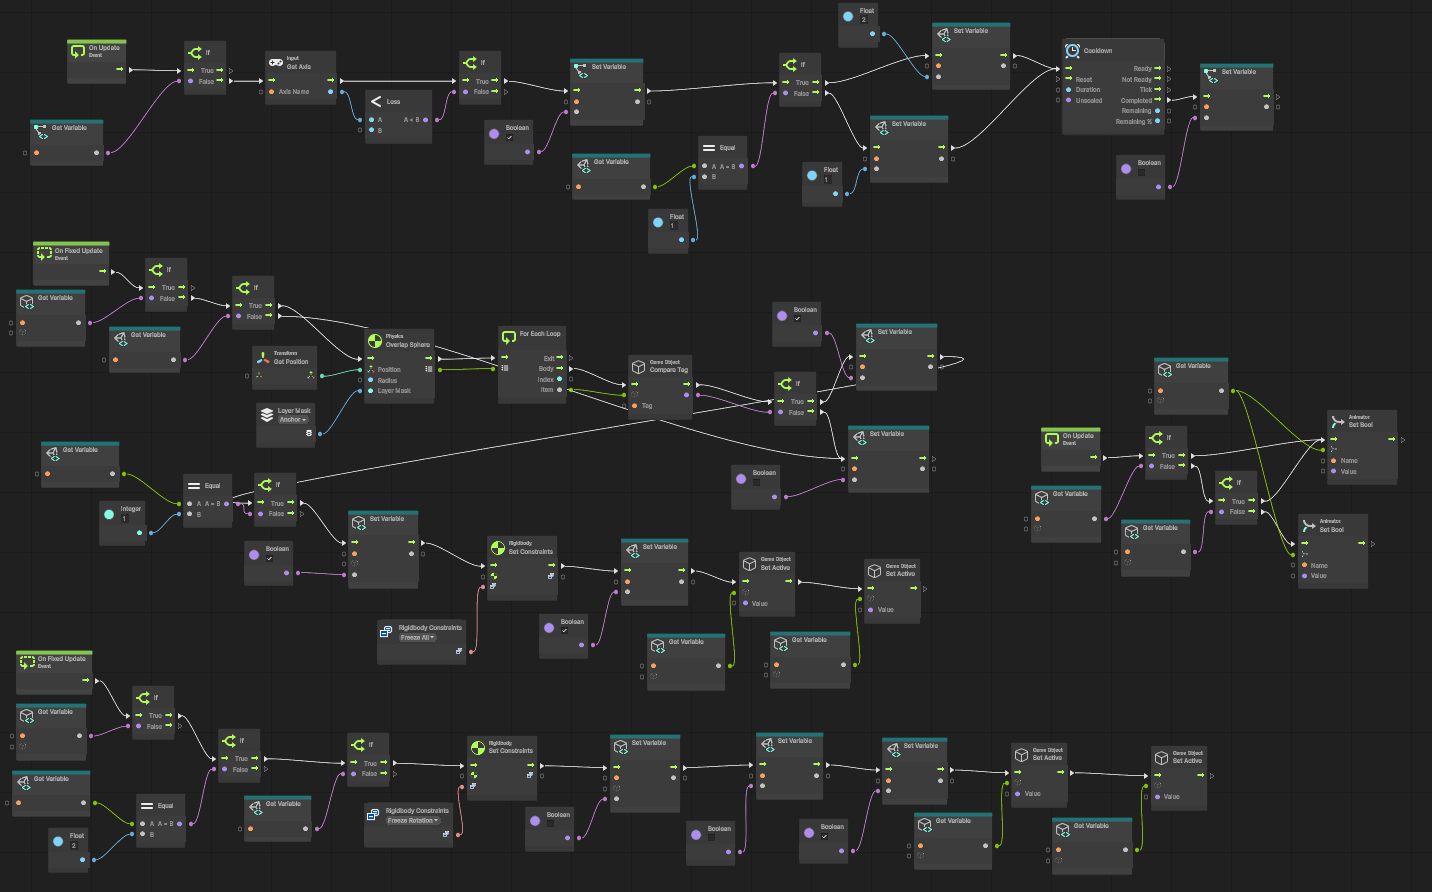
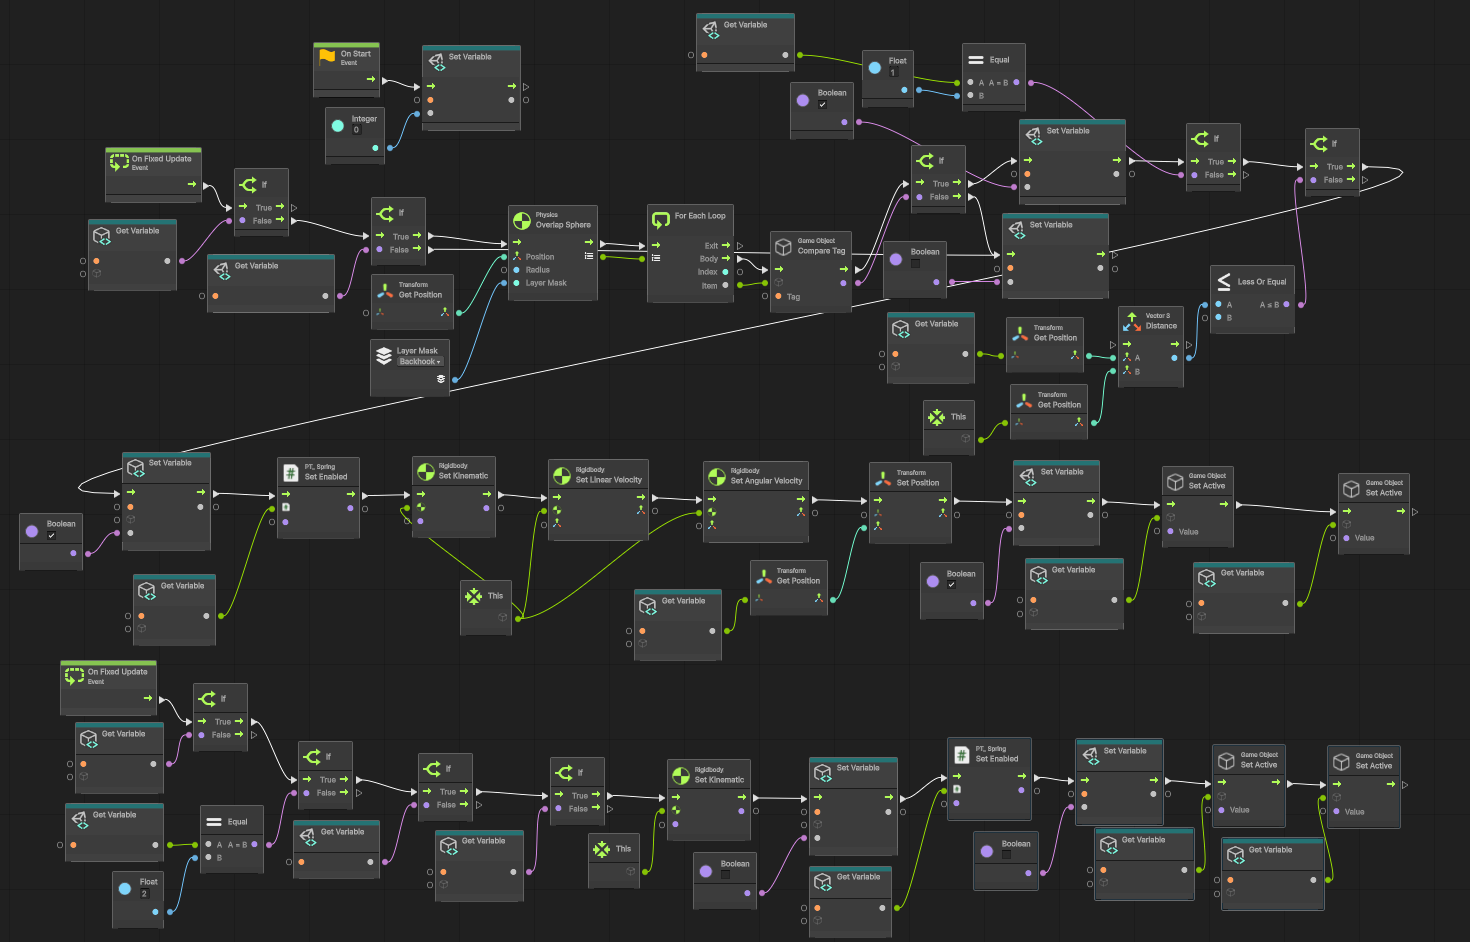
The Anchor system checks for nearby valid interaction points, controls prompts and animation states, and manages Rigidbody constraints while the Wizard is anchored.

Wizard Anchor system Visual Scripting graph
Wizard Anchor detection, interaction state, physics constraints, and UI prompt logic.

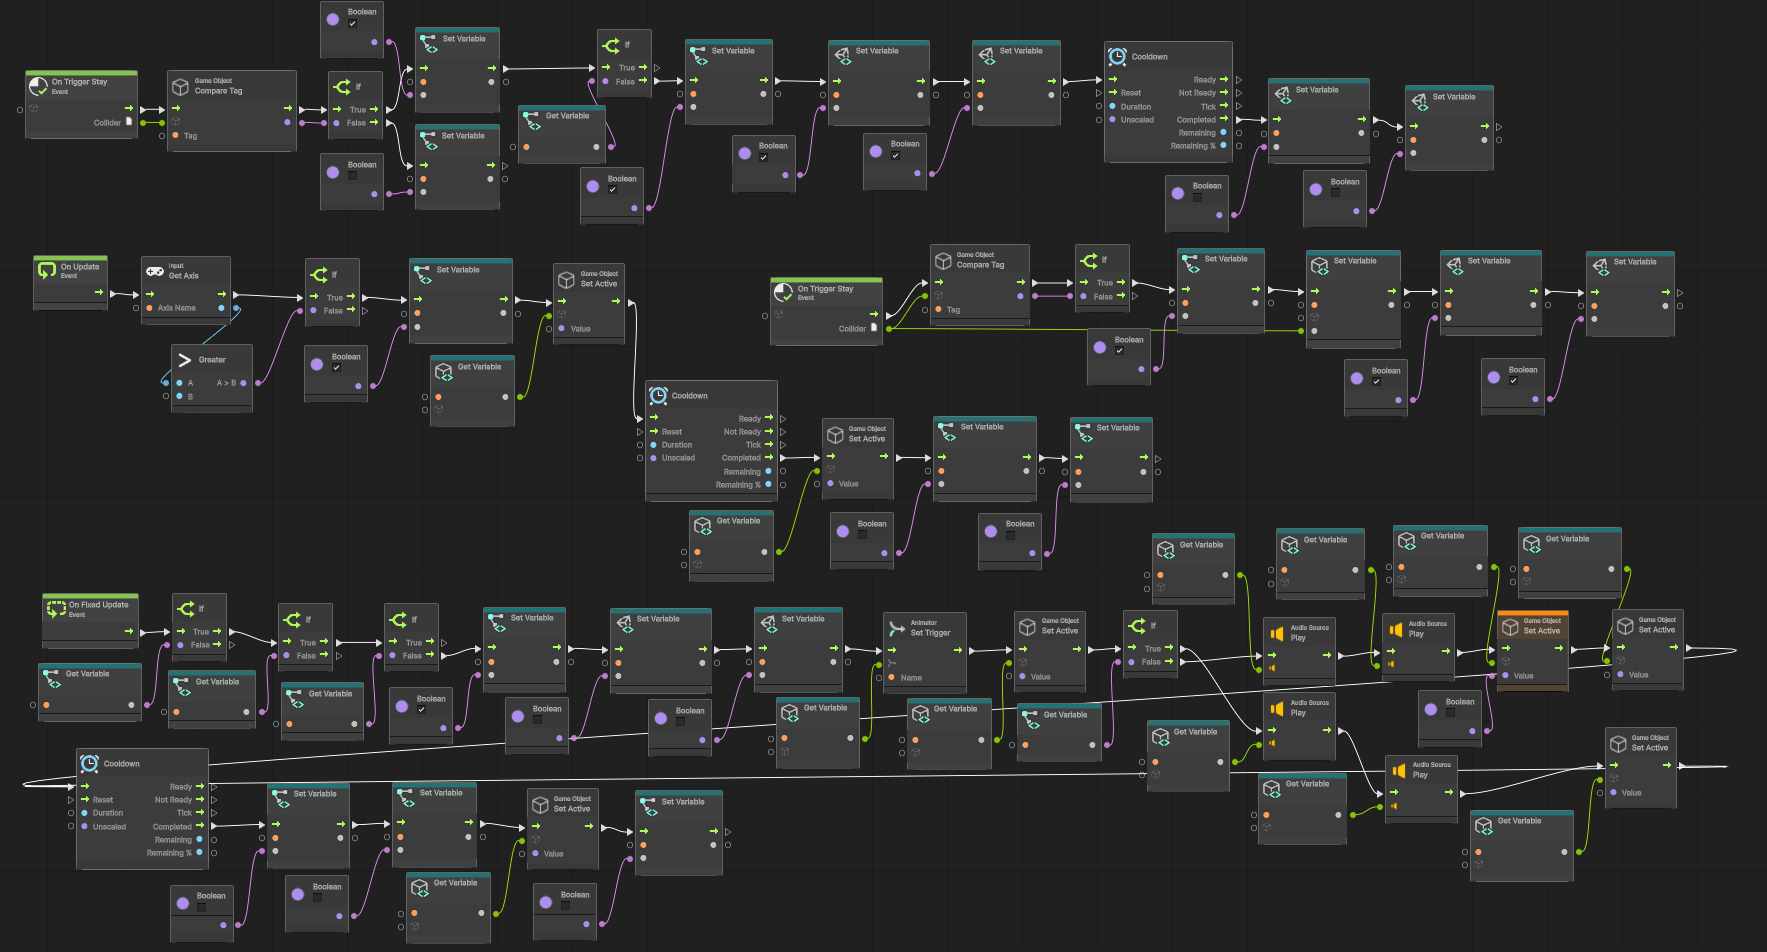
Back Hook

The Back Hook allows the Wizard to connect to the Monster during cooperative traversal. The graph detects the valid hook target, checks range, controls the connection state, resets velocity, and coordinates physics changes when attaching or releasing.

Wizard Back Hook Visual Scripting graph
Back Hook target detection, distance validation, attachment, release, and physics-state management.

Monster Controller — Player 2

State Machine

Monster Player Controller State Machine

The Monster Controller handles standard movement alongside the distance checks used to control several of the Monster's gameplay actions. These checks determine when specific interactions are available and help manage the behavior of the shared Curse tether, including its allowed length and rebound.

The Monster's Slash attack can only be triggered when the player is within the appropriate interaction area. The same type of validation is used for Rock Climb walls, ensuring the Monster only enters the climbing state when a valid climbable surface is detected.

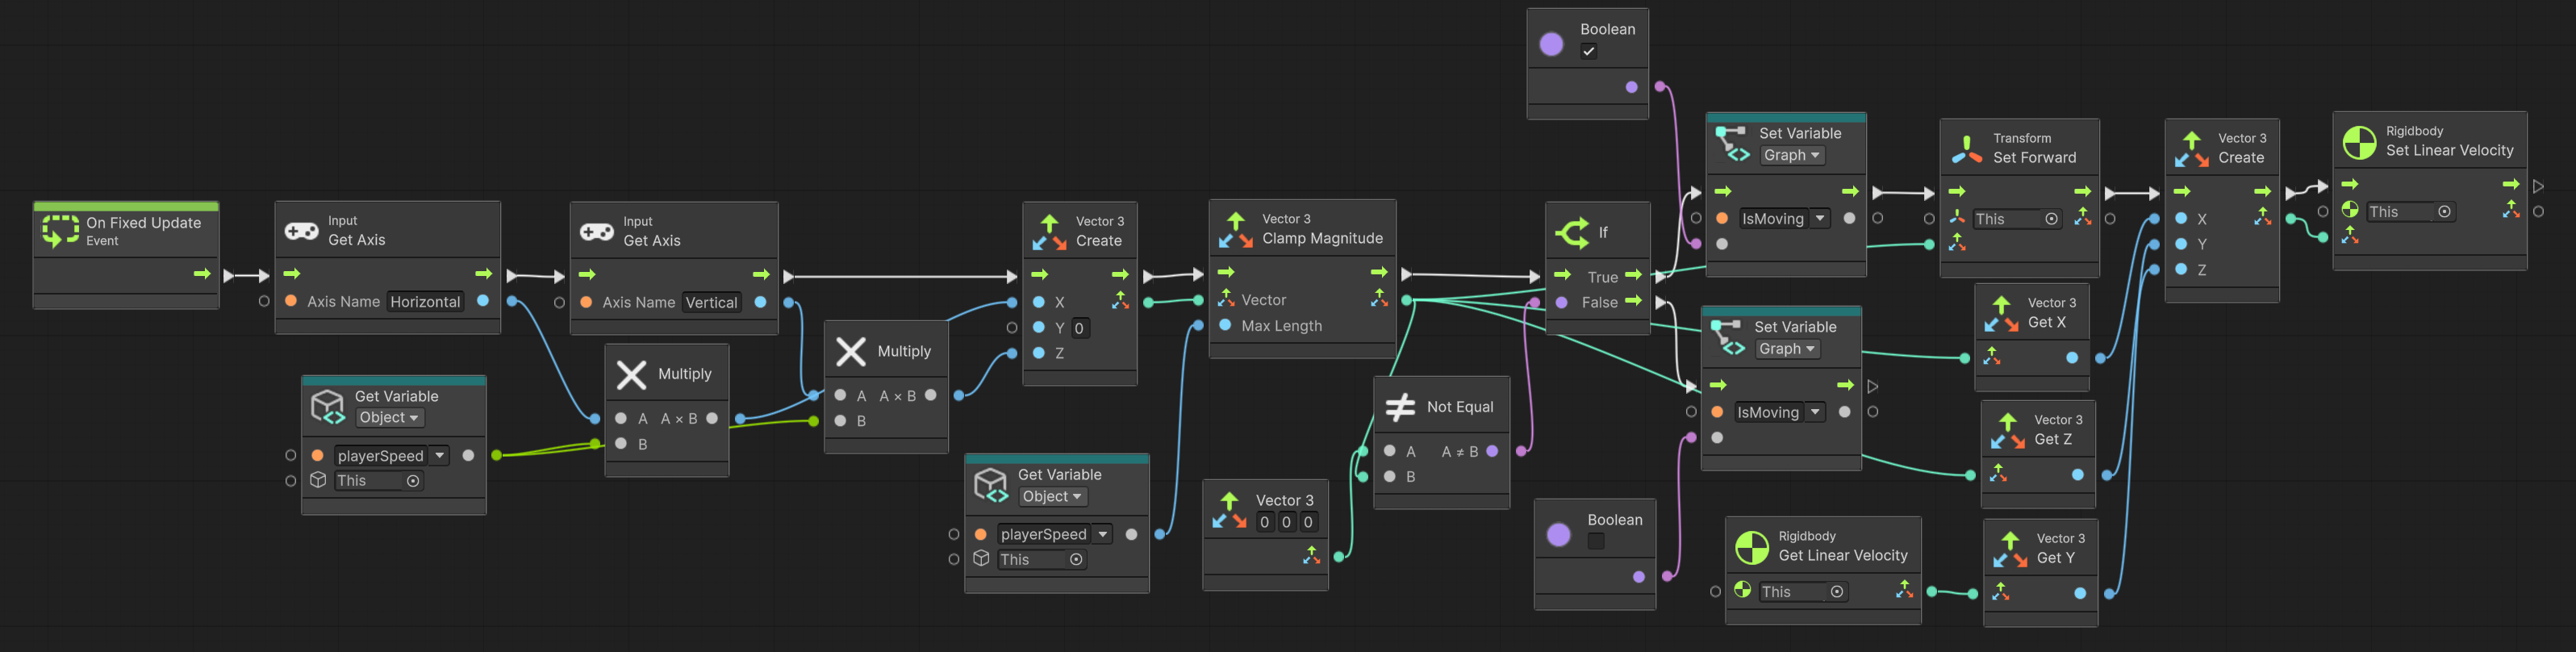
Movement

Monster Movement Visual Scripting graph

Distance Check / Slash

The Distance Check allows the player controller to transition into the appropriate gameplay state by detecting nearby Rock Climb walls, Wizard interaction walls, and split-section boundaries.

Integration Challenges

Because both controllers were linked by the Curse mechanic, changes to climbing, anchoring, Back Hook behavior, combat, collision, or animation could affect the other player. The controllers required repeated testing and debugging to keep the two characters responsive while preserving their distinct abilities.

03 — Rock Climbing System

Monster Rock Climbing — C#

Design Goal

The Rock Climbing system was designed to support traversal-focused gameplay while providing players with additional freedom when navigating the environment. Because Cursed Friendship relied heavily on cooperation between the Wizard and Monster, the climbing system needed to work seamlessly alongside the core Curse mechanic while remaining responsive, predictable, and easy to read.

The objective was to create a traversal system that allowed players to climb designated surfaces, access new areas, and interact with level layouts in ways that supported exploration, puzzle solving, and cooperative gameplay.

Implementation

I implemented the Rock Climbing system as a dedicated traversal mechanic that integrates with the Player Controller and Curse systems. The Monster can detect climbable surfaces, enter a climbing state, move across valid climbing areas, stop safely at the top of a wall, mantle over ledges, and transition smoothly back into standard movement.

C#Climb DetectionState MachineAttach / DetachWall TraversalMantlingCollisionAnimation StatesCurse Integration

Because climbing was used throughout multiple levels, the system was designed to be reusable, stable, and adaptable to a variety of environment layouts.

C# Implementation

The custom RockClimbingController uses separate normal, climbing, and top-of-wall states. A SphereCast detects climbable surfaces, the Rigidbody is aligned and snapped to the wall plane, and movement is calculated from vectors derived from the detected wall normal. Stable top detection prevents overshooting before the mantle action moves the Monster above the ledge and returns control to standard movement.

RockClimb.csC# · 291 lines
Open full file
using UnityEngine;
 
[RequireComponent(typeof(Rigidbody))]
[RequireComponent(typeof(CapsuleCollider))]
public class RockClimbingController : MonoBehaviour
{
    private enum ClimbState { None, Climbing, AtTop }
    private ClimbState state = ClimbState.None;
 
    [Header("Climbing Settings")]
    [SerializeField] private float climbSpeed = 5f;
    [SerializeField] private float wallDetectionDistance = 2f;
    [SerializeField] private float wallSnapOffset = 0.25f;
    [SerializeField] private LayerMask climbableLayer;
 
    [Header("Wall Probing")]
    [SerializeField] private float chestHeight = 1f;
    [SerializeField] private float wallStickRadius = 0.45f;
 
    [Header("Top Stop")]
    [SerializeField] private float topStopMargin = 0.05f;
    [SerializeField] private float topEpsilon = 0.05f;
    [SerializeField] private int topStableFramesRequired = 2;
 
    [Header("Mantle")]
    [SerializeField] private float mantleForward = 1.2f;
    [SerializeField] private float mantleUpExtra = 0.8f;
    [SerializeField] private float mantleClearanceUp = 0.1f;
 
    [Header("Input (Old Input Manager)")]
    [SerializeField] private string attachButtonLB = "LB";
    [SerializeField] private string climbTriggerLT = "LT";
    [SerializeField] private string horizontalAxis = "Horizontal";
    [SerializeField] private string verticalAxis = "Vertical";
 
    [Range(0f, 1f)]
    [SerializeField] private float ltThreshold = 0.5f;
 
    [SerializeField] private bool ltIsMinusOneToOne = false;
 
    [Header("UI / Prompt Bools")]
    public bool showClimbPrompt;
    public bool showMantlePrompt;
    public bool isClimbing;
 
    private Rigidbody rb;
    private CapsuleCollider capsule;
 
    private Vector3 wallNormal;
    private Vector3 wallPointOnPlane;
    private Collider currentWall;
    private float wallTopY;
 
    private int topStableFrames;
    private float detachLockUntil;
 
    private Vector2 moveInput;
    private bool mantleConsumed;
 
    public bool IsClimbing => state != ClimbState.None;
 
    private void Start()
    {
        rb = GetComponent<Rigidbody>();
        capsule = GetComponent<CapsuleCollider>();
        rb.interpolation = RigidbodyInterpolation.Interpolate;
    }
 
    private void Update()
    {
        moveInput.x = Input.GetAxis(horizontalAxis);
        moveInput.y = Input.GetAxis(verticalAxis);
 
        UpdatePromptBools();
 
        if (Input.GetButtonDown(attachButtonLB))
        {
            if (state == ClimbState.None)
            {
                if (TryFindWall(out RaycastHit hit))
                    Attach(hit);
            }
            else if (Time.time >= detachLockUntil)
            {
                Detach(true);
            }
        }
    }
 
    private void FixedUpdate()
    {
        if (state == ClimbState.None) return;
 
        rb.MoveRotation(Quaternion.LookRotation(-wallNormal, Vector3.up));
 
        bool ltPressed = ReadLT();
        bool atTop = IsAtTop();
 
        topStableFrames = atTop ? topStableFrames + 1 : 0;
 
        showMantlePrompt = atTop && !mantleConsumed;
 
        if (atTop && ltPressed && !mantleConsumed)
        {
            mantleConsumed = true;
            showMantlePrompt = false;
            Mantle();
            return;
        }
 
        if (!ltPressed)
            mantleConsumed = false;
 
        if (topStableFrames >= topStableFramesRequired)
        {
            state = ClimbState.AtTop;
            FreezeAtTop();
            return;
        }
 
        state = ClimbState.Climbing;
        ClimbMove();
    }
 
    private void Attach(RaycastHit hit)
    {
        state = ClimbState.Climbing;
        topStableFrames = 0;
        mantleConsumed = false;
 
        rb.useGravity = false;
        rb.linearVelocity = Vector3.zero;
        rb.angularVelocity = Vector3.zero;
 
        wallNormal = hit.normal;
        wallPointOnPlane = hit.point;
        currentWall = hit.collider;
        wallTopY = currentWall.bounds.max.y;
 
        rb.position = SnapToWall(rb.position);
        rb.rotation = Quaternion.LookRotation(-wallNormal, Vector3.up);
 
        detachLockUntil = Time.time + 0.15f;
 
        showClimbPrompt = false;
        showMantlePrompt = false;
        isClimbing = true;
    }
 
    private void Detach(bool push)
    {
        state = ClimbState.None;
 
        rb.useGravity = true;
        rb.linearVelocity = Vector3.zero;
        rb.angularVelocity = Vector3.zero;
 
        if (push)
            rb.AddForce(wallNormal * 2.5f, ForceMode.Impulse);
 
        currentWall = null;
        showMantlePrompt = false;
        isClimbing = false;
    }
 
    private void ClimbMove()
    {
        Vector3 right = Vector3.Cross(wallNormal, Vector3.up).normalized;
        Vector3 up = Vector3.Cross(right, wallNormal).normalized;
 
        Vector3 movement =
            (moveInput.x * right + moveInput.y * up) *
            climbSpeed * Time.fixedDeltaTime;
 
        Vector3 desired = rb.position + movement;
 
        float stopY = GetStopCenterY();
        if (!float.IsInfinity(stopY) && desired.y > stopY)
            desired.y = stopY;
 
        rb.MovePosition(SnapToWall(desired));
    }
 
    private void FreezeAtTop()
    {
        rb.linearVelocity = Vector3.zero;
        rb.angularVelocity = Vector3.zero;
 
        Vector3 pos = rb.position;
        float stopY = GetStopCenterY();
        if (!float.IsInfinity(stopY))
            pos.y = stopY;
 
        rb.MovePosition(SnapToWall(pos));
    }
 
    private void Mantle()
    {
        float halfHeight = GetCapsuleHalfHeight();
 
        Vector3 outward = new Vector3(wallNormal.x, 0f, wallNormal.z).normalized;
 
        float targetY = wallTopY + halfHeight + mantleClearanceUp + mantleUpExtra;
 
        Vector3 target =
            new Vector3(rb.position.x, targetY, rb.position.z) +
            outward * mantleForward;
 
        rb.linearVelocity = Vector3.zero;
        rb.angularVelocity = Vector3.zero;
        rb.MovePosition(target);
 
        Detach(false);
    }
 
    private bool ReadLT()
    {
        float lt = Input.GetAxis(climbTriggerLT);
        if (ltIsMinusOneToOne)
            lt = Mathf.InverseLerp(-1f, 1f, lt);
 
        return lt >= ltThreshold;
    }
 
    private bool IsAtTop()
    {
        if (currentWall == null) return false;
 
        float stopY = wallTopY - topStopMargin;
        return GetCapsuleTopY() >= stopY - topEpsilon;
    }
 
    private float GetStopCenterY()
    {
        if (currentWall == null) return float.PositiveInfinity;
 
        float stopY = wallTopY - topStopMargin;
        return stopY - GetCapsuleHalfHeight();
    }
 
    private Vector3 SnapToWall(Vector3 pos)
    {
        float dist = Vector3.Dot(pos - wallPointOnPlane, wallNormal);
        Vector3 corrected = pos - wallNormal * (dist - wallSnapOffset);
        corrected.y = pos.y;
        return corrected;
    }
 
    private bool TryFindWall(out RaycastHit hit)
    {
        Vector3 origin = rb.position + Vector3.up * chestHeight;
 
        return Physics.SphereCast(
            origin,
            wallStickRadius,
            transform.forward,
            out hit,
            wallDetectionDistance,
            climbableLayer,
            QueryTriggerInteraction.Ignore
        );
    }
 
    private float GetCapsuleHalfHeight()
    {
        float height = capsule.height * Mathf.Abs(transform.lossyScale.y);
        float radius = capsule.radius * Mathf.Abs(transform.lossyScale.y);
        return Mathf.Max(height * 0.5f, radius);
    }
 
    private float GetCapsuleTopY()
    {
        return transform.TransformPoint(capsule.center).y + GetCapsuleHalfHeight();
    }
 
    private void UpdatePromptBools()
    {
        isClimbing = state != ClimbState.None;
 
        if (state == ClimbState.None)
        {
            showMantlePrompt = false;
            showClimbPrompt = TryFindWall(out _);
        }
        else
        {
            showClimbPrompt = false;
            showMantlePrompt = IsAtTop() && !mantleConsumed;
        }
    }
}

Technical Highlights

  • Dedicated climbing state machine for normal, climbing, and top-of-wall behavior.
  • SphereCast probing for reliable climbable-wall detection.
  • Wall-relative movement generated from the detected surface normal.
  • Rigidbody alignment and wall snapping to maintain a stable climbing position.
  • Top-of-wall stabilization to prevent overshooting before mantling.
  • Controlled mantle placement and safe return to normal movement.
  • Climb and mantle prompt states exposed for UI integration.

Challenges

One of the biggest challenges was ensuring the climbing system worked correctly alongside both the Curse mechanic and the Player Controller. Since the Wizard and Monster were physically connected, climbing frequently introduced conflicts involving movement, collision, and player positioning.

  • Player clipping through walls.
  • Movement triggering without valid player input.
  • Climbing scripts failing during runtime.
  • Conflicts with mantling behavior.
  • Player Controller issues caused by the Curse mechanic.
  • Collision and positioning problems while climbing.
  • Difficulties allowing the Wizard to correctly attach to the Monster while climbing.

Resolving these issues required extensive debugging, iteration, and testing across multiple gameplay scenarios to ensure stable traversal while maintaining cooperative gameplay.

Download RockClimb.cs

04 — Level Design & Puzzle Implementation

Level Design

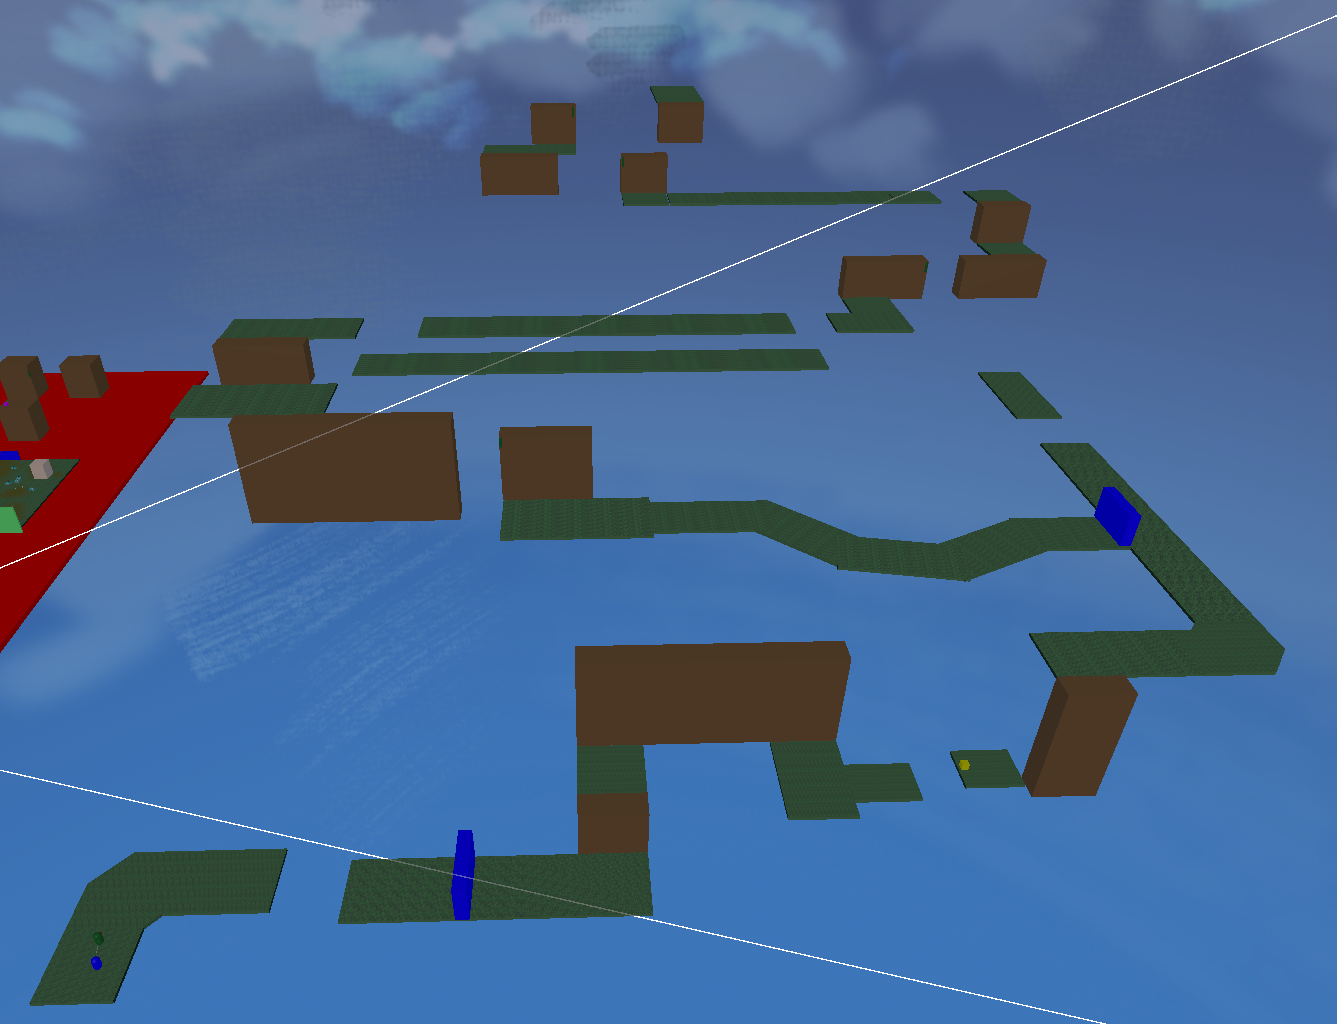
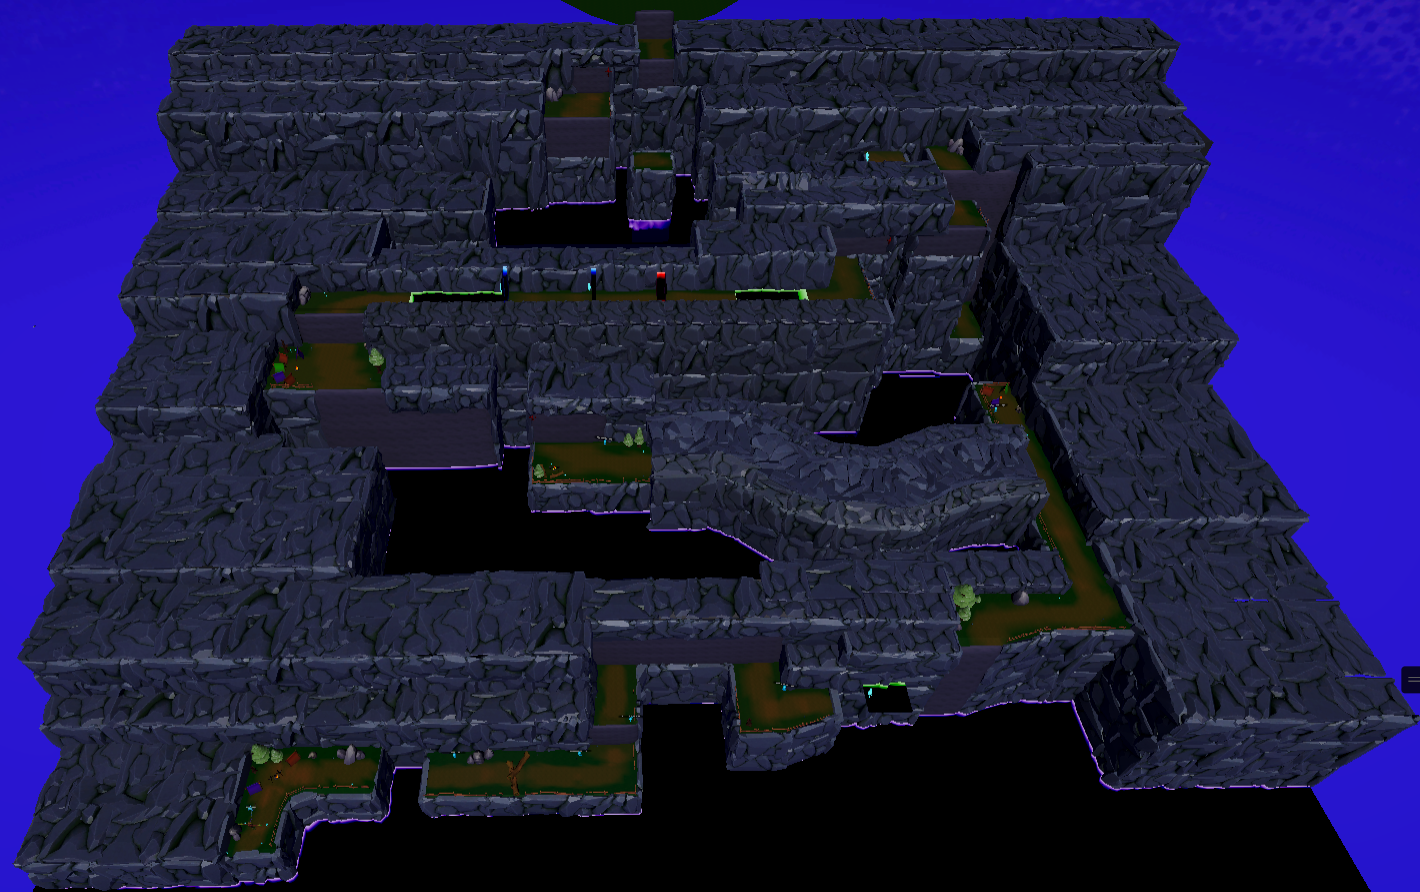
The level-design section documents the progression from early planning and gameplay blockout to the completed environment. A full level walkthrough will be added to demonstrate the final traversal and puzzle flow in motion.

Level 5 — Design Goal

Level 5 was the first fully designed level created for Cursed Friendship and established the project's overall level design direction. It expanded player mastery of climbing, traversal, puzzle solving and cooperation while preparing players for the final stages of the game.

Layout & Flow

The level alternates between traversal, exploration and puzzle solving to maintain pacing while encouraging communication between both players.

  • Advanced rock climbing sections.
  • Curse-assisted swinging traversal.
  • Cave exploration.
  • Player separation challenges.
  • Anchor / Detach mechanics.
  • Environmental navigation puzzles.
  • Cooperative traversal sequences.

Mechanics Introduced

  • Advanced climbing routes.
  • Curse-assisted swinging.
  • Vertical traversal.
  • Player reunification sequences.
  • Wizard Anchor / Detach abilities.
  • Multi-step traversal puzzles.
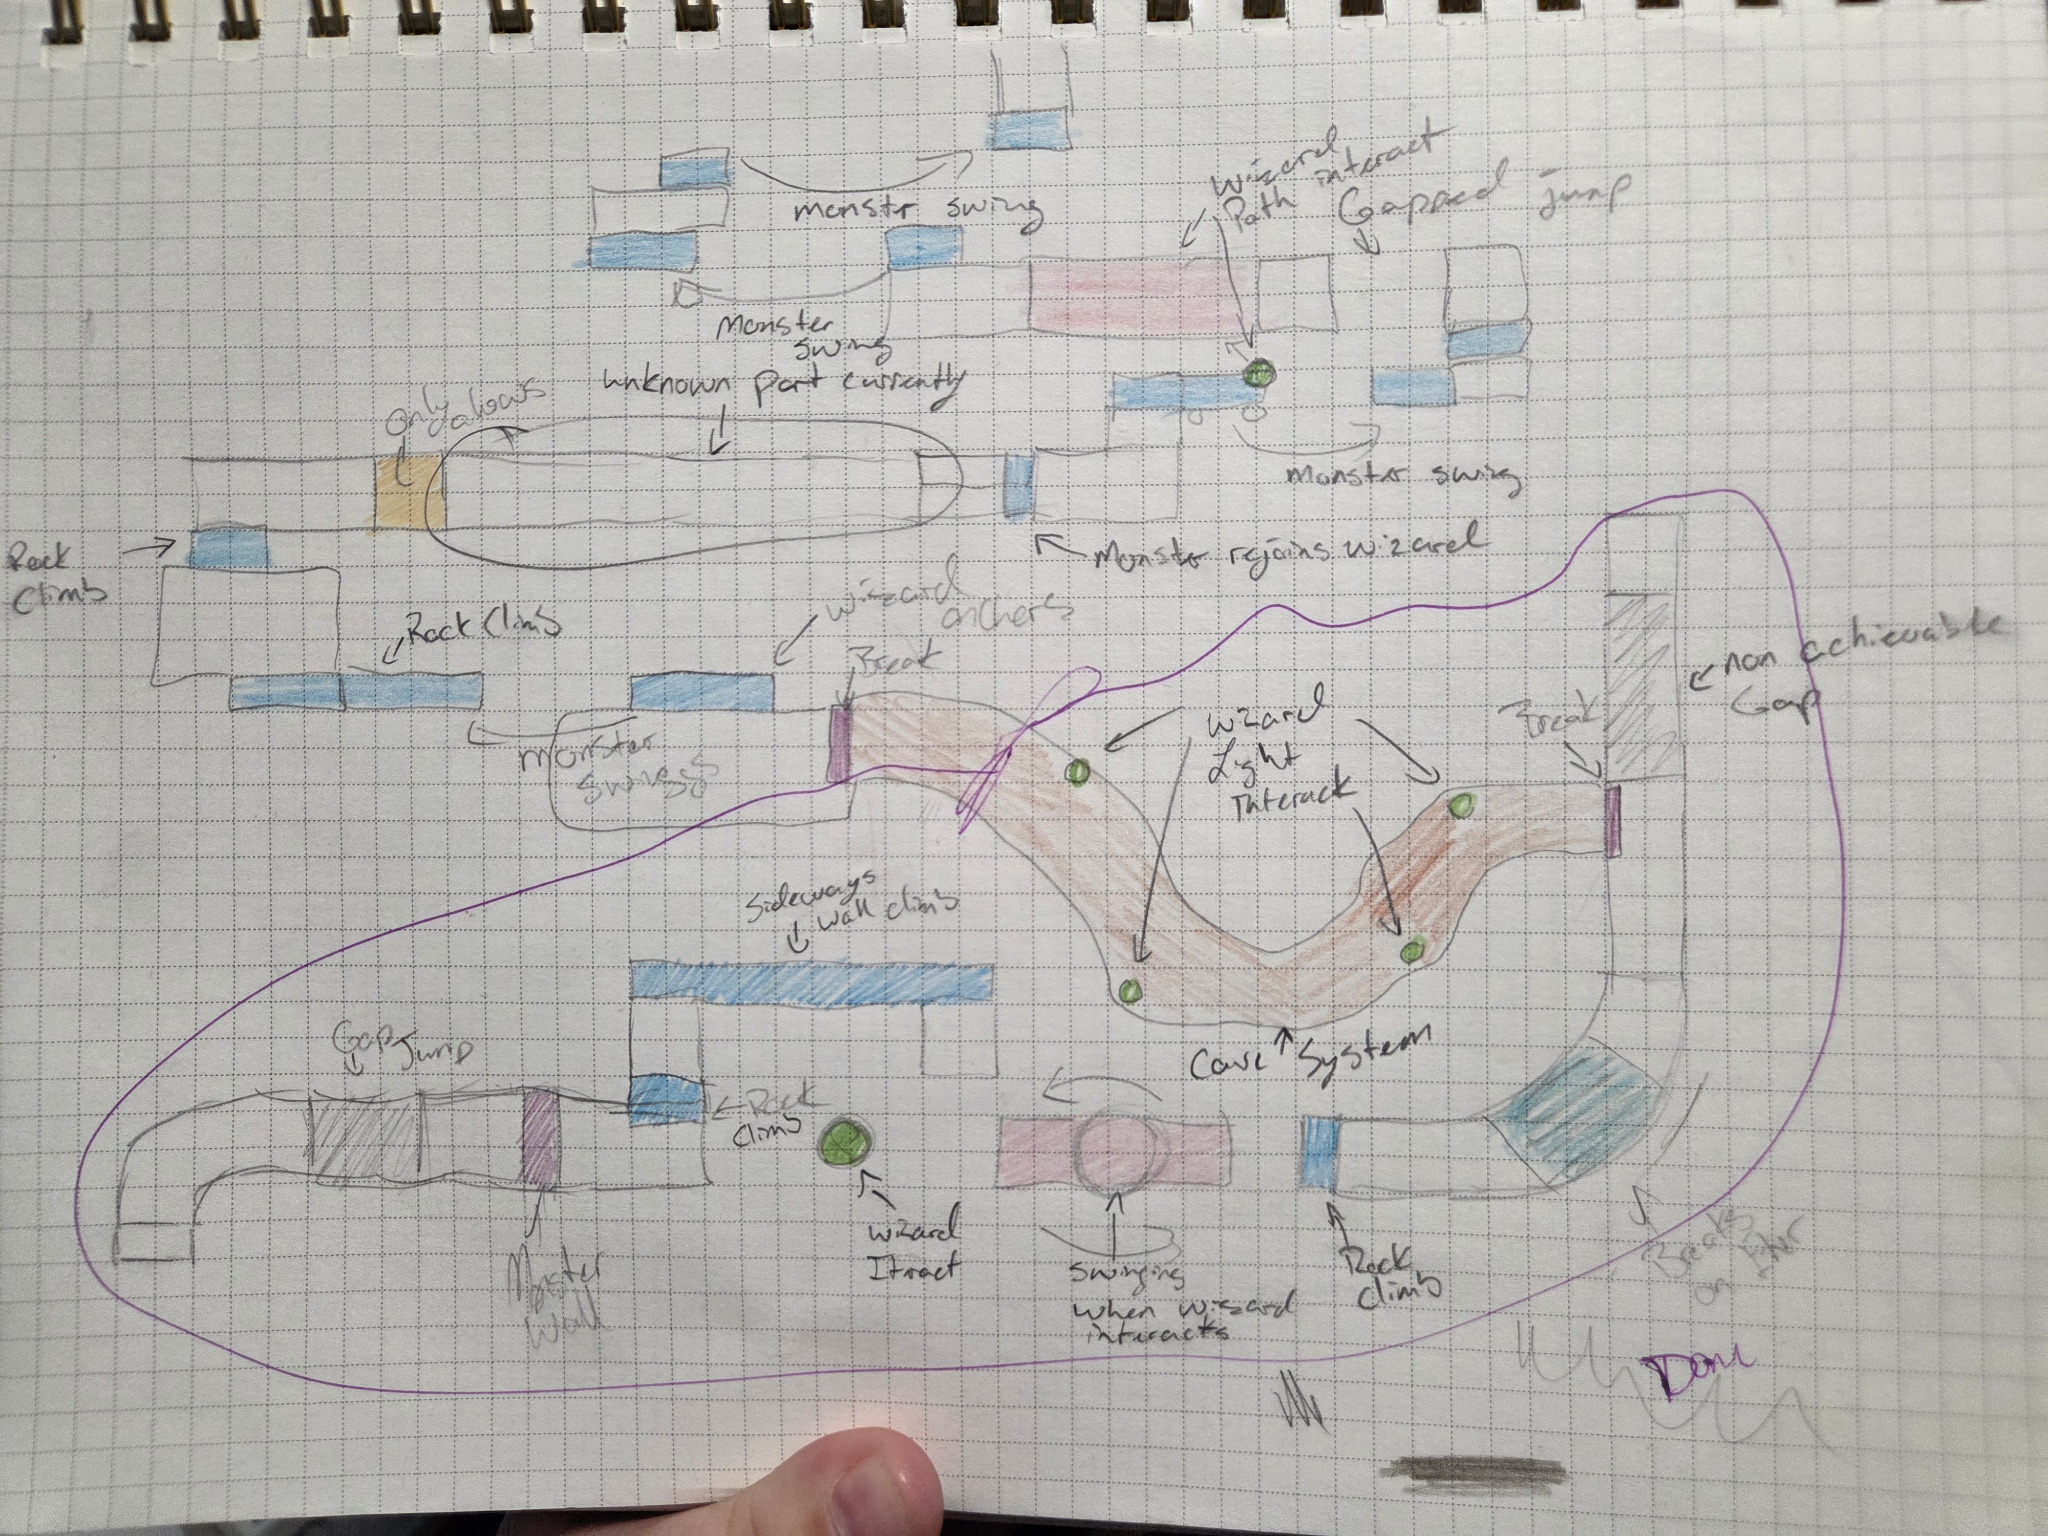
Paper Level Design
Paper Level Design. Early planning for puzzle flow, climbing routes, swinging sections, anchor placement, player separation and cooperative traversal.

Design Process

Development began with paper layouts before moving into Unity blockouts. I used the blockout to evaluate progression, traversal readability, pacing, cooperative gameplay, and puzzle placement, then iterated through playtesting before replacing the prototype geometry with the final modular environment.

Design Influence

Level 5 became the reference point for traversal pacing, puzzle complexity, cooperative gameplay, mechanic progression, and environmental challenge structure used throughout the rest of the project.


Puzzle Systems

Monolith Puzzle

The Monolith Puzzle became one of the project's primary cooperative puzzle systems. I debugged, refined, and integrated the mechanic into the game's broader puzzle framework, improving reliability and supporting implementation across multiple levels.

  • Fixed sequence logic.
  • Improved reliability.
  • Integrated barriers and progression.
  • Tested across multiple levels.

Statue Puzzle

Contribution: Primary Owner (Design & Implementation)

Design Goal

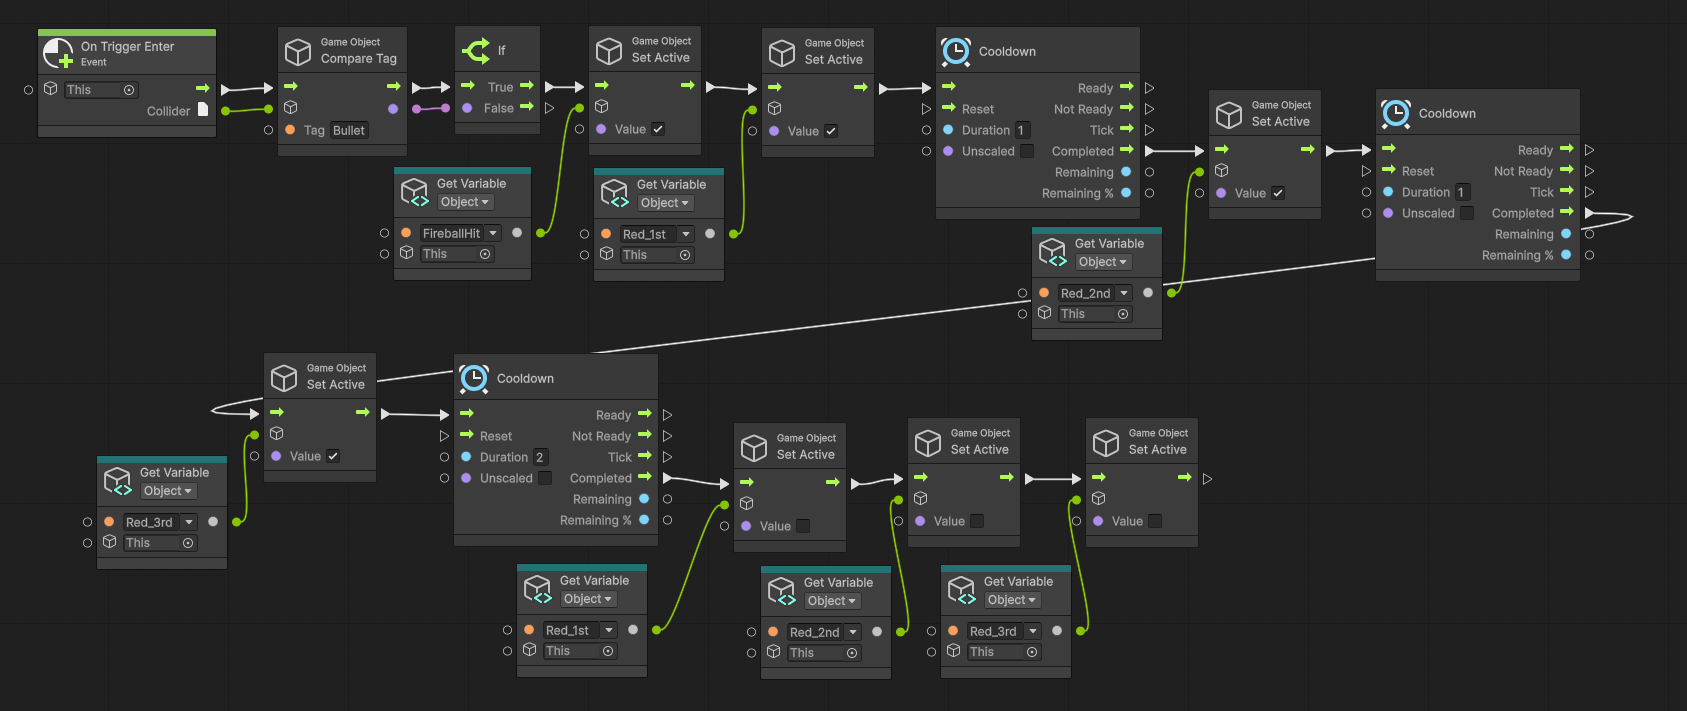
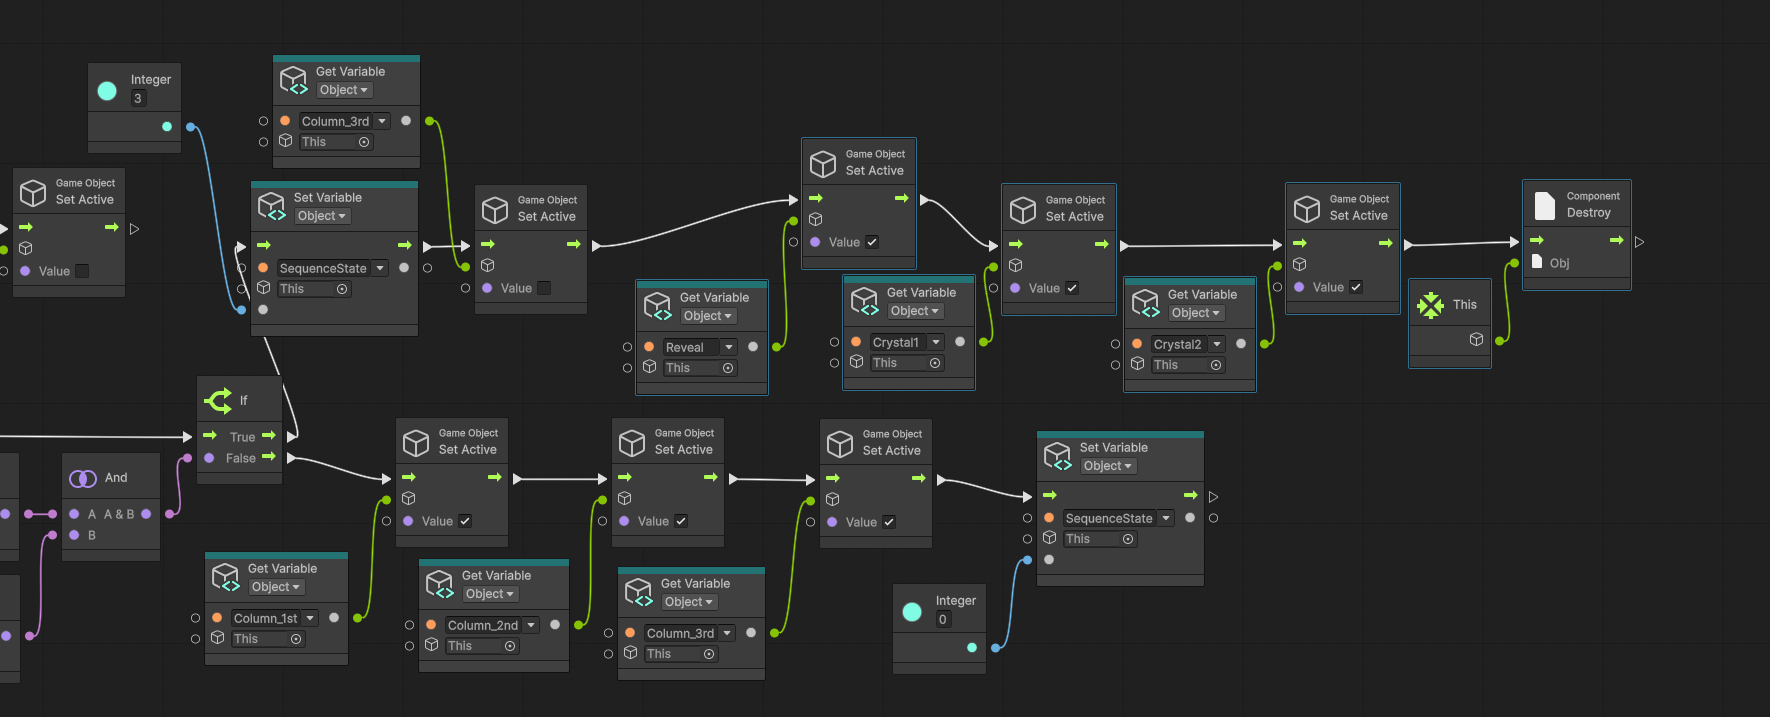
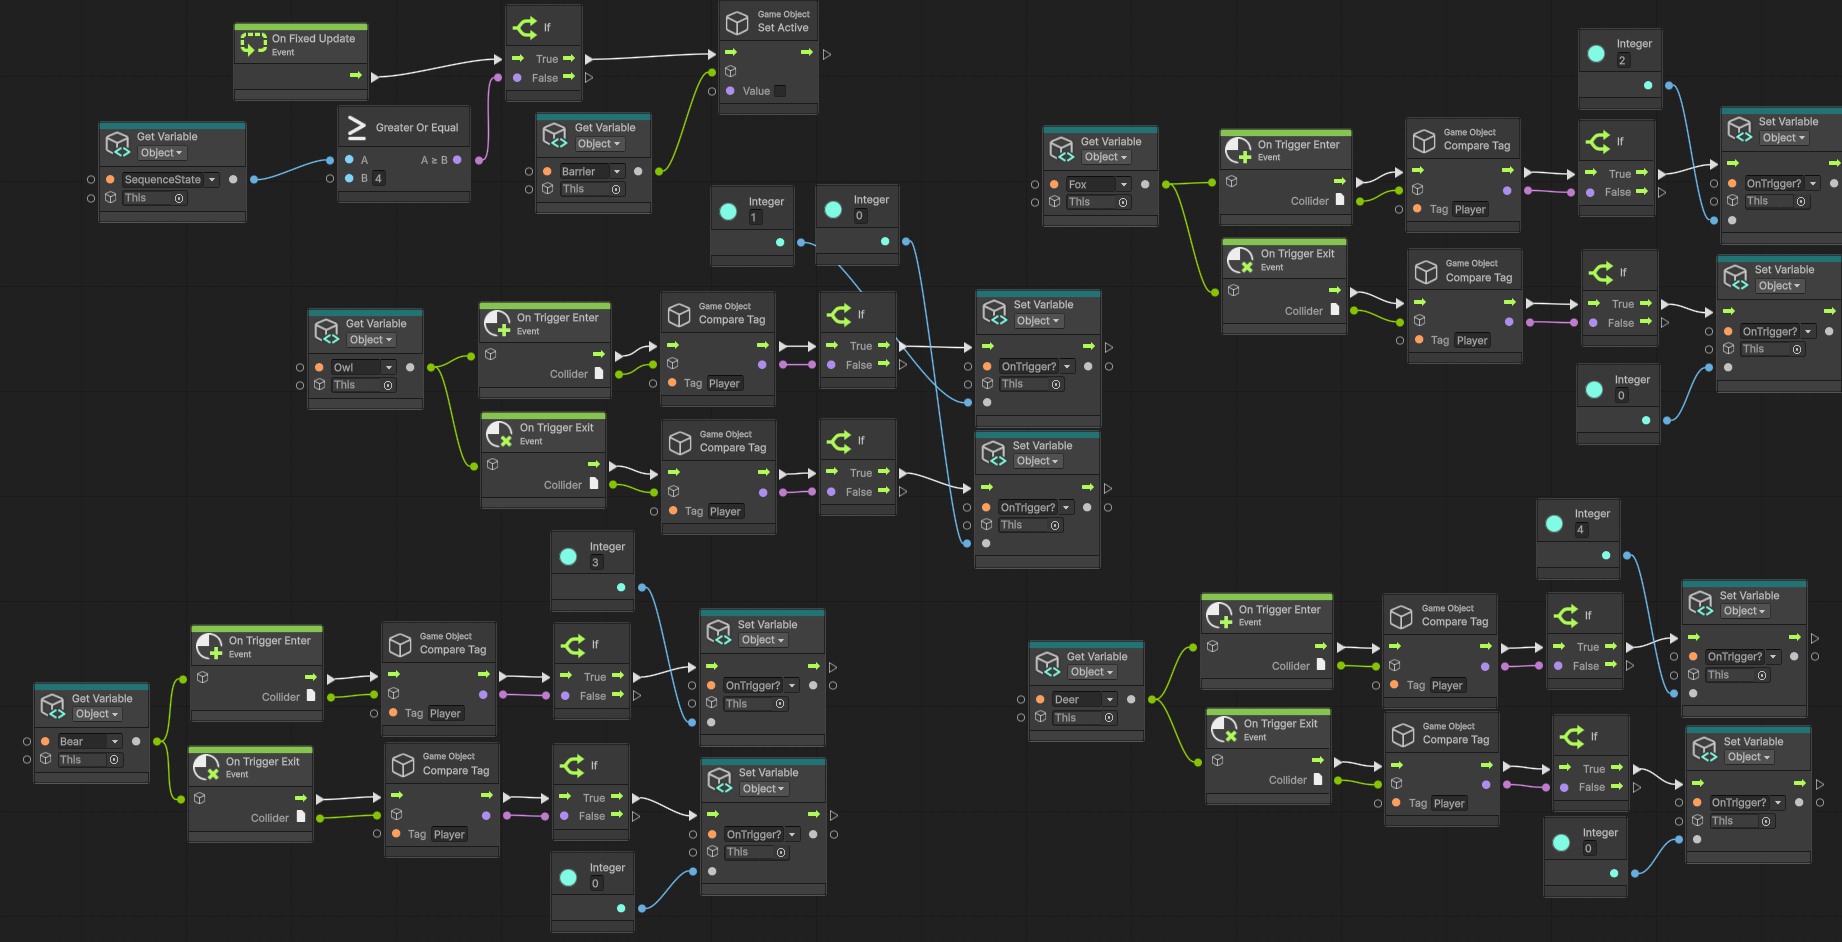
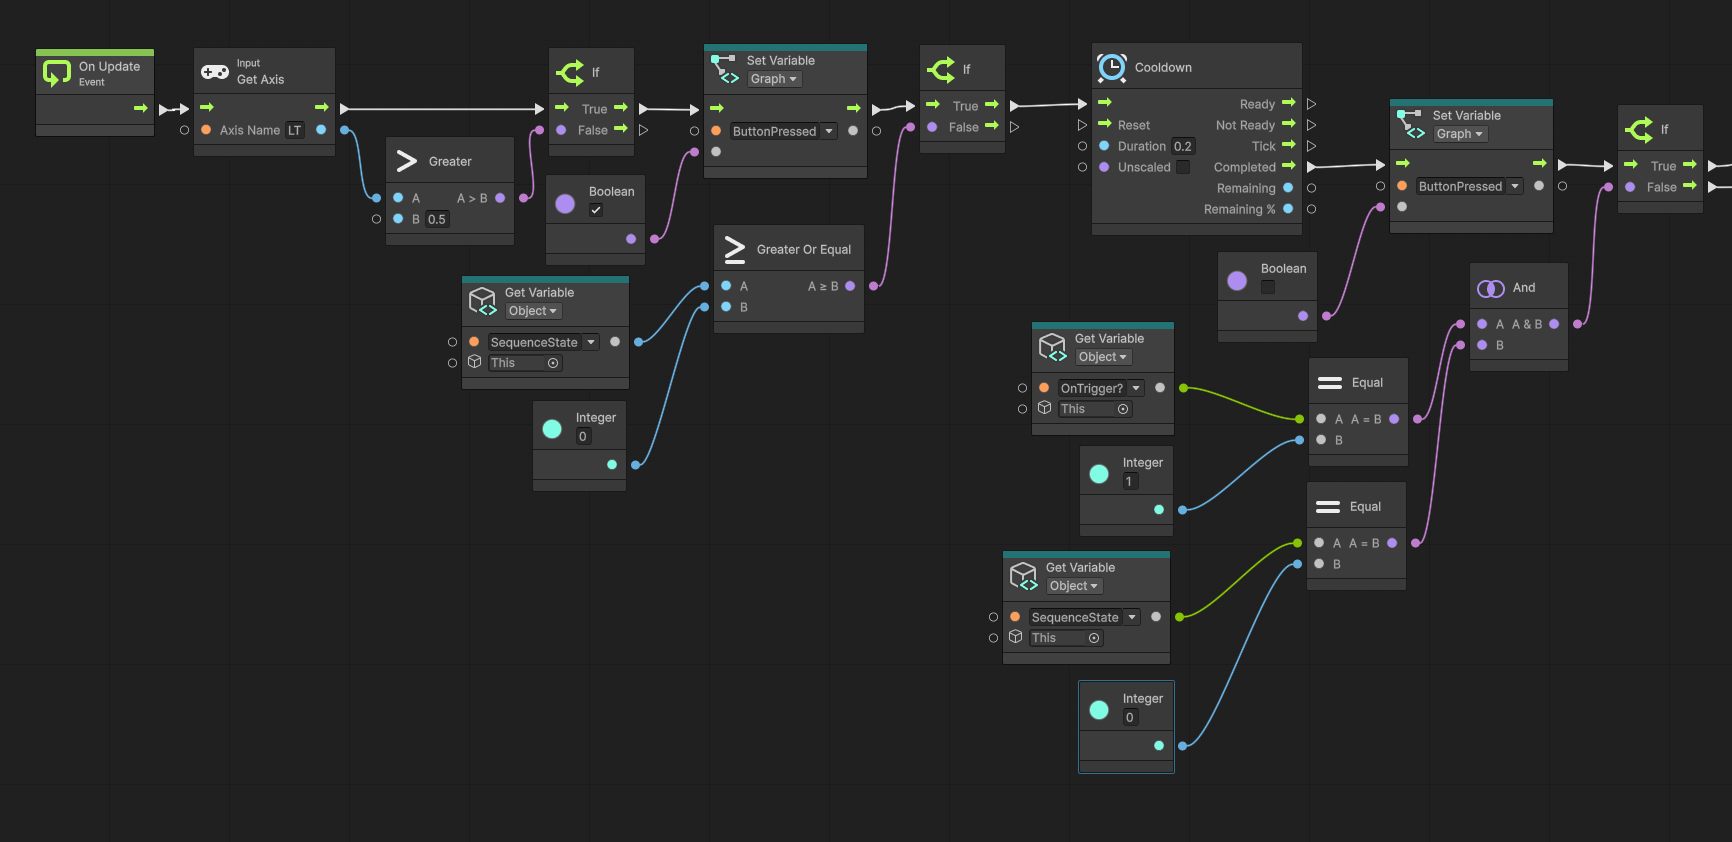
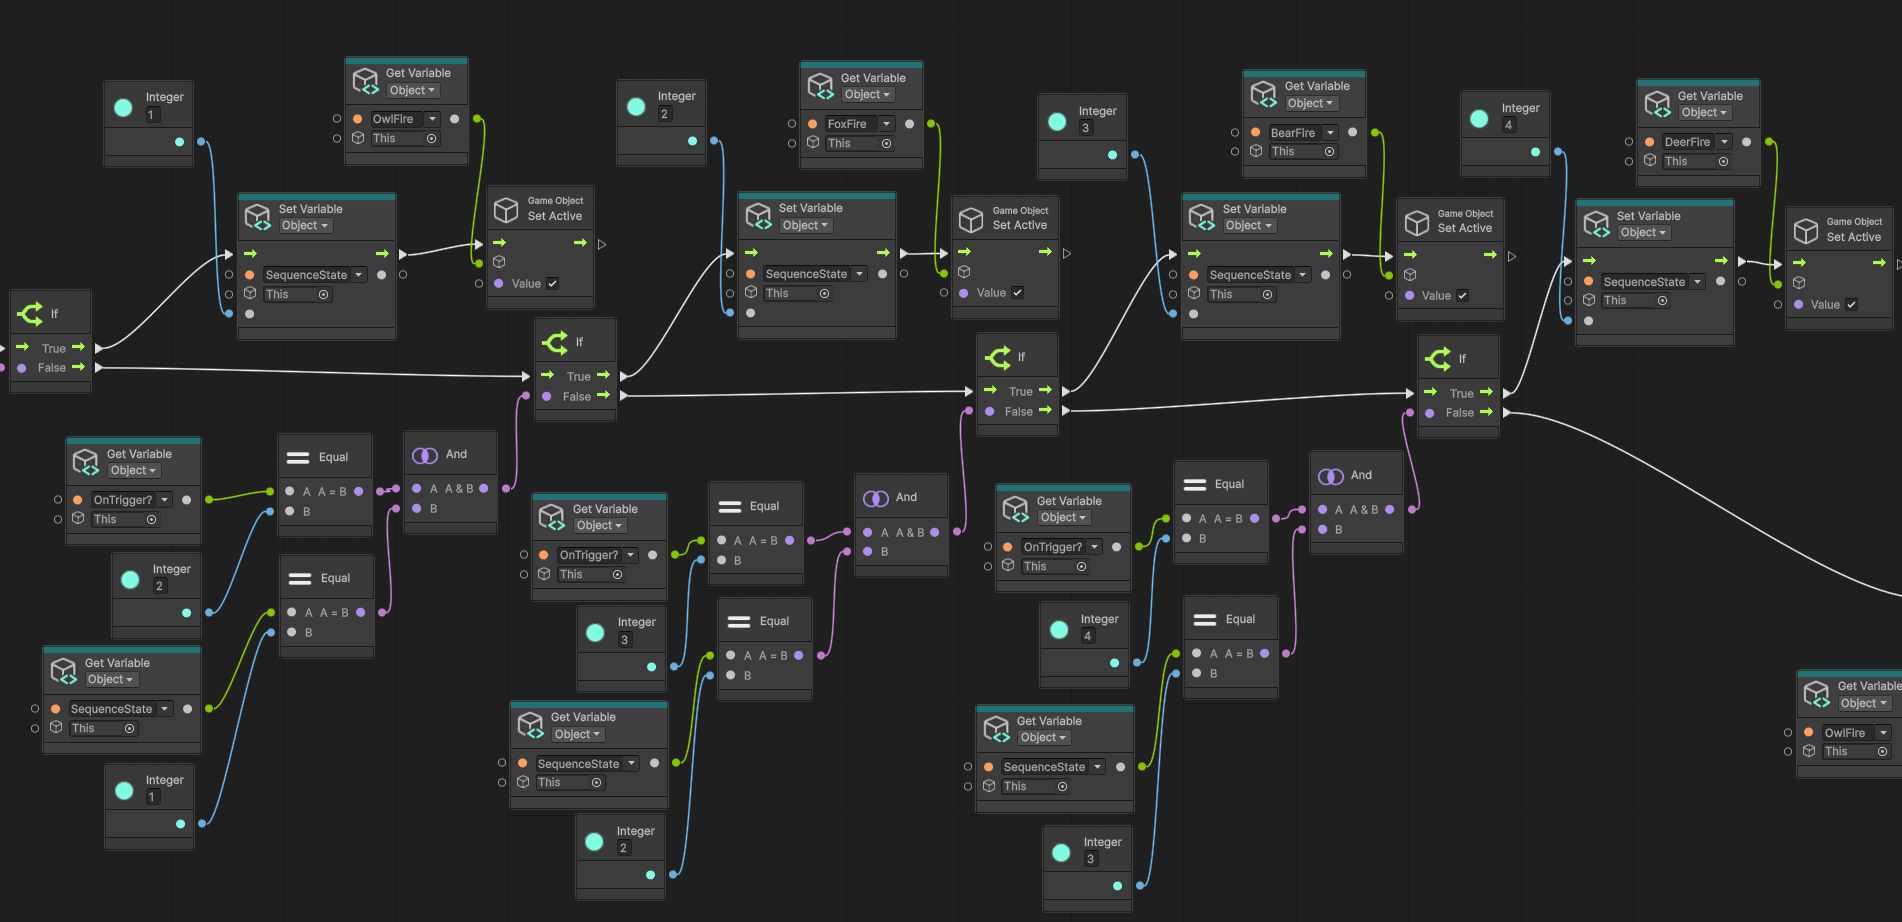
The Statue Puzzle was designed to connect environmental storytelling directly to gameplay. When players approach an ancient pillar, an animated scroll moves into view and a voiced story explains the history of the forest. The animals are mentioned in a specific order, and that order becomes the solution to the nearby statue puzzle.

This structure encourages players to explore, listen carefully, and use narrative information rather than relying on trial and error.

Implementation

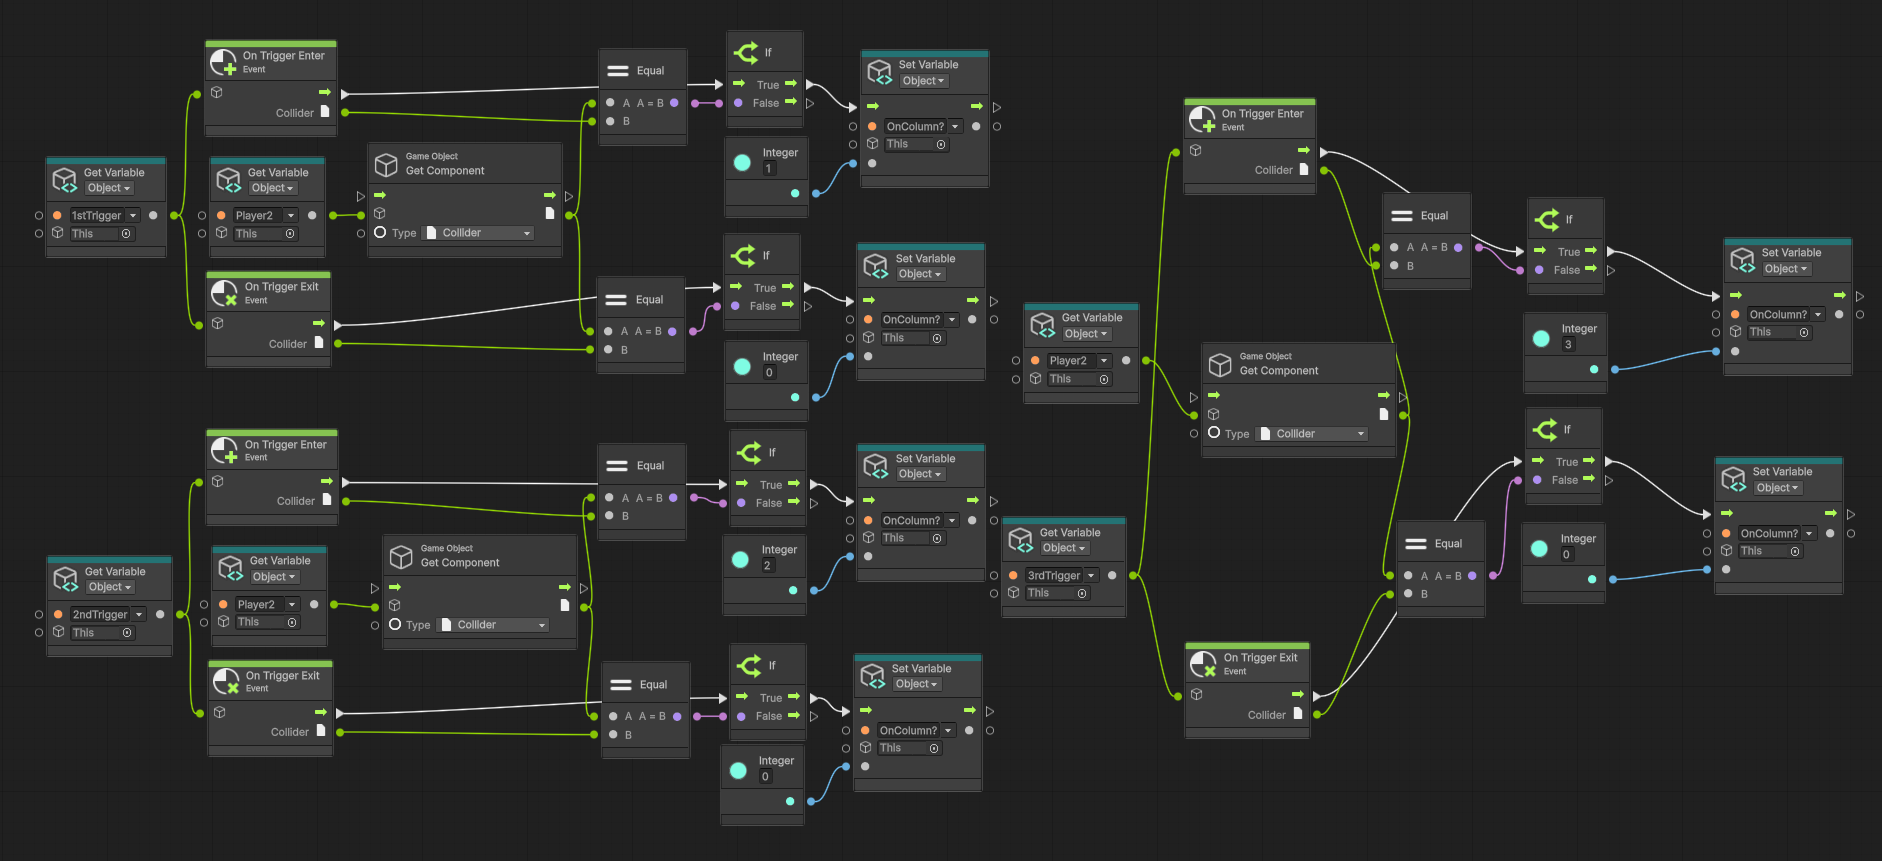
I implemented the system in Unity Visual Scripting as two connected gameplay sequences: the story-pillar presentation and the statue-input puzzle.

Story Trigger Animated Scroll Voice-over Statue Interaction Sequence Validation Environmental Feedback Barrier Unlock Story Progression

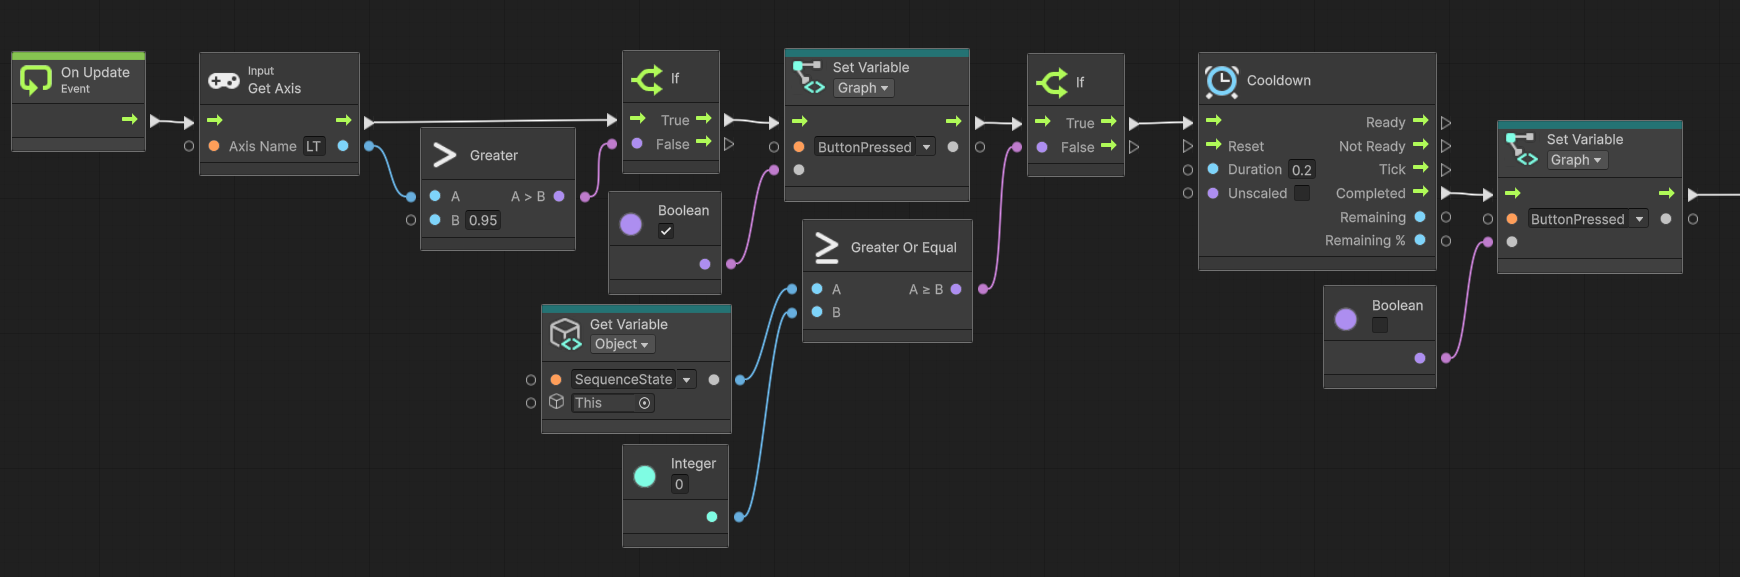
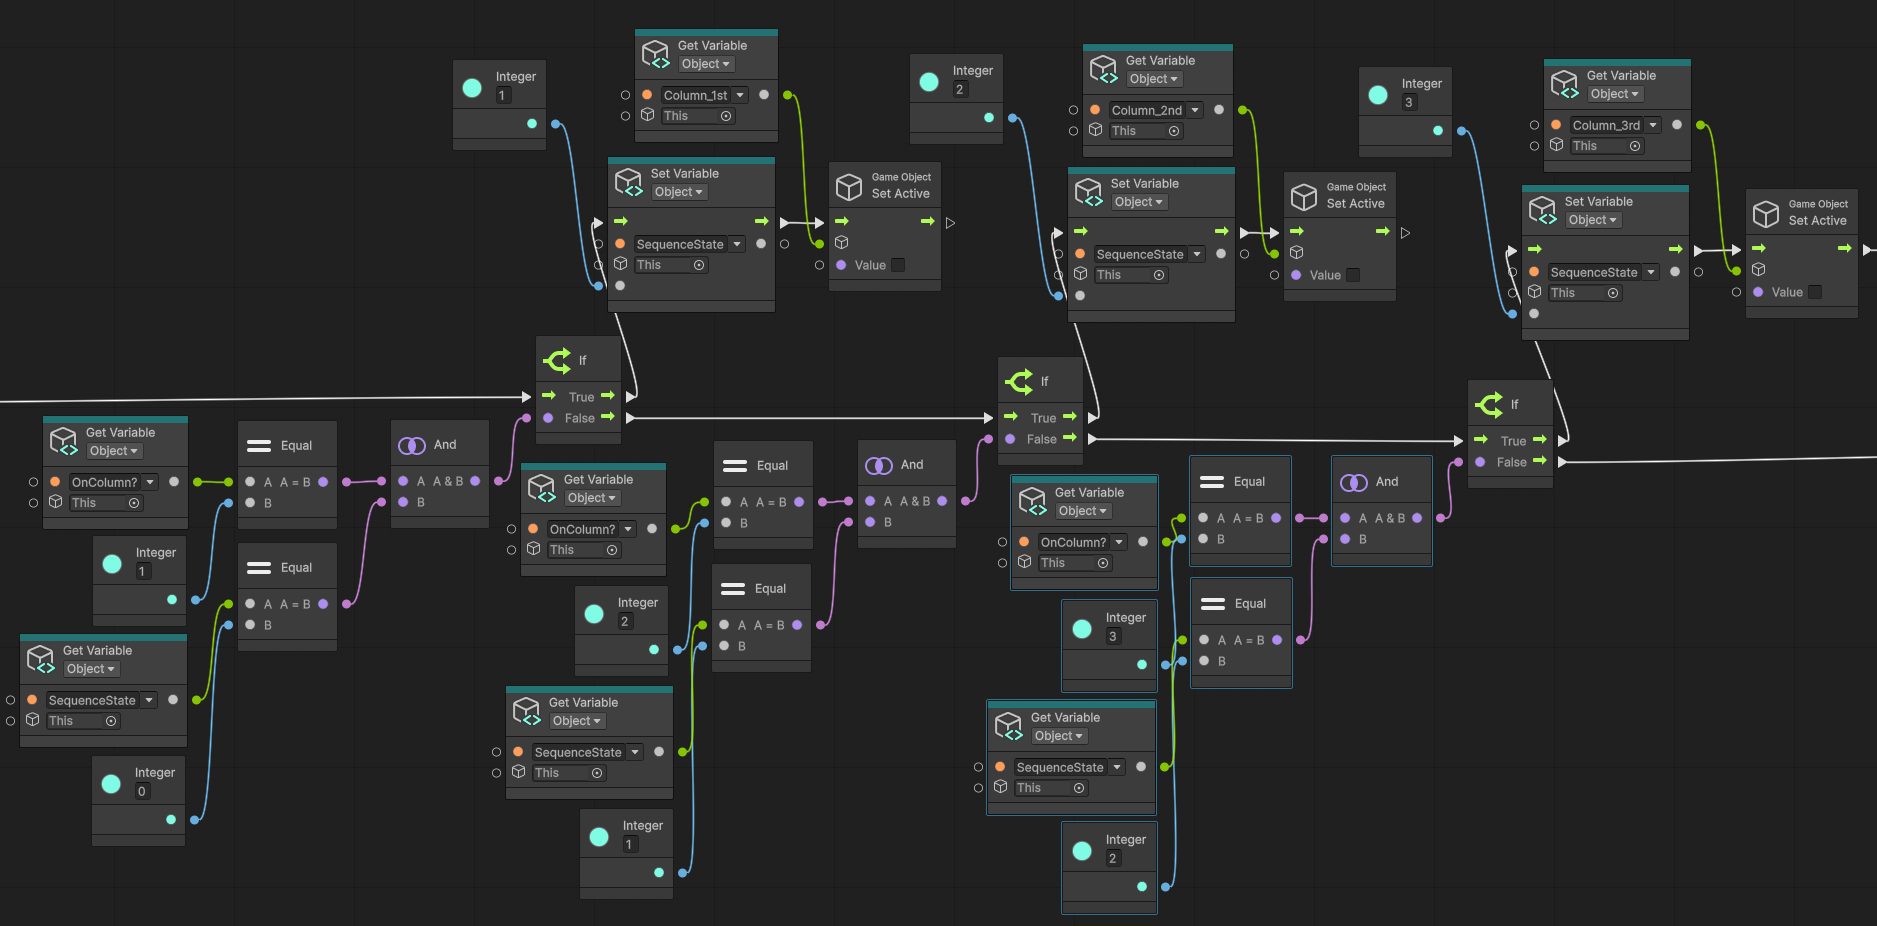
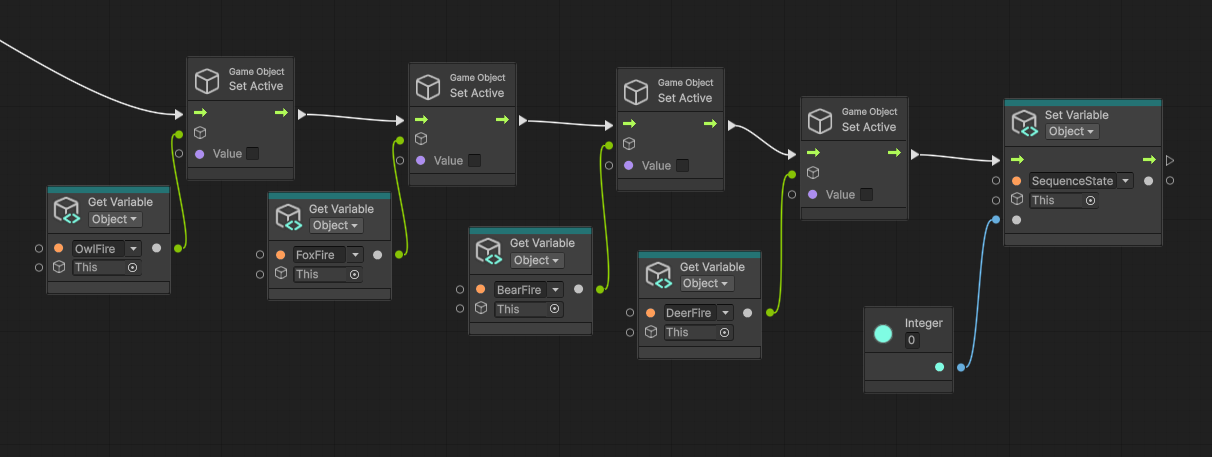
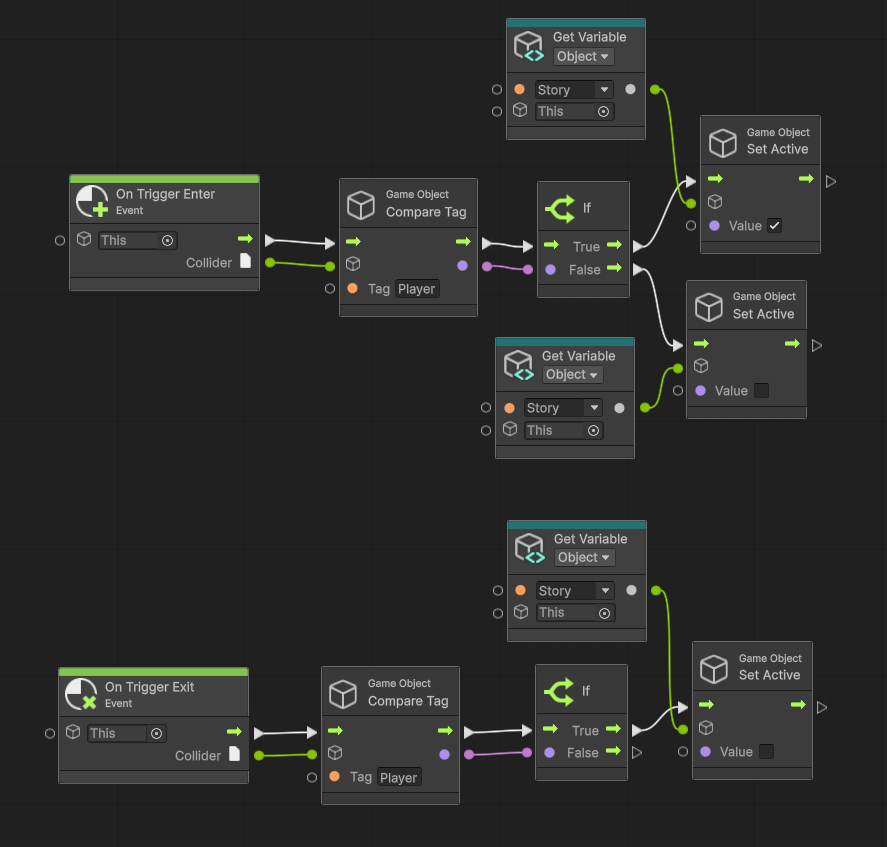
Approaching the pillar activates the scroll and narration. The puzzle logic then records each statue selected by the players, validates the input against the narrated animal order, activates the corresponding environmental effects, and unlocks the next area when the sequence is completed correctly.

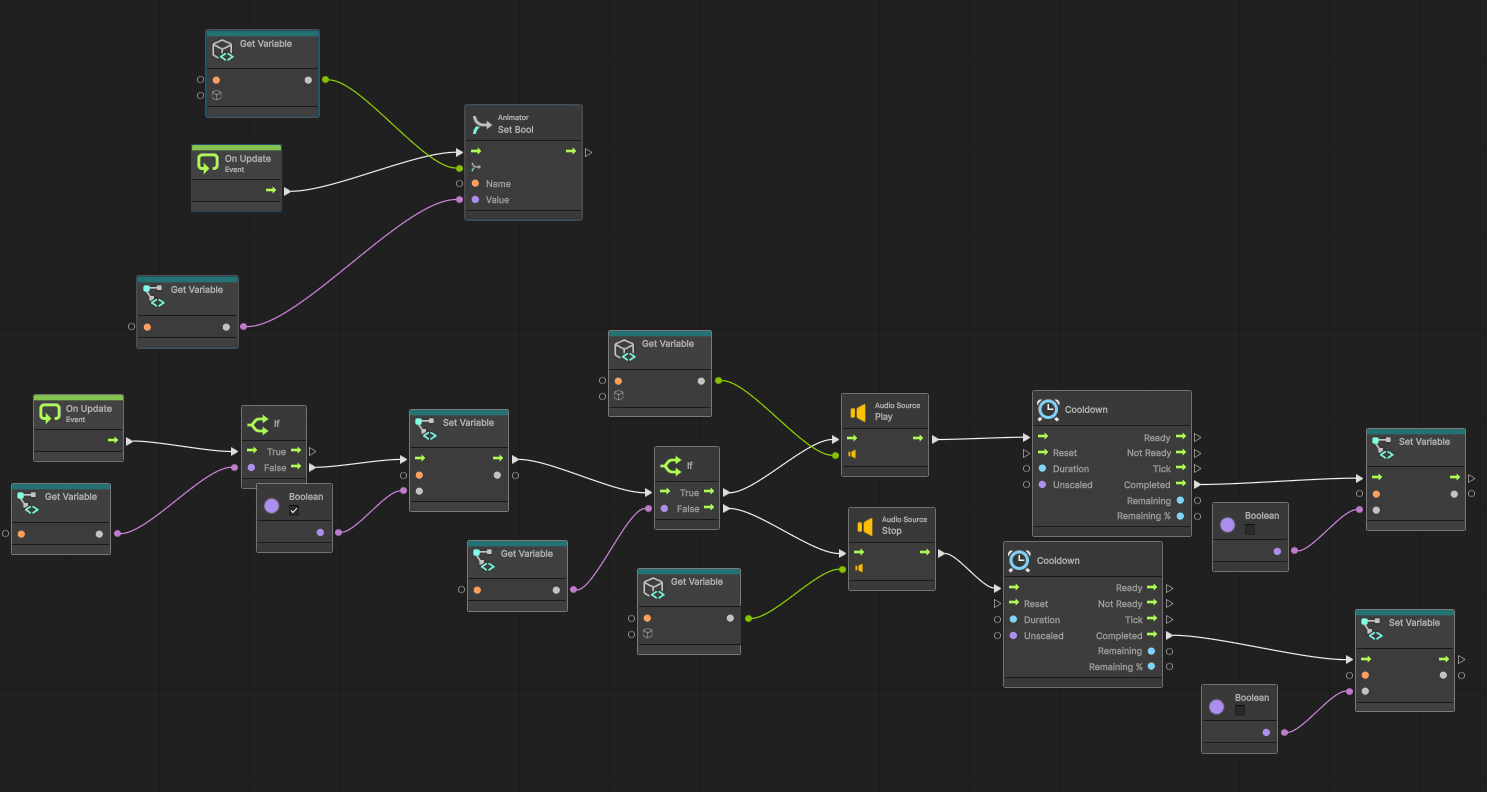
Unity Visual Scripting graph for the story pillar trigger and scroll activation
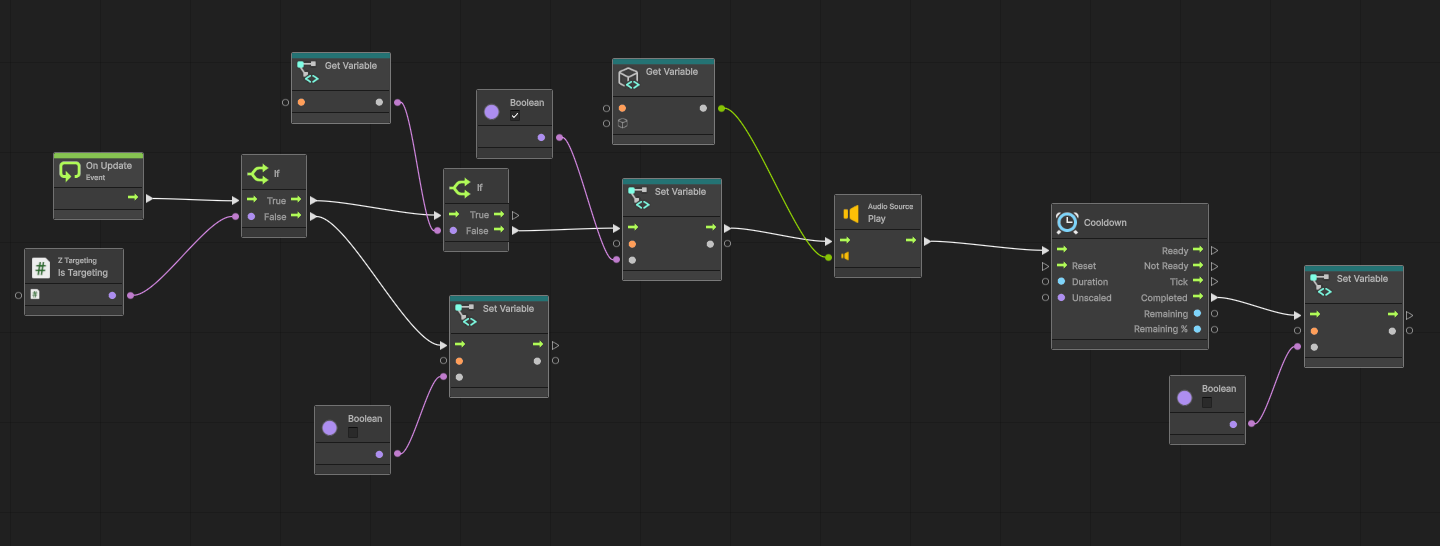
Unity Visual Scripting graph for statue interaction input
Unity Visual Scripting graph validating the animal statue sequence
Unity Visual Scripting graph for statue puzzle completion
Unity Visual Scripting graph connecting the statue puzzle to story progression

Challenges

The main challenge was coordinating the narrative presentation with the puzzle state. The scroll movement, voice-over, statue interactions, environmental feedback, and level progression all needed to occur in the correct order without allowing repeated triggers or invalid inputs to break the sequence.

I iterated on the trigger logic, validation flow, and object activation states to ensure that the clue remained understandable and that the completed puzzle transitioned reliably into the next section of the level.

05 — Character Contributions

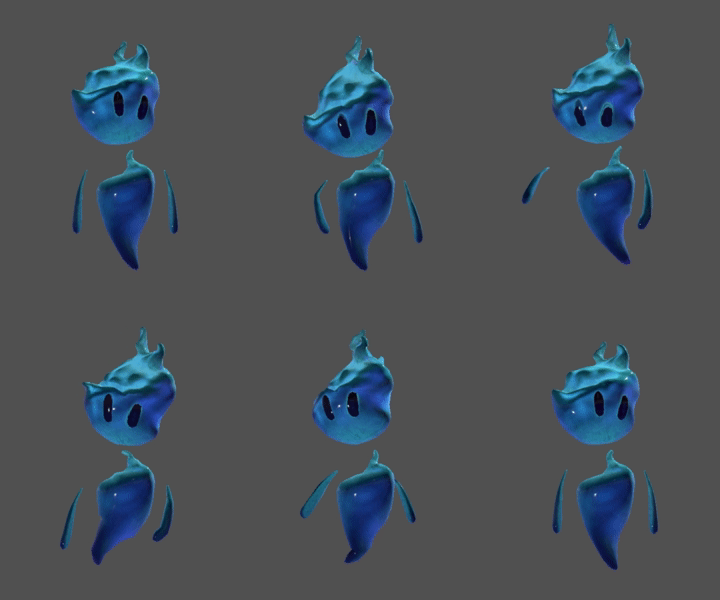
Wisps

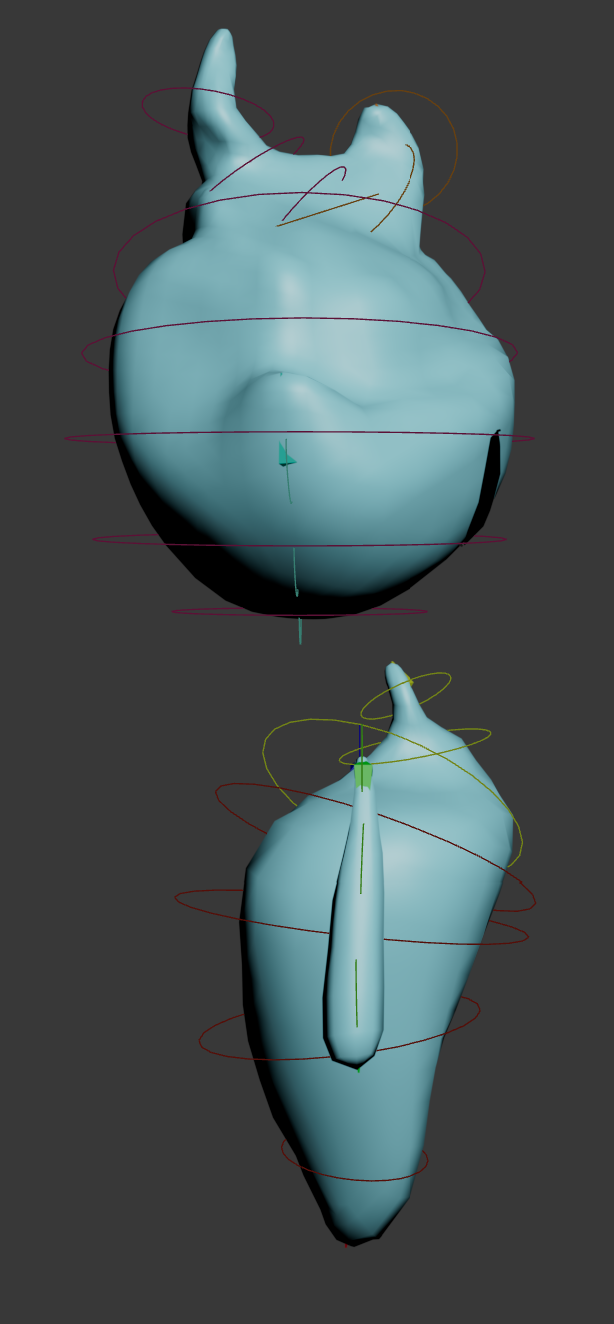
Wisp rig
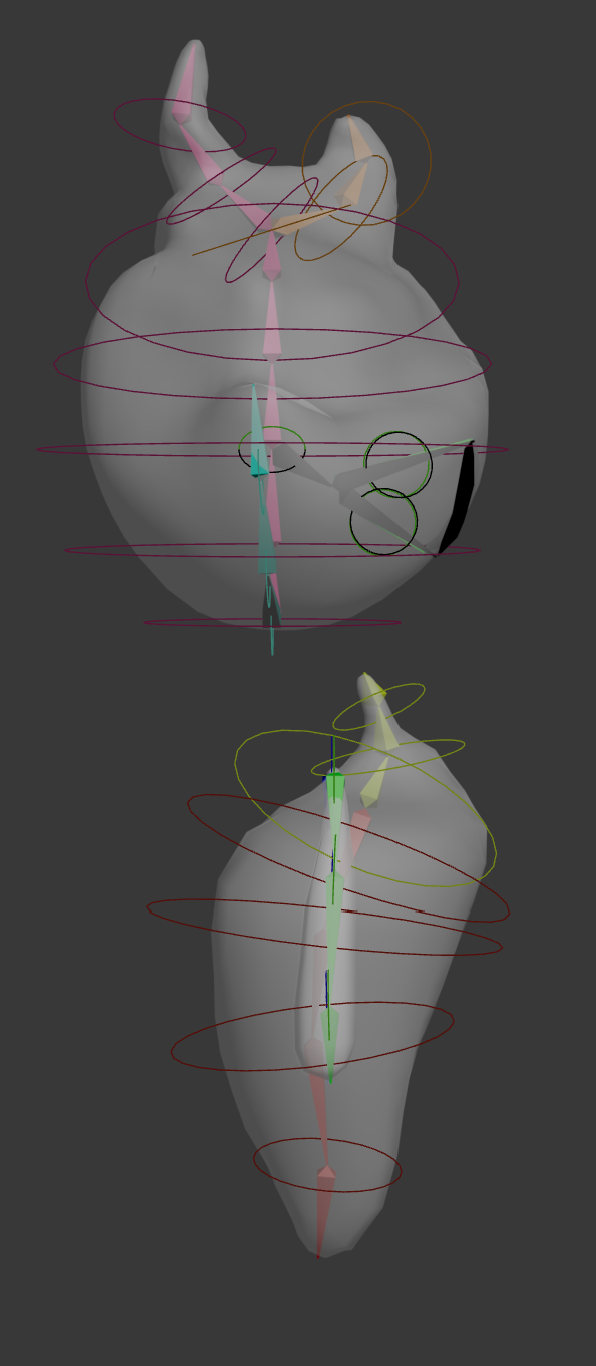
Wisp bone view
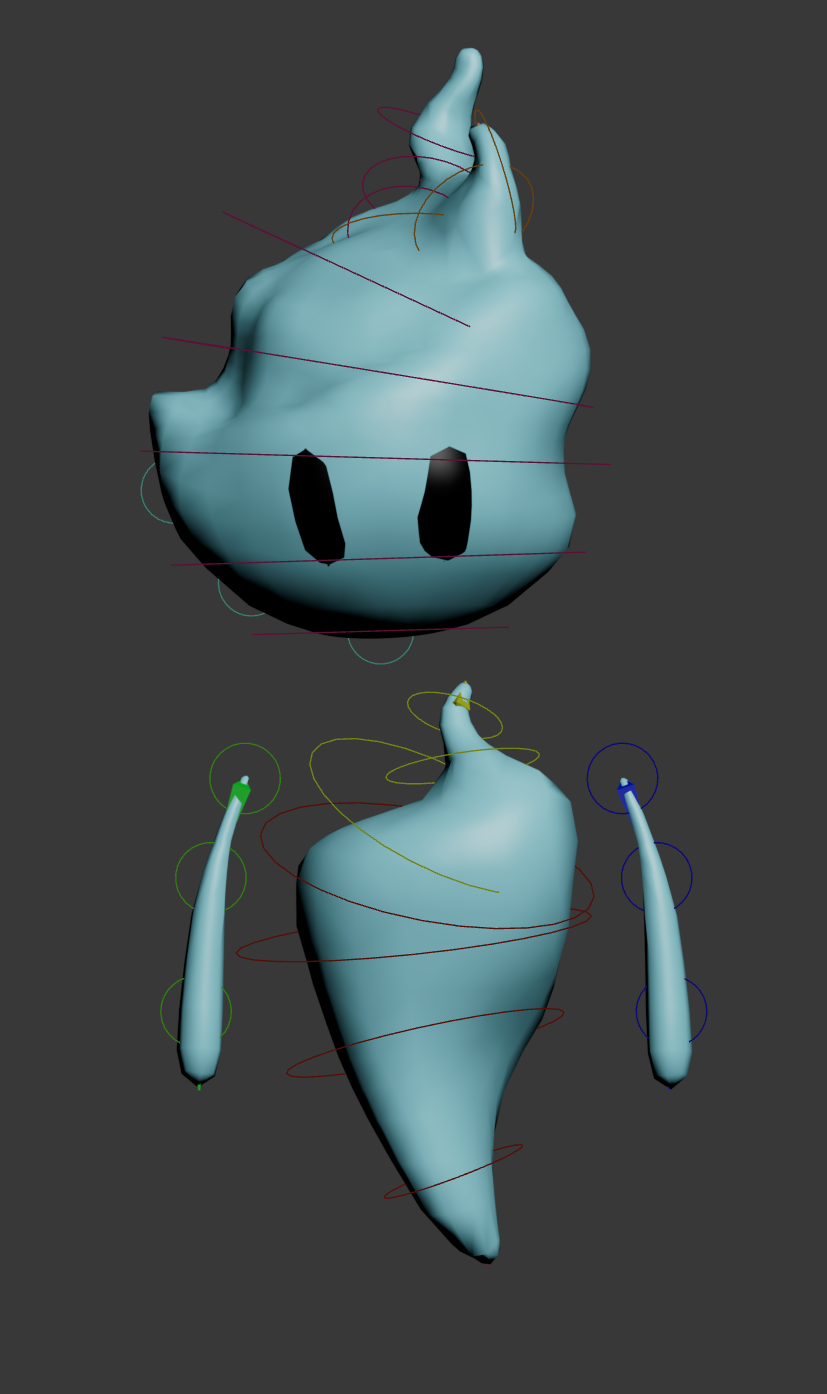
Wisp rig
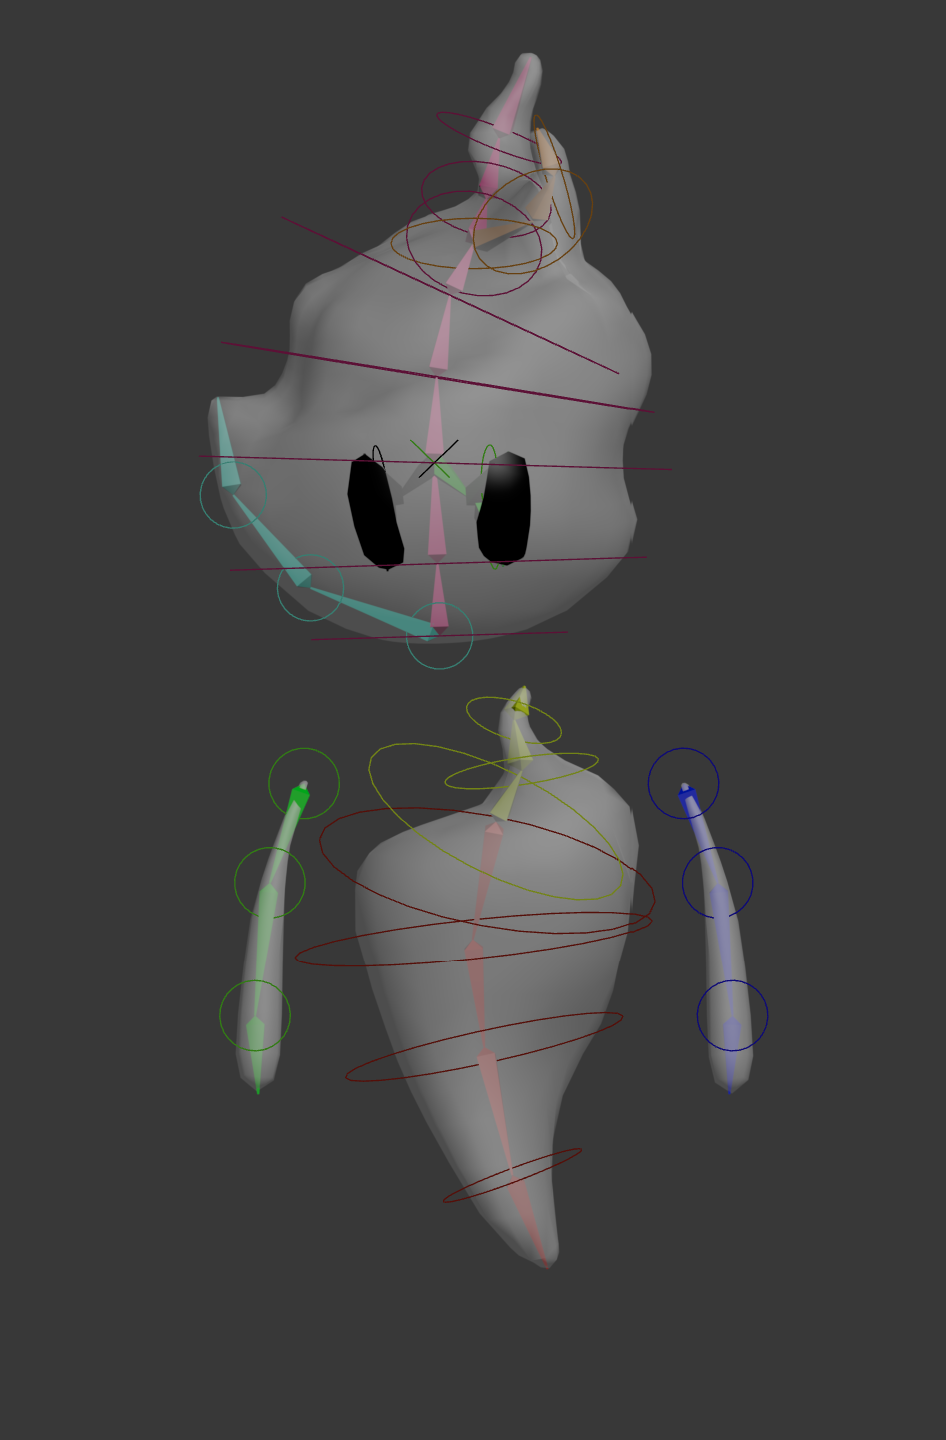
Wisp bone view
Wisp rig
Wisp bone view
1 / 3

Overview

The Wisp was originally conceived as a small environmental companion designed to hover near points of interest and provide additional life to the world. However, internal and external playtesting revealed that players often struggled to remember mechanics and understand how to use them effectively.

Based on this feedback, the Wisp evolved into an interactive tutorial system that provided contextual guidance to players throughout the game.

Design Evolution

Player feedback indicated that additional support was needed to reinforce mechanics and improve player understanding. As a result, the Wisp transitioned from an environmental character into an interactive tutorial companion.

Players could approach a Wisp and interact with it to display information relevant to the mechanics and gameplay challenges found within that area of the game. This allowed tutorials to be integrated naturally into the environment without disrupting gameplay flow.

Rigging

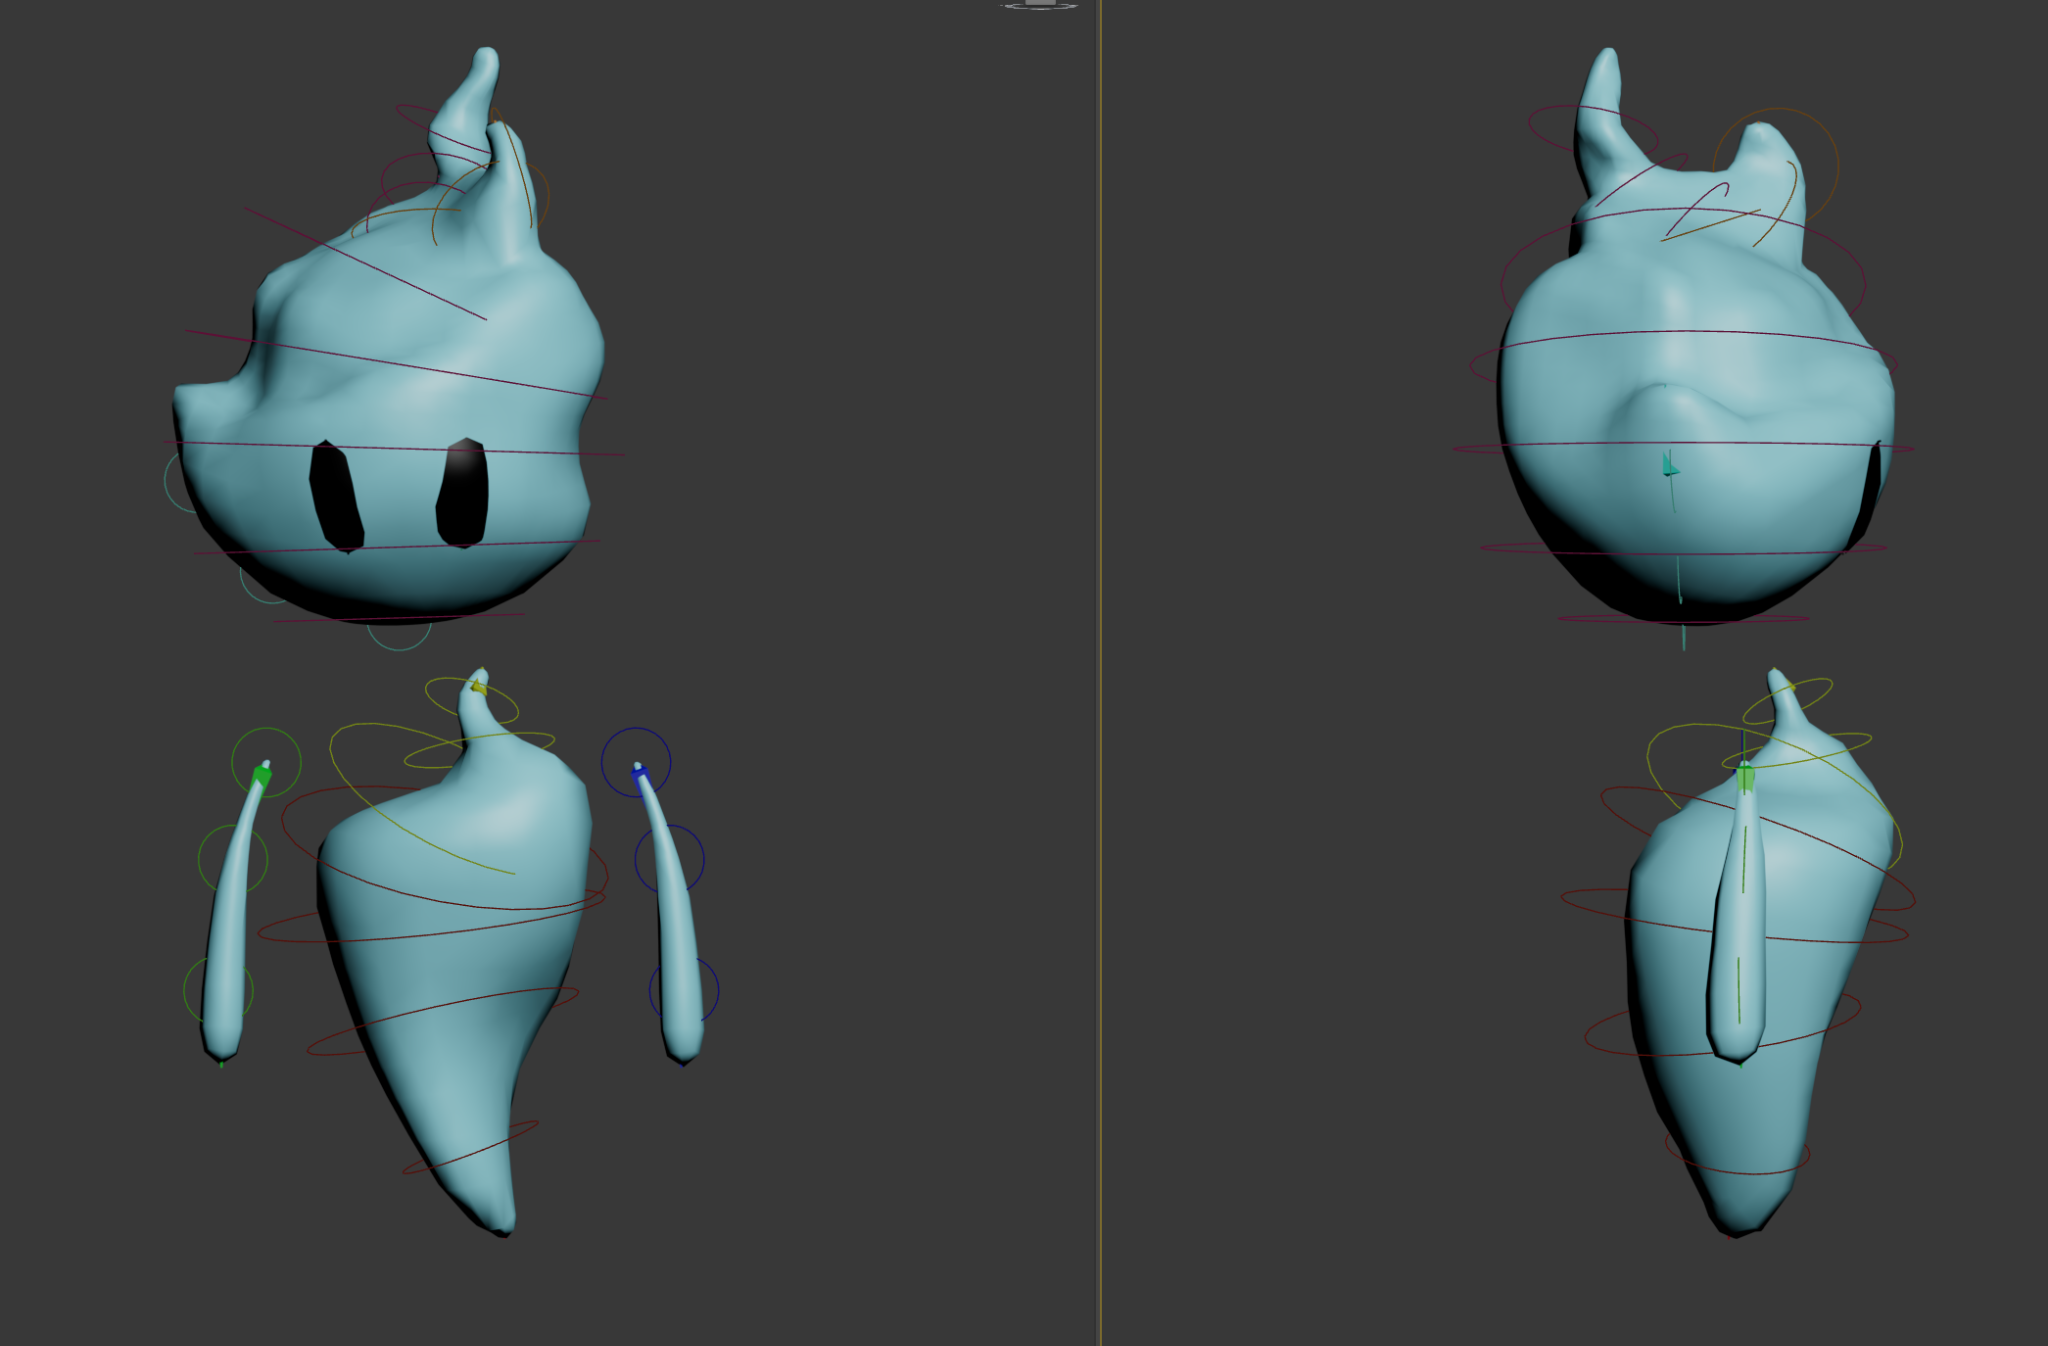
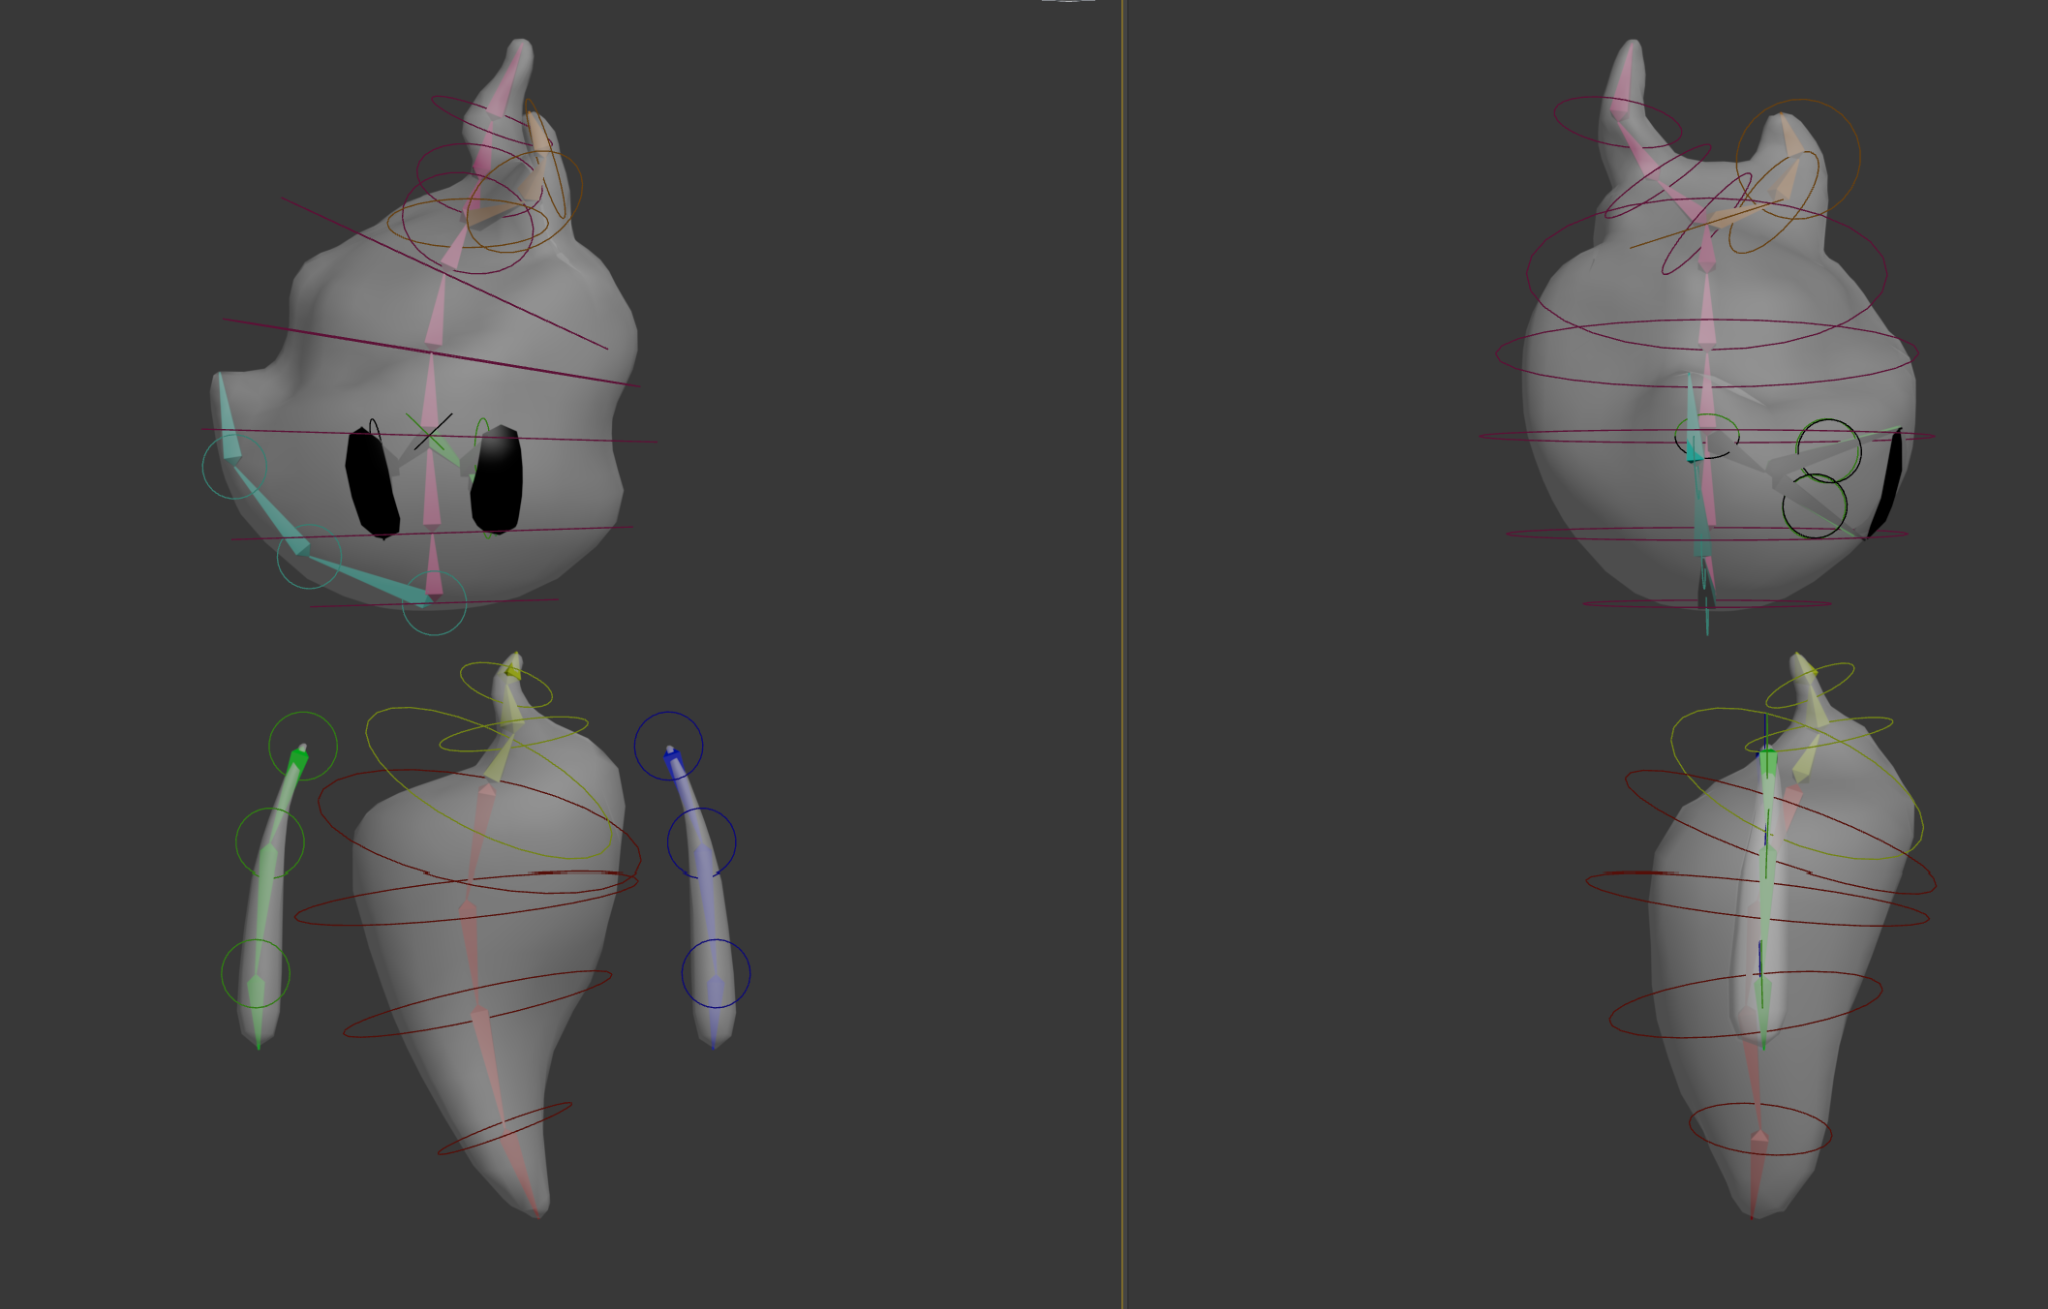
The Wisp character model was created by another team member. I was responsible for rigging the character and approached the rig with the intention of giving it softer and more fluid movement.

To support this, I created a rig with additional bones and control points that allowed for more organic deformations and easier animation.

After rigging was completed, the character was passed to another team member for animation production.

Animation Integration

Once animation was complete, I imported the character into Unity and configured the Animator Controller.

Idle Animation

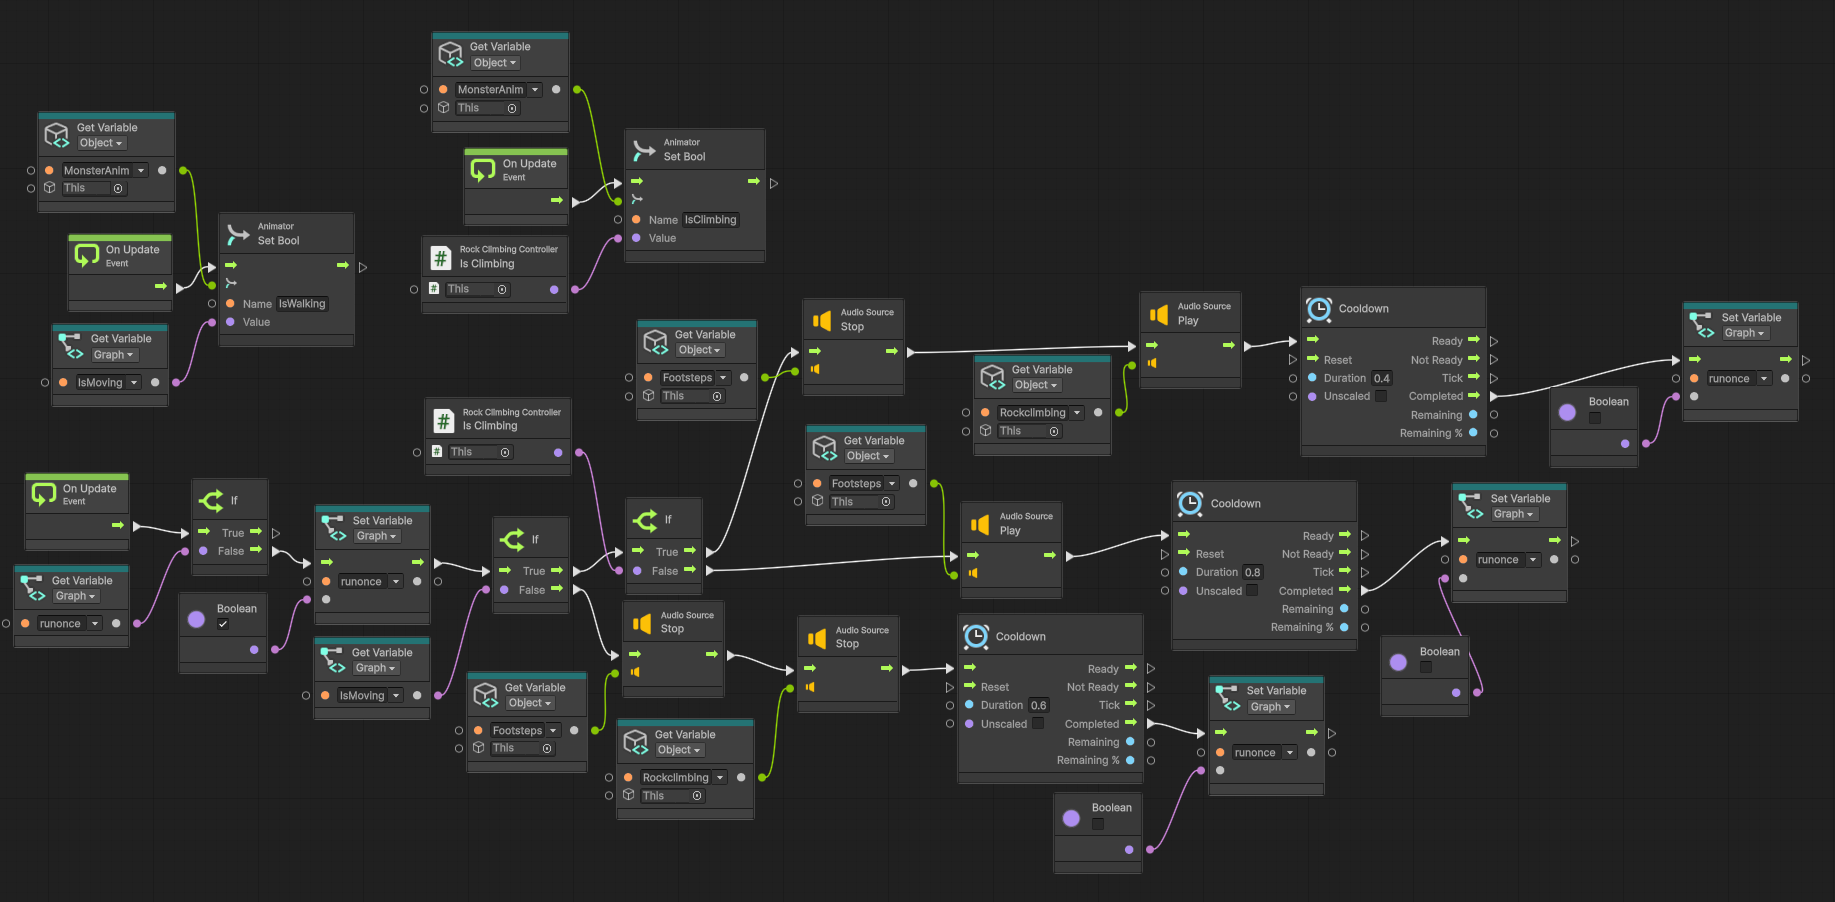
Although the animation setup itself was relatively straightforward, the character's gameplay functionality became significantly more important as development progressed.

Wisp animation

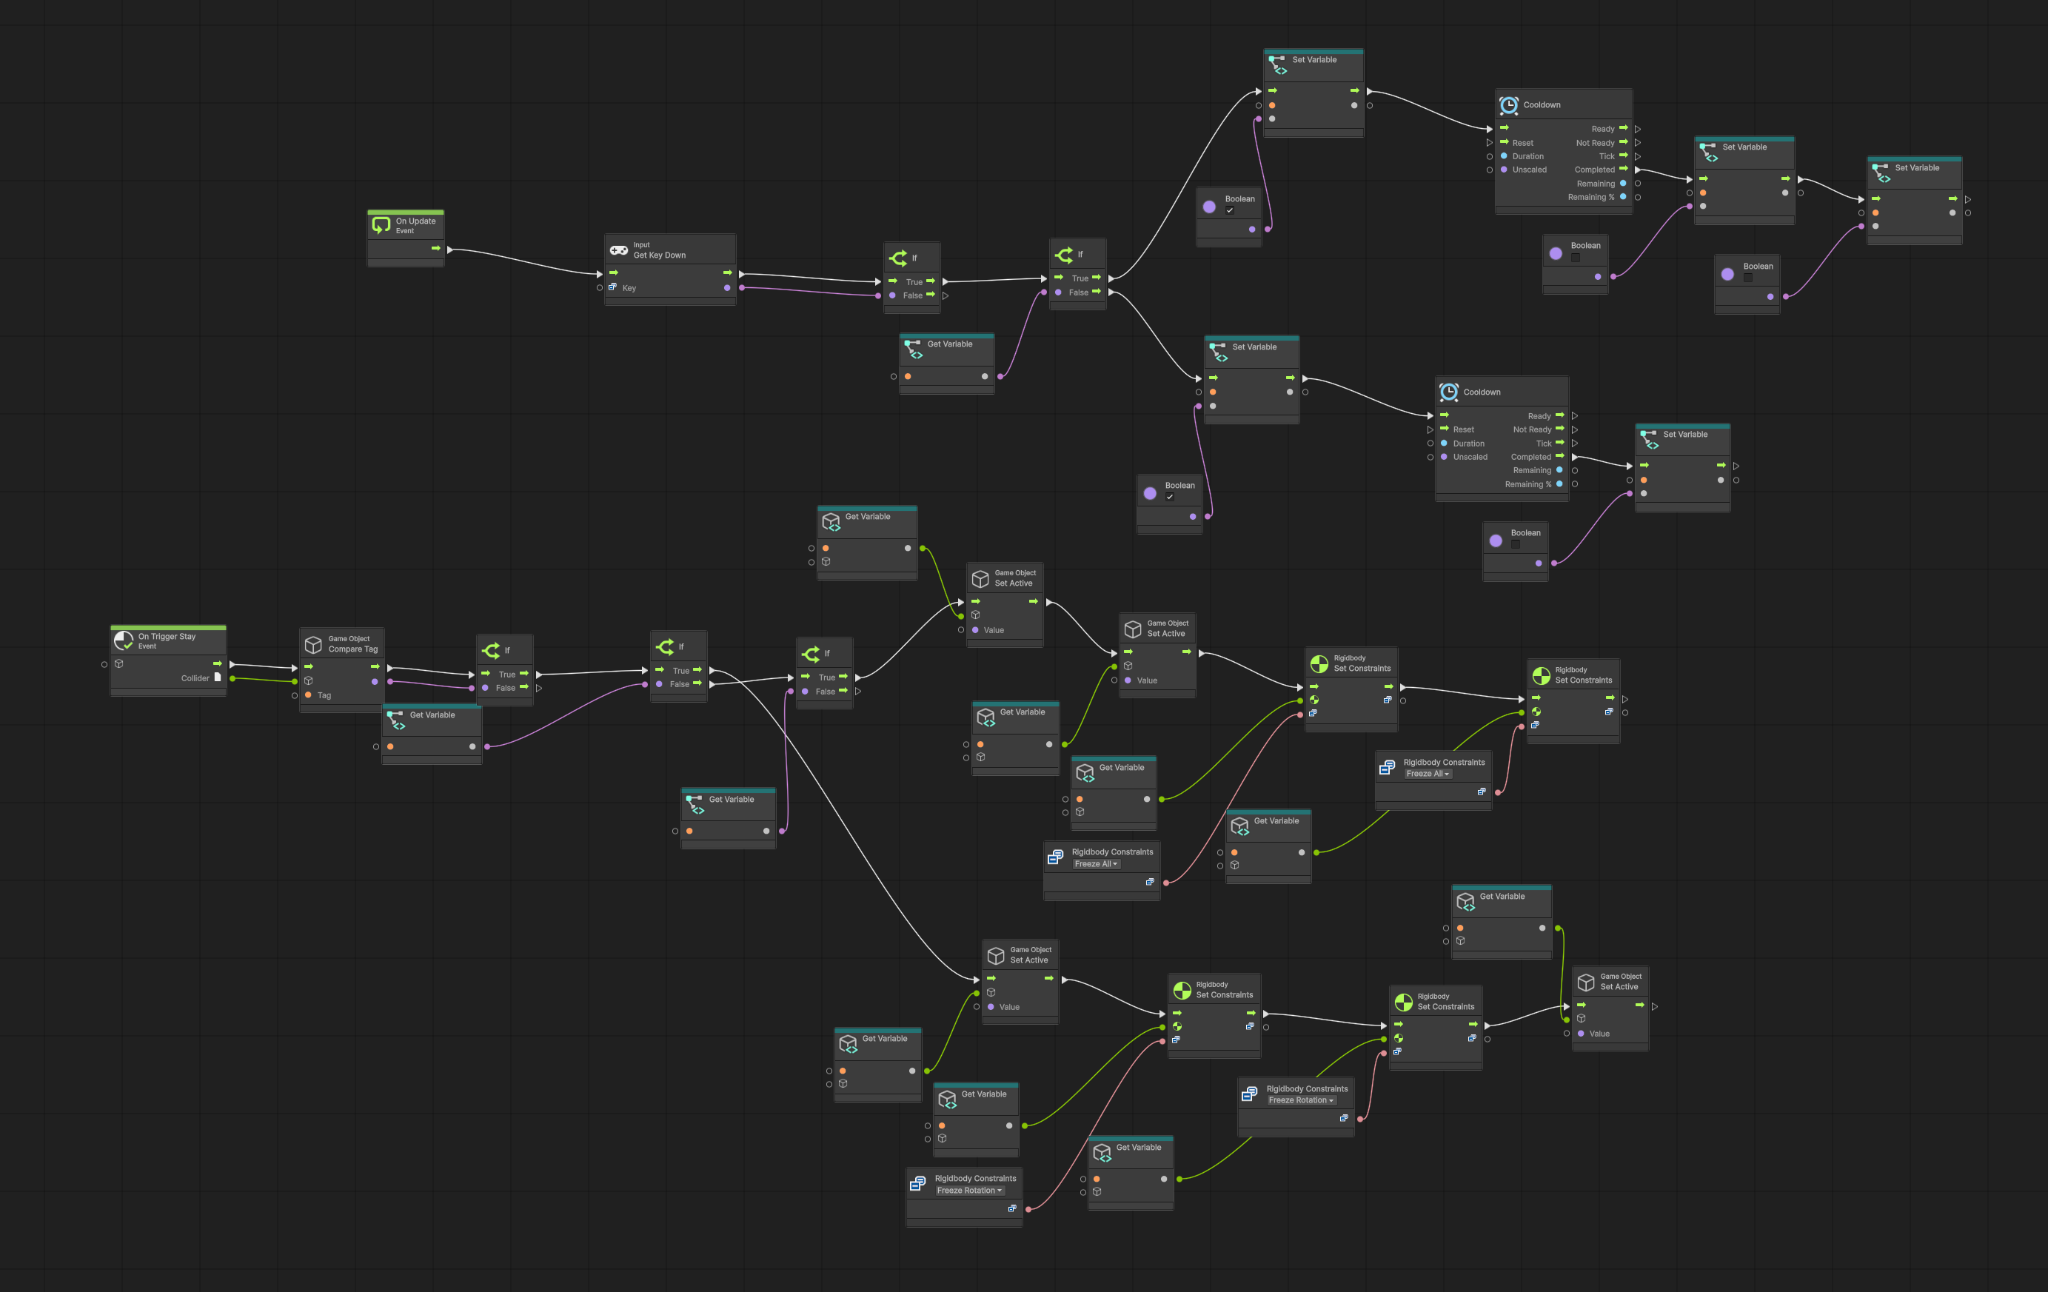
Tutorial System Implementation

The most significant contribution I made to the Wisp was the implementation of the tutorial system.

  • Interaction detection.
  • Tutorial triggering.
  • Context-sensitive information display.
  • UI integration.
  • Progression support.

This allowed players to access gameplay information naturally through the environment rather than relying on intrusive pop-ups or external menus.

Blueprint overview of the tutorial implementation (click to view full size).

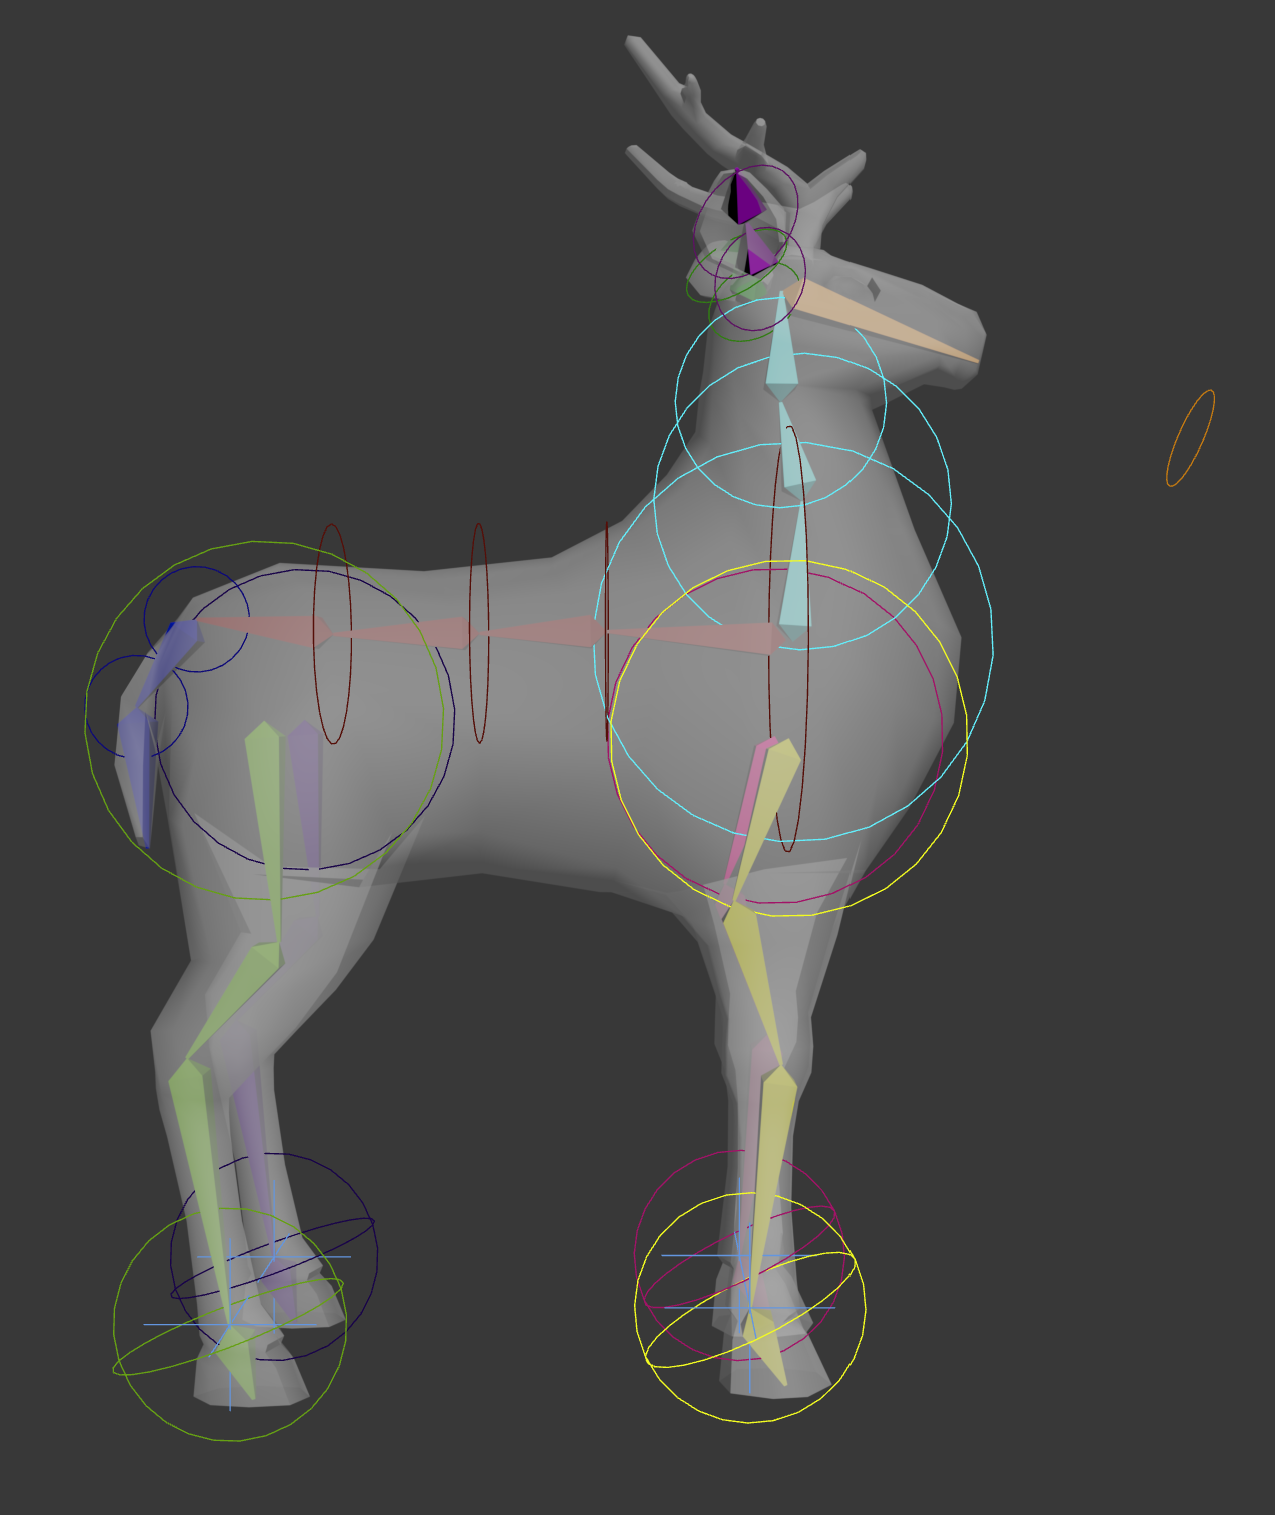
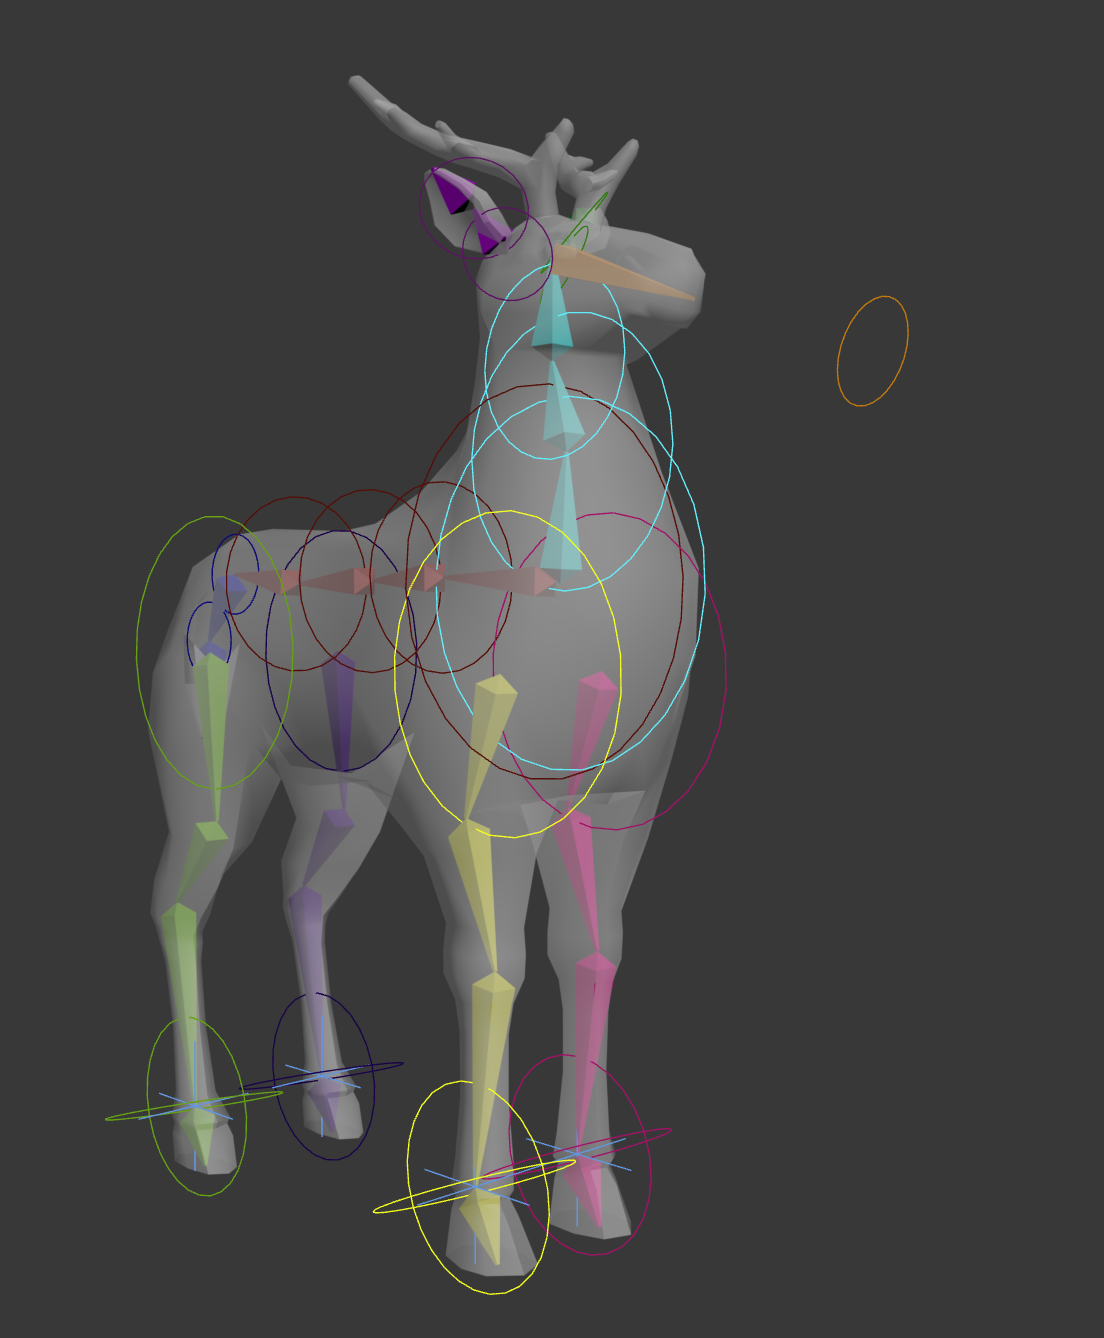
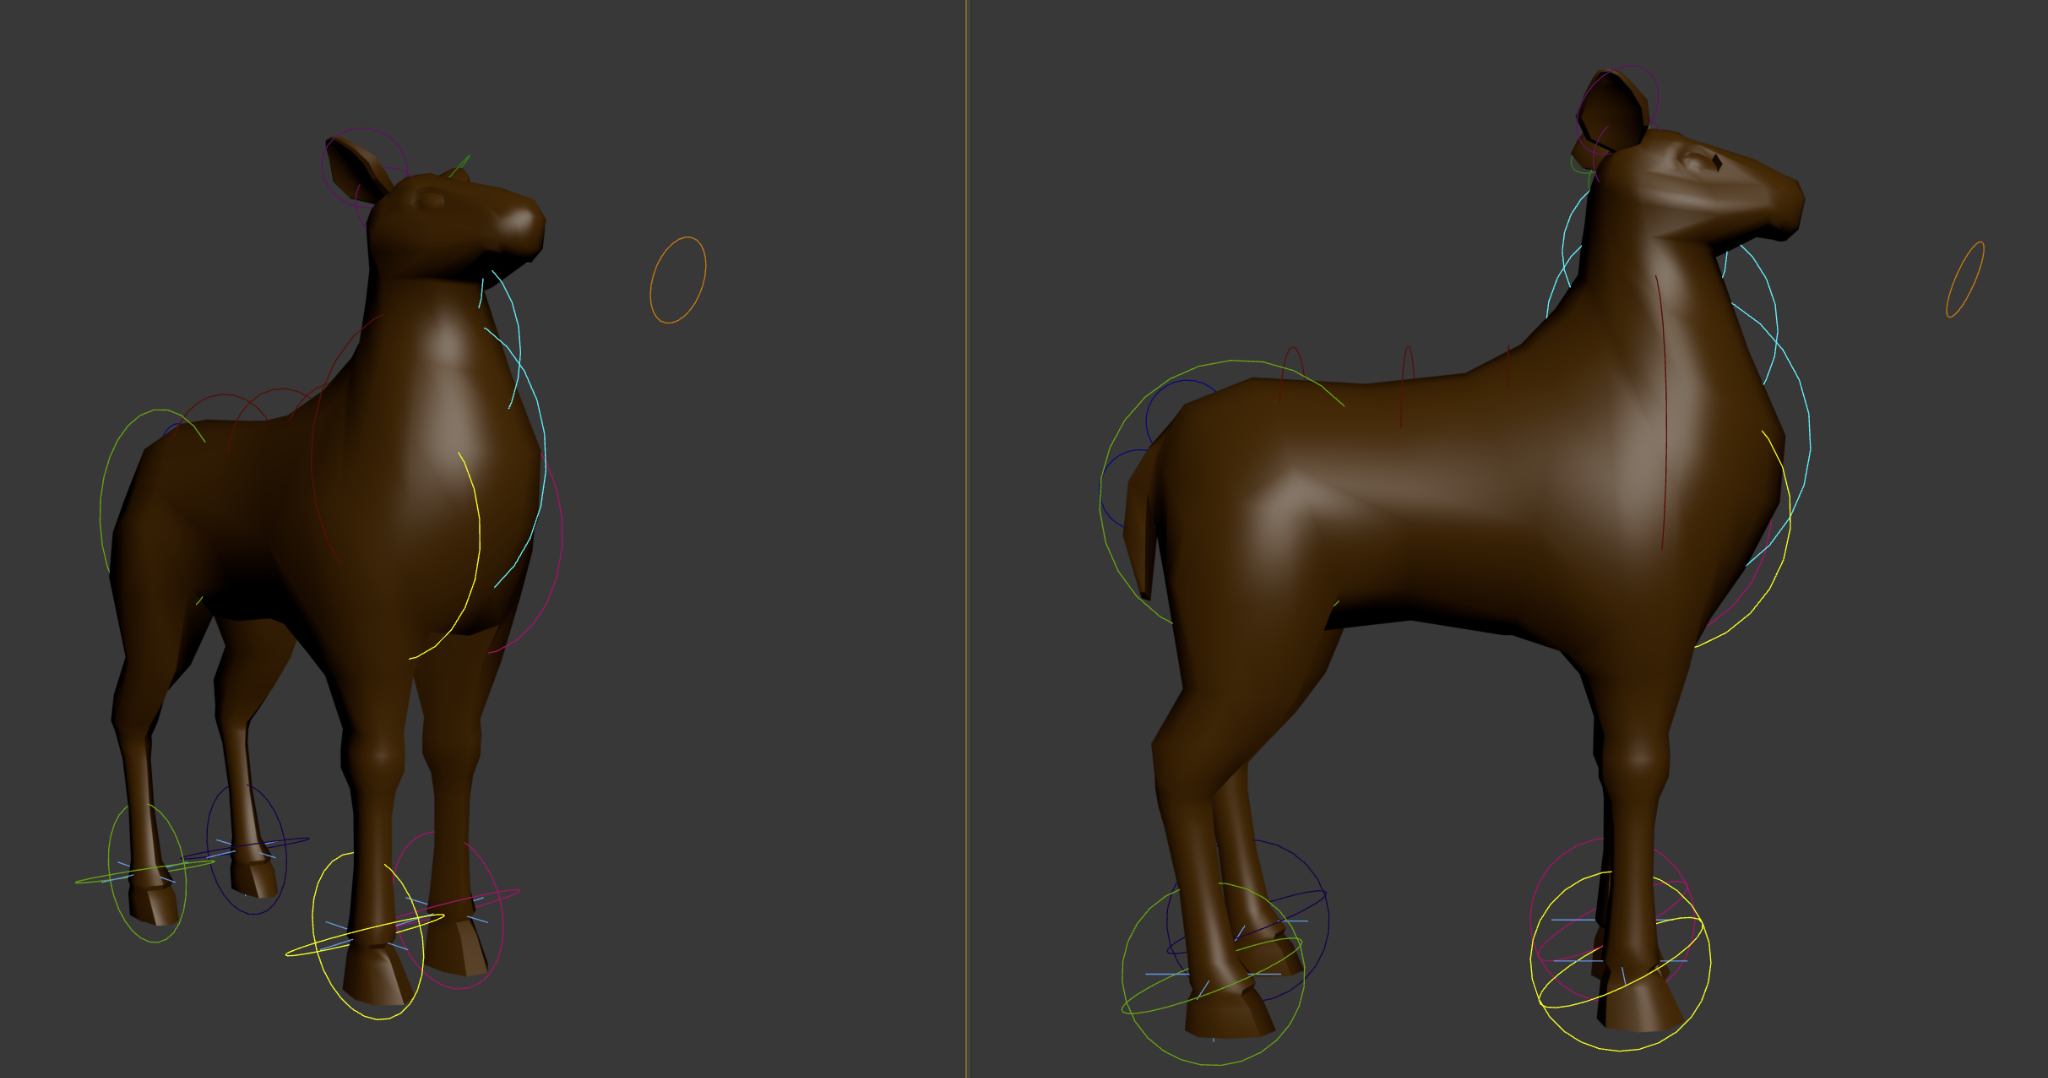
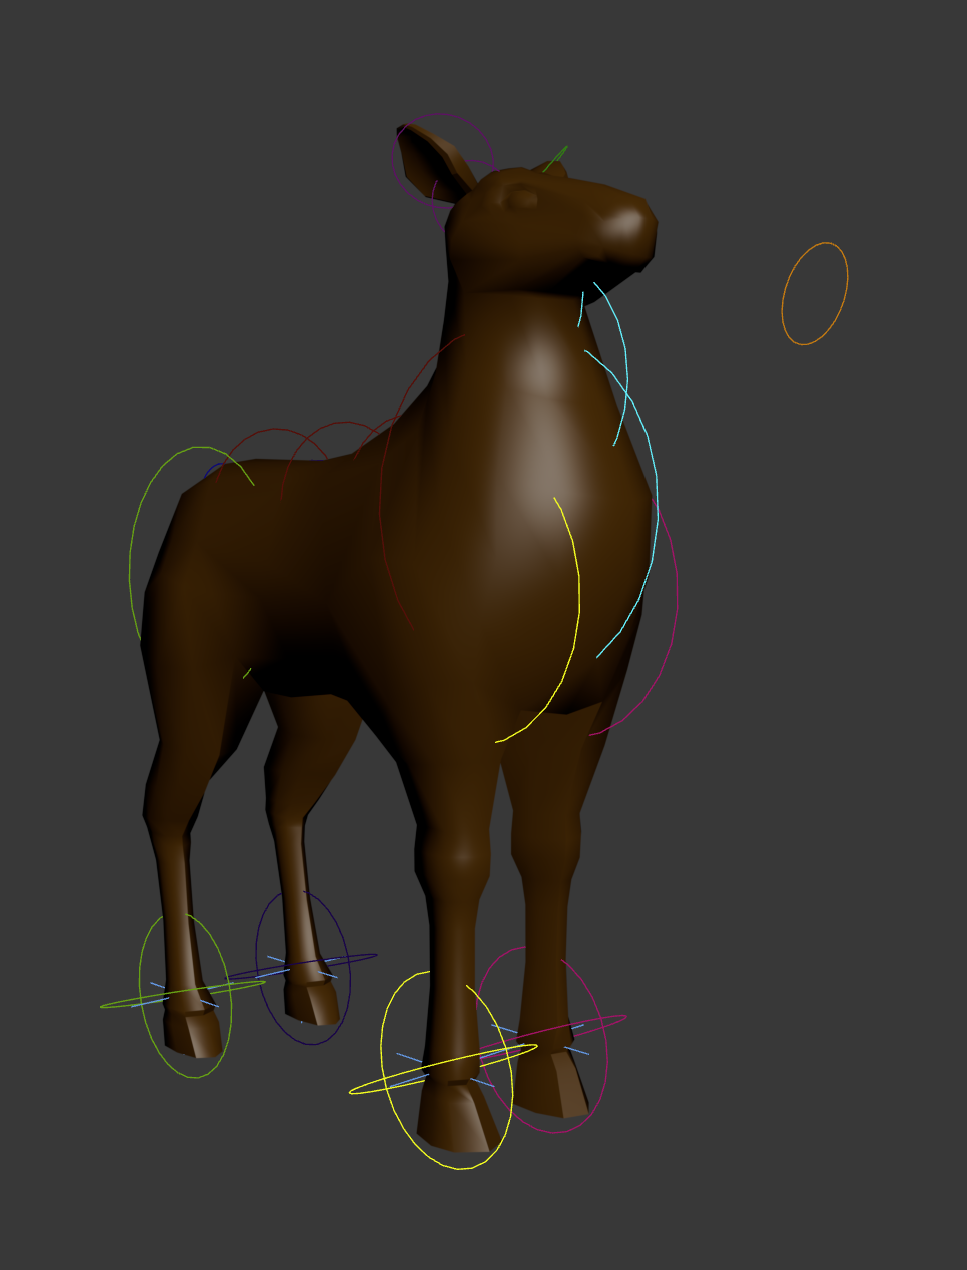
Deer

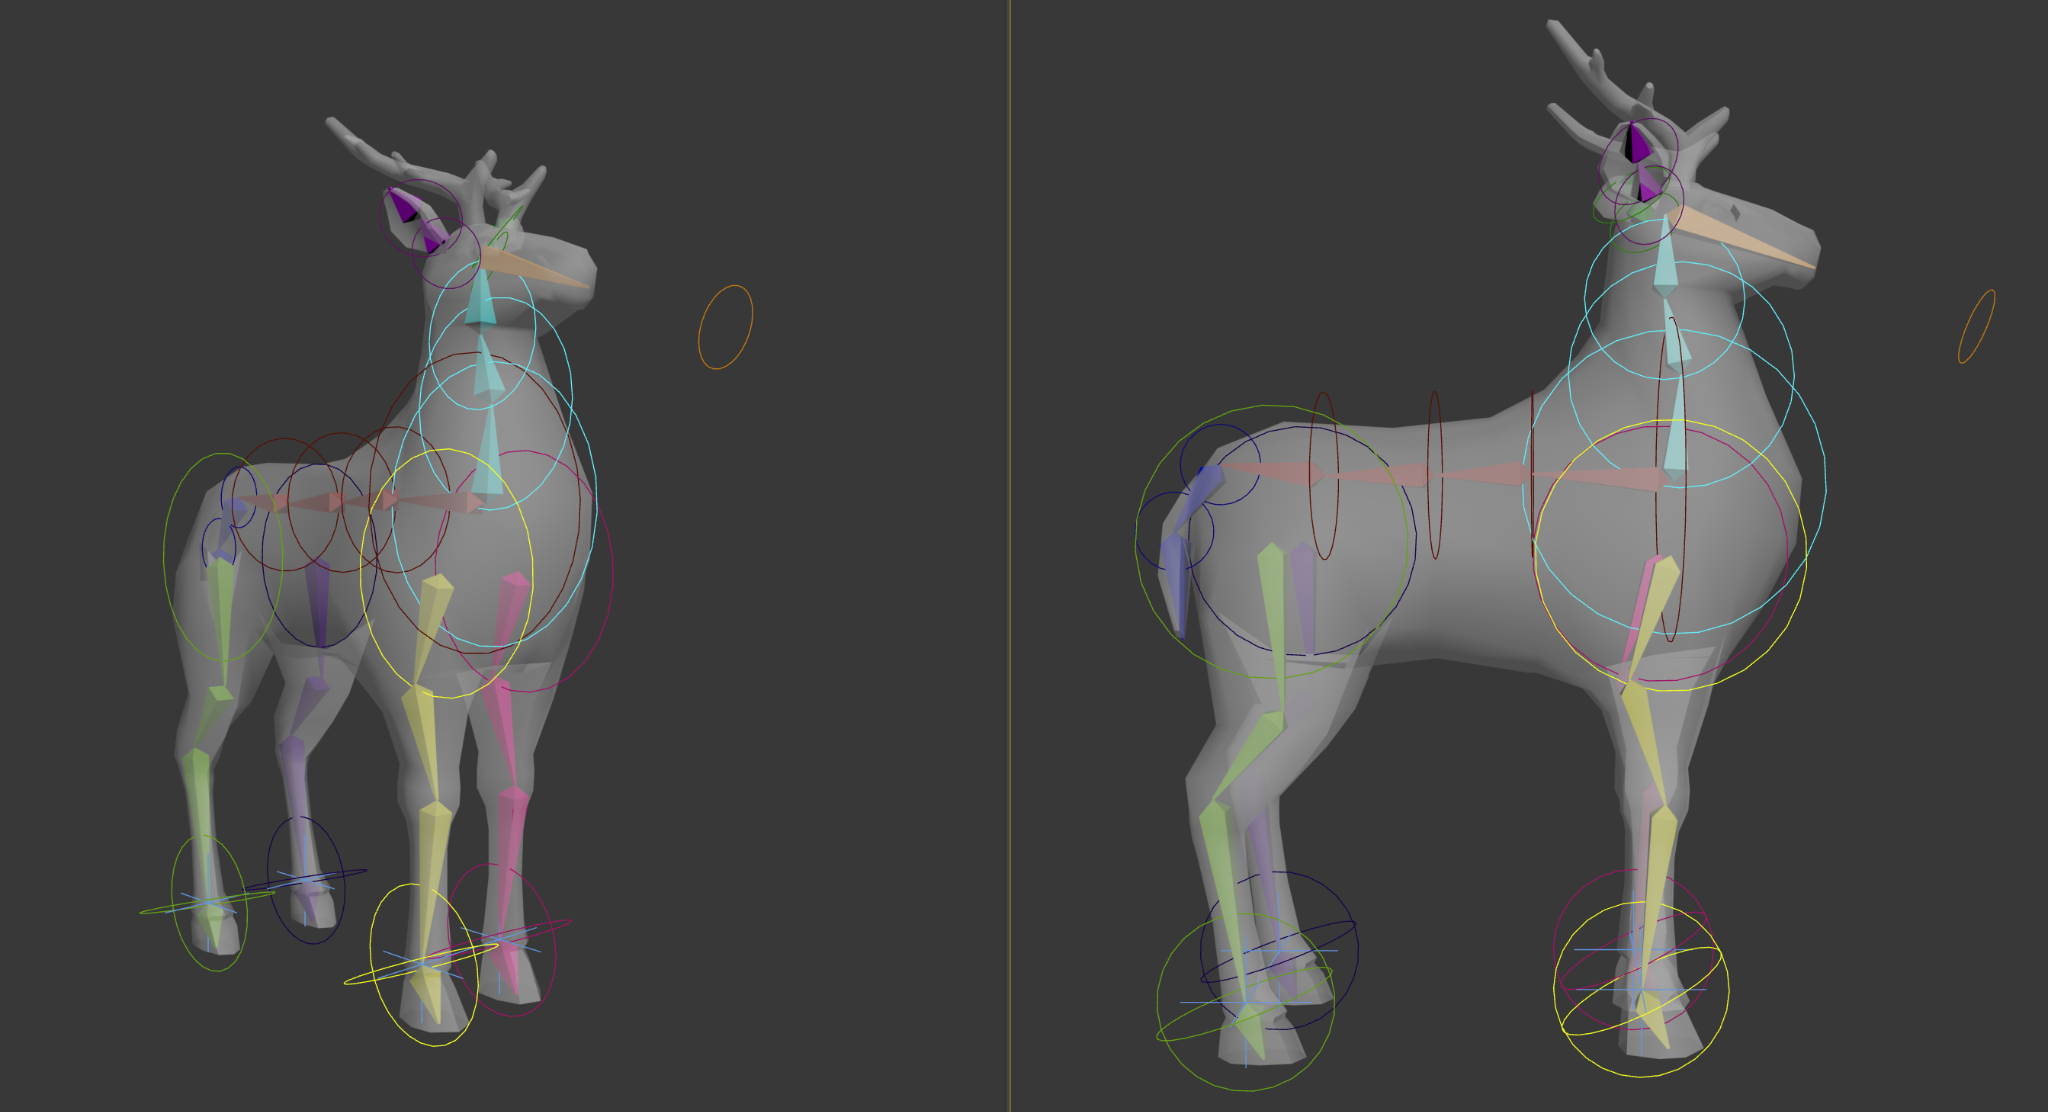
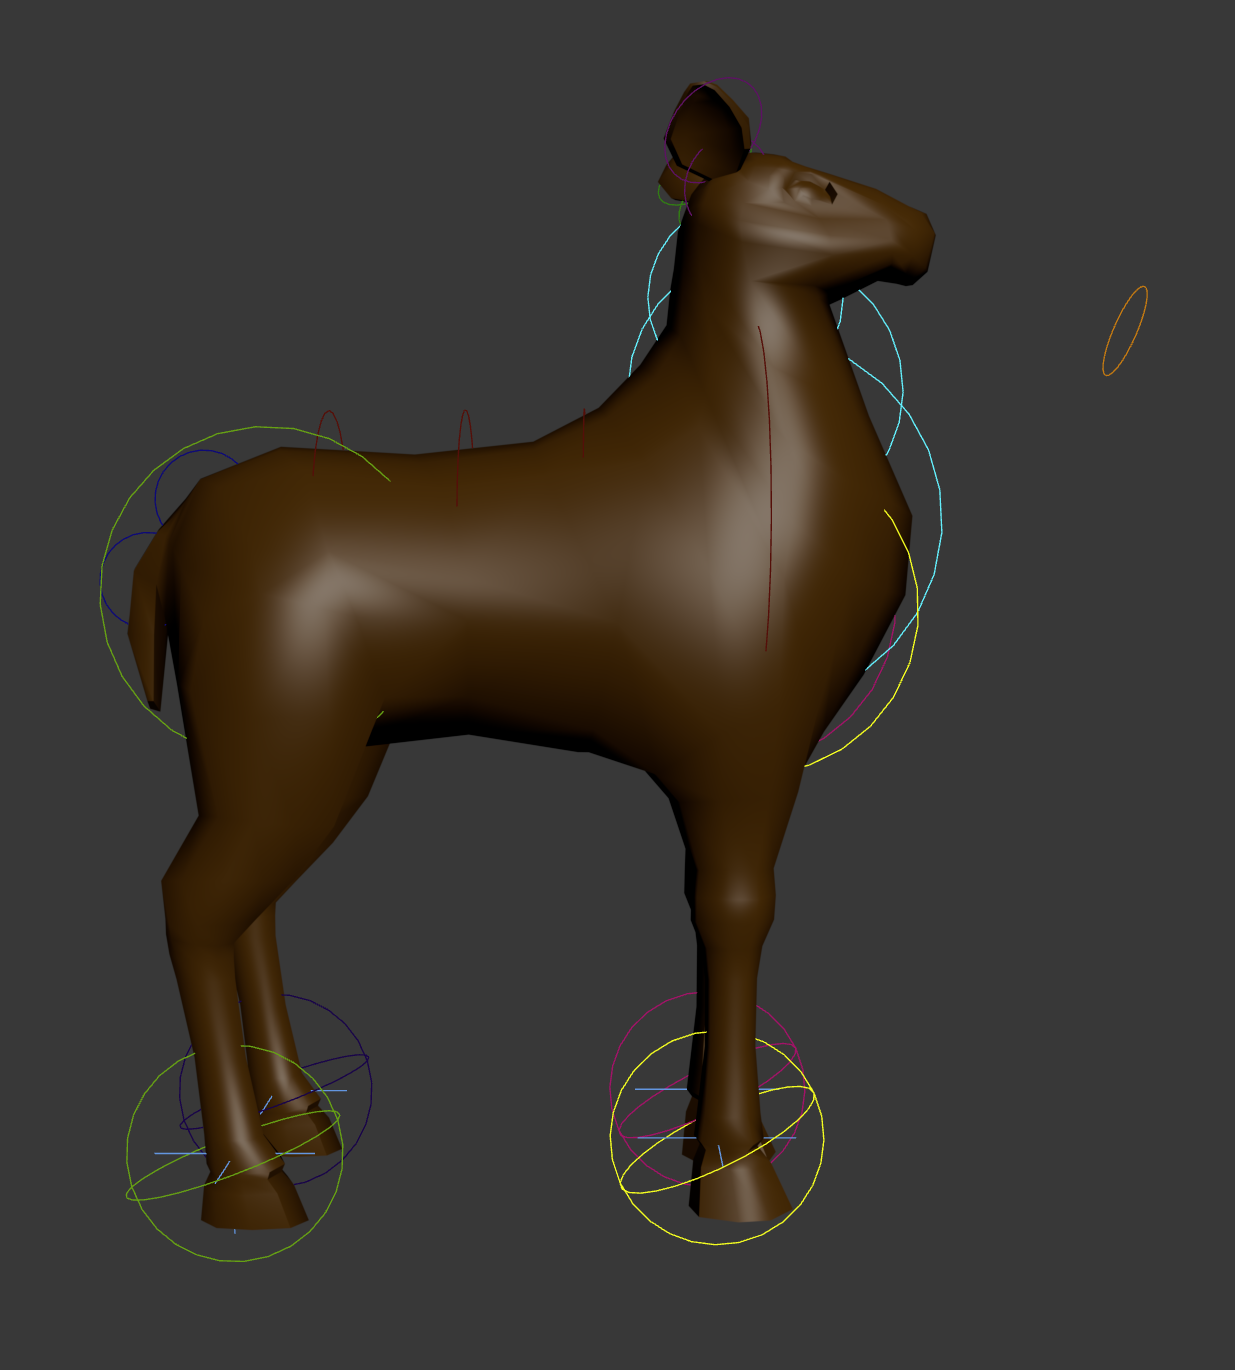
Deer rig
Deer bone view
Deer rig
Deer bone view
Deer rig
Deer bone view
1 / 3

Overview

The Deer was originally conceived as an environmental creature intended to add life to the world and provide subtle player feedback. The initial design goal was for the Deer to detect approaching players and flee using an avoidance system driven by Unity's NavMesh.

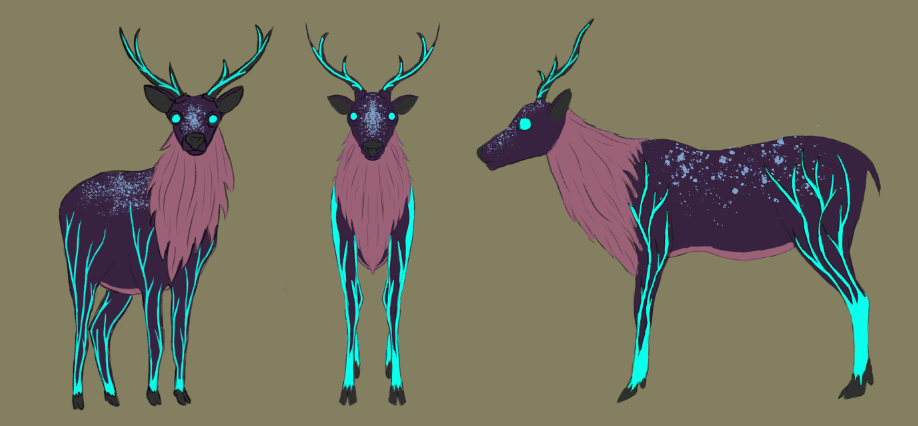
Character Concept

Design Goal

The Deer was intended to serve as an ambient environmental element that would react naturally to the player's presence.

  • Player detection.
  • Avoidance behavior.
  • NavMesh movement.
  • Dynamic reactions to nearby players.

Rigging

I created the base rig for the Deer with the intention of animating the character myself. However, due to software issues encountered during production, animation work had to be transferred to another member of the team.

Animation Integration

After the animations were completed, I imported the character and animation assets into Unity and configured the Animator Controller.

IdleWalking

Although the walking animation was successfully integrated, it was ultimately removed from the final build due to higher-priority gameplay tasks and limited development time.


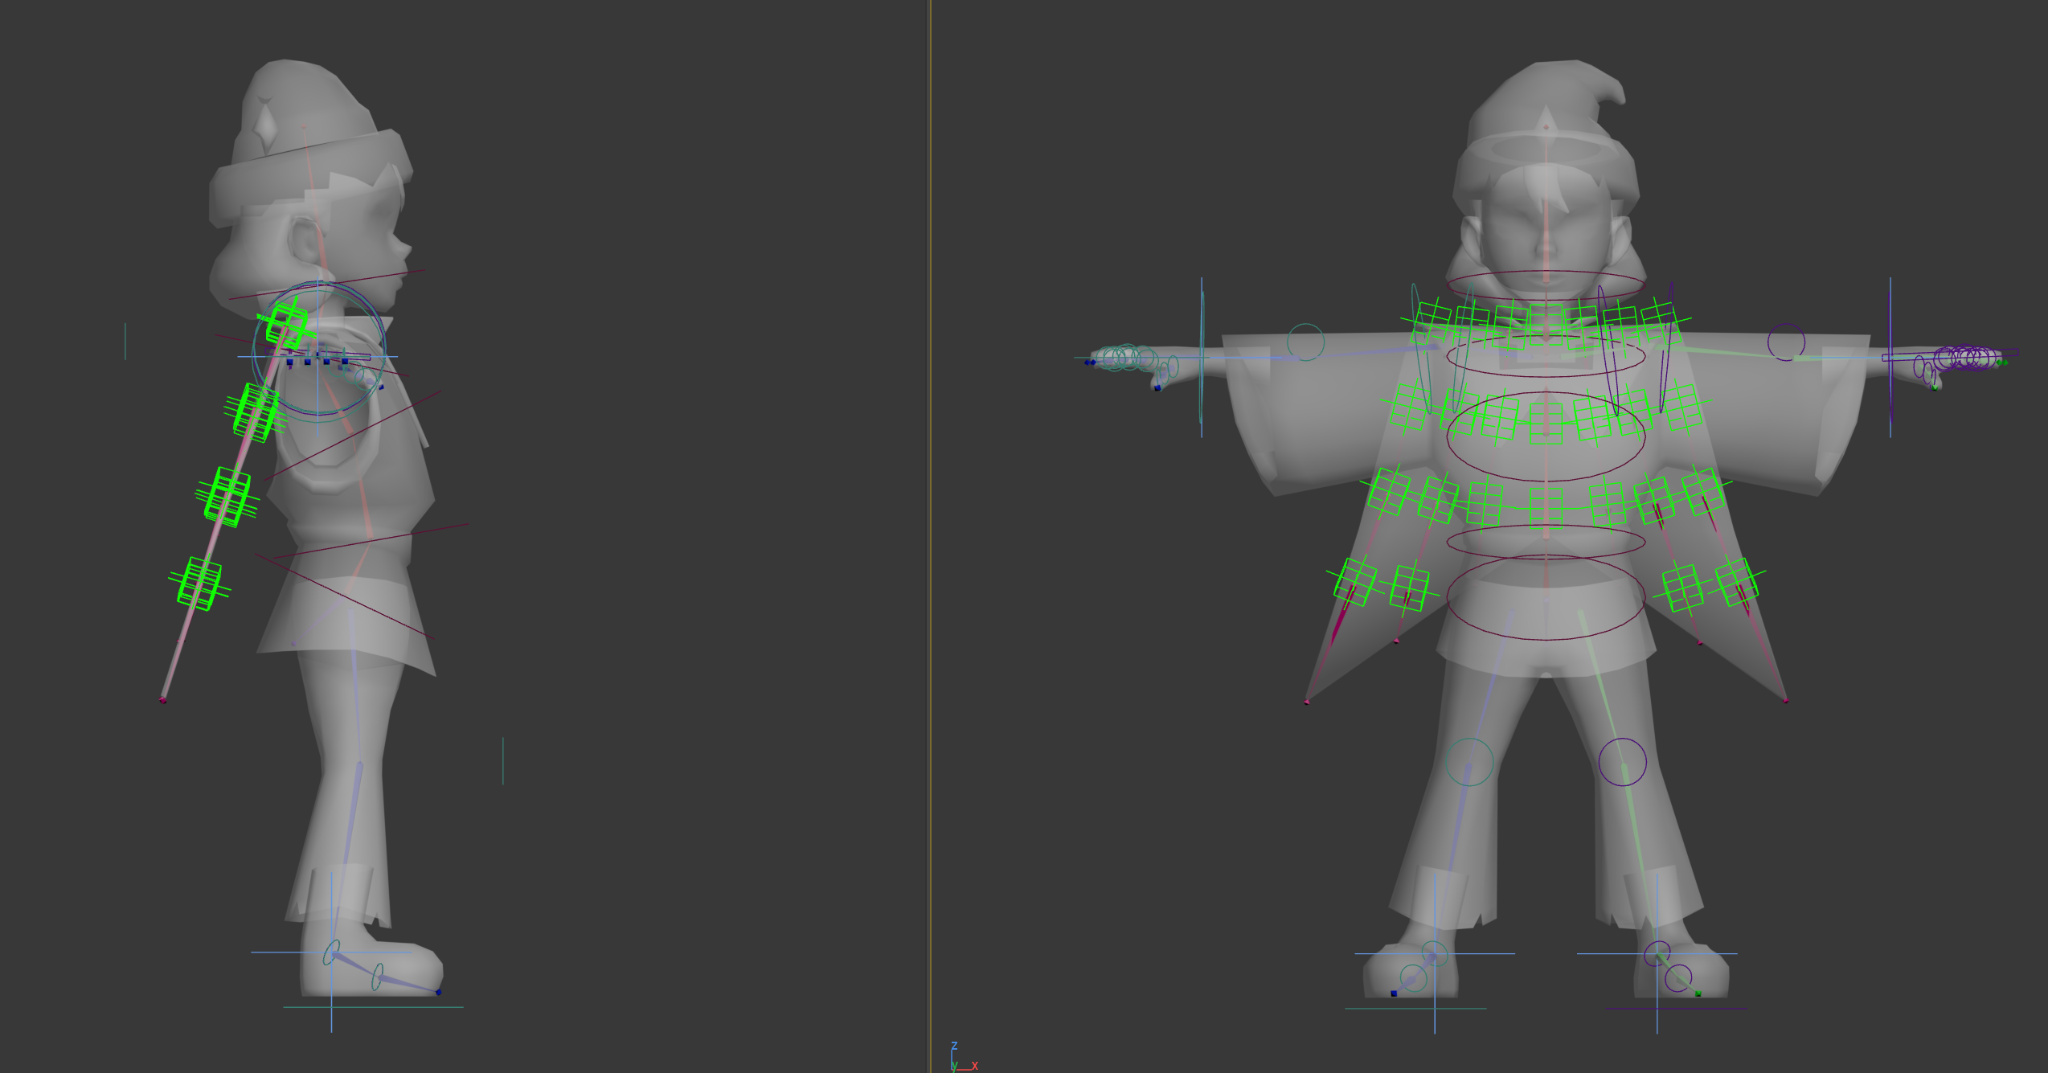
Wizard

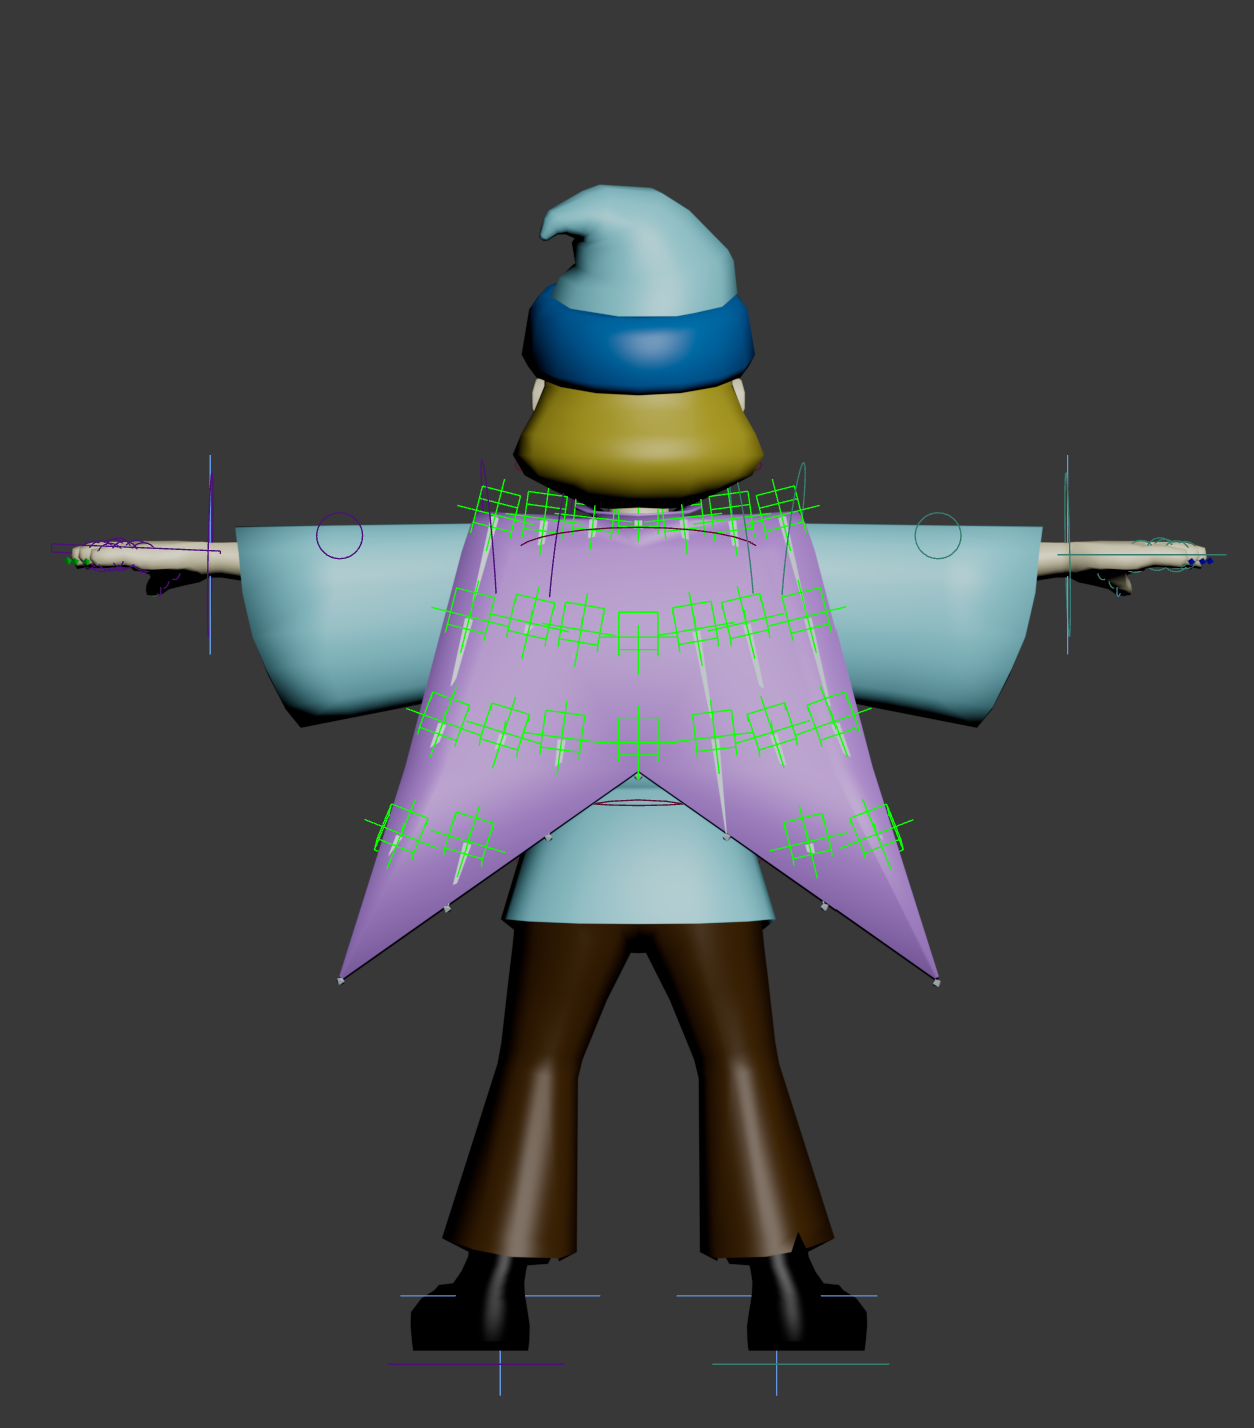
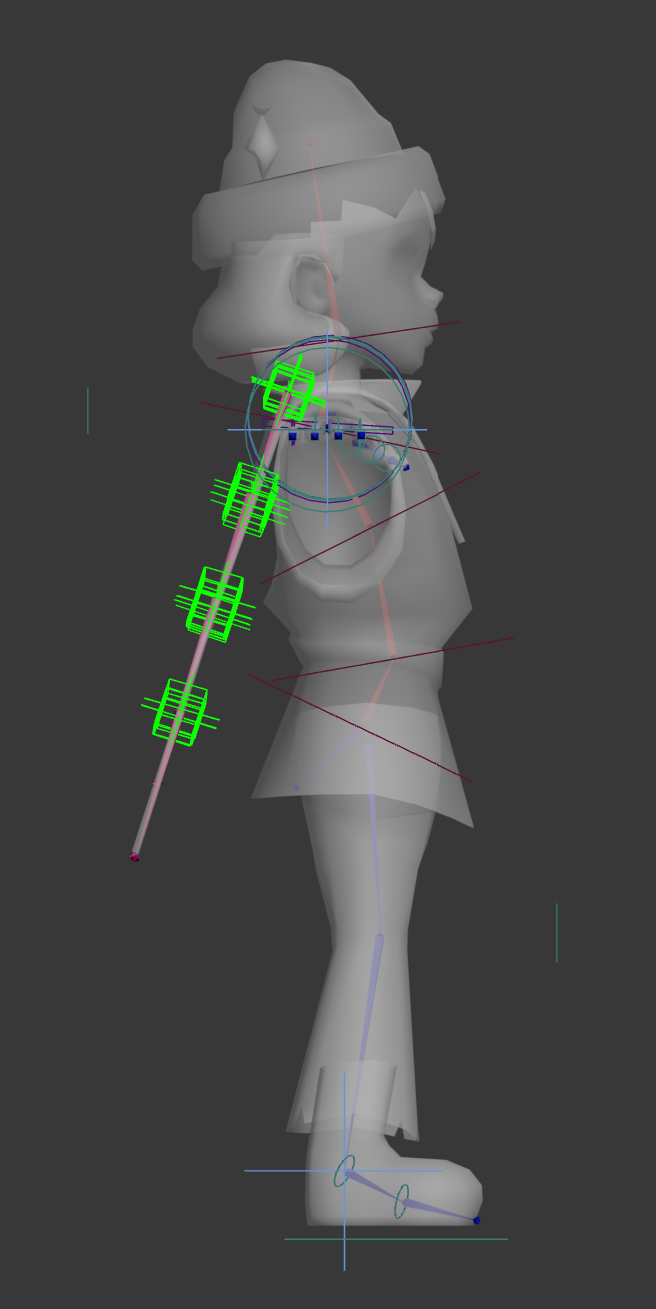
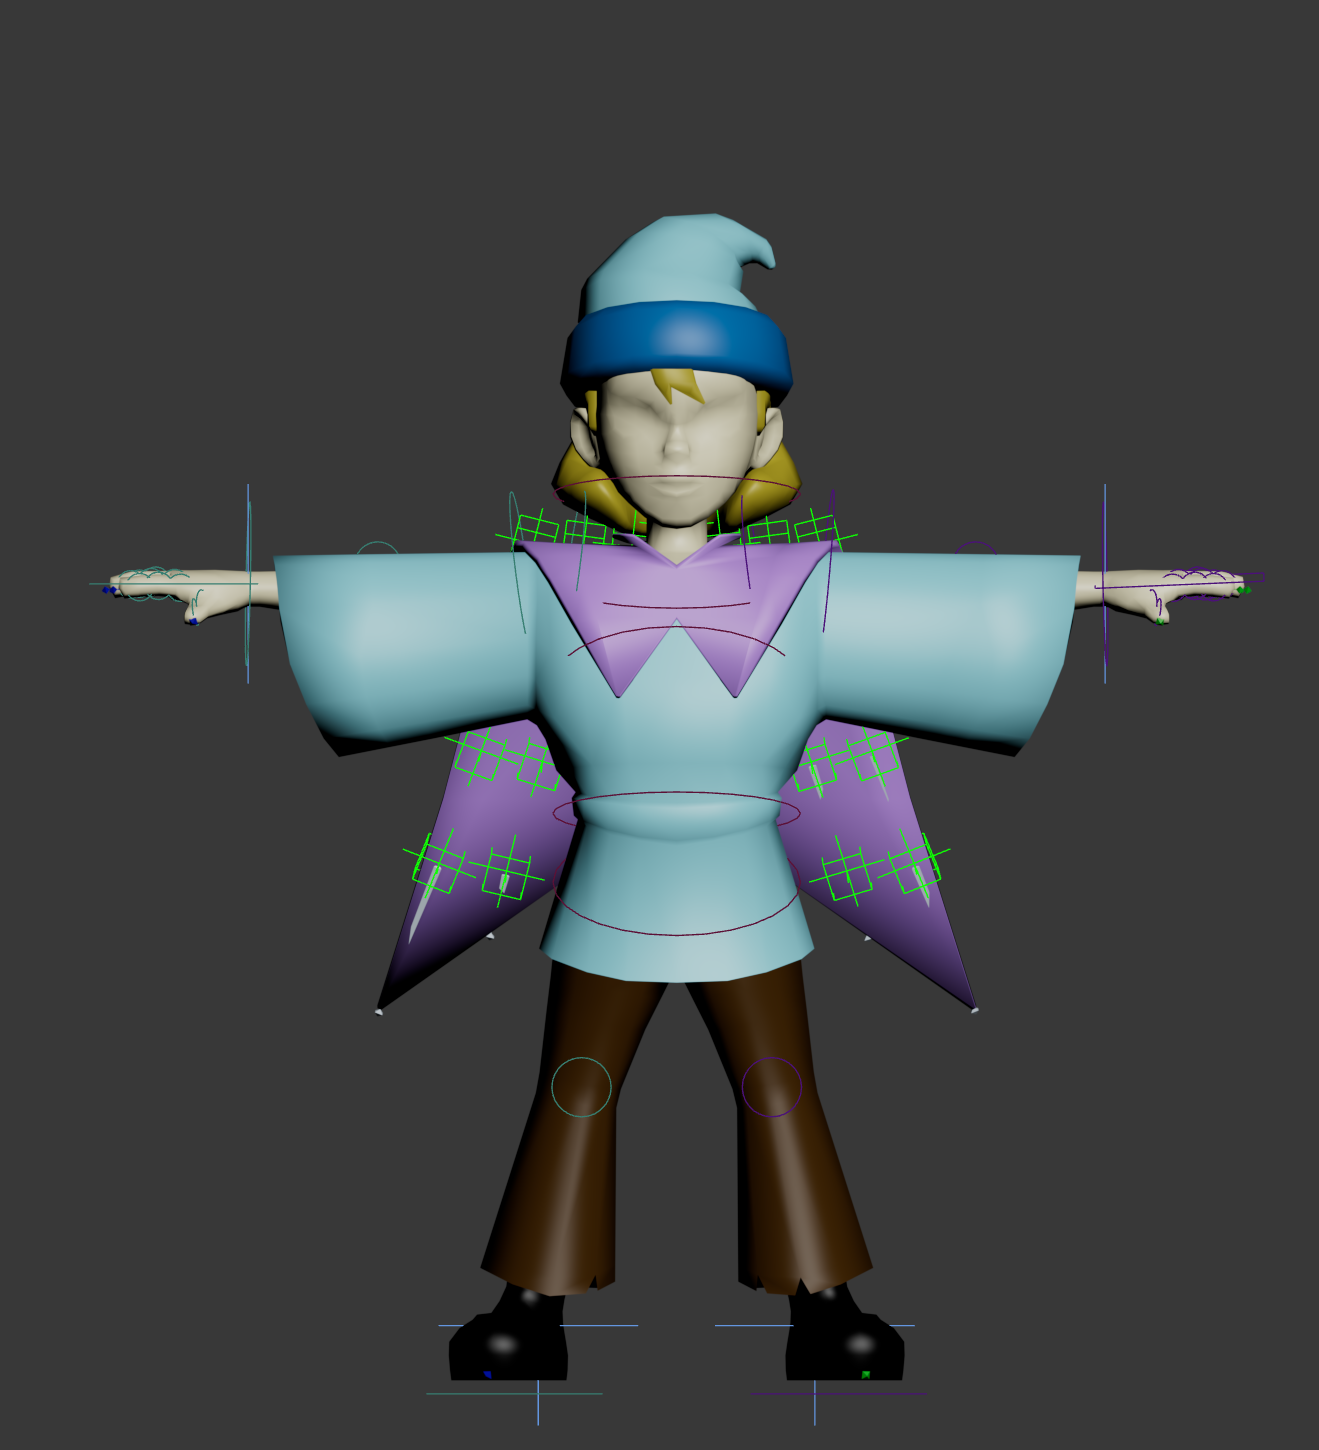
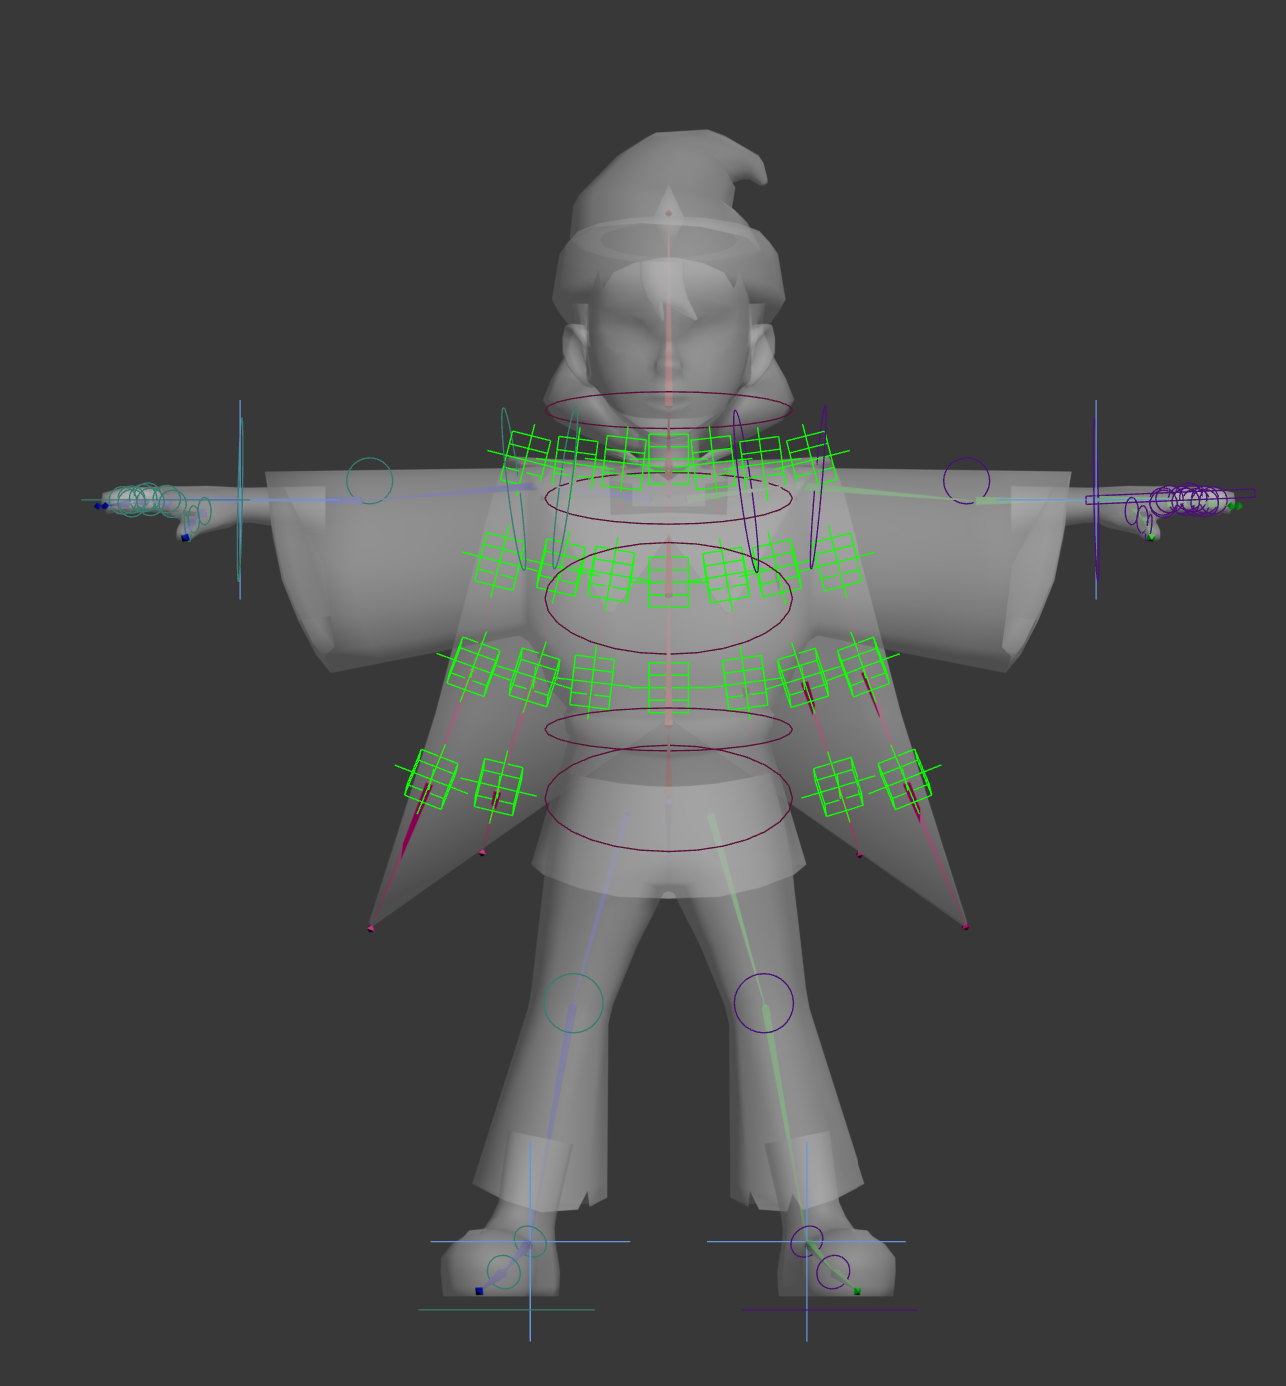
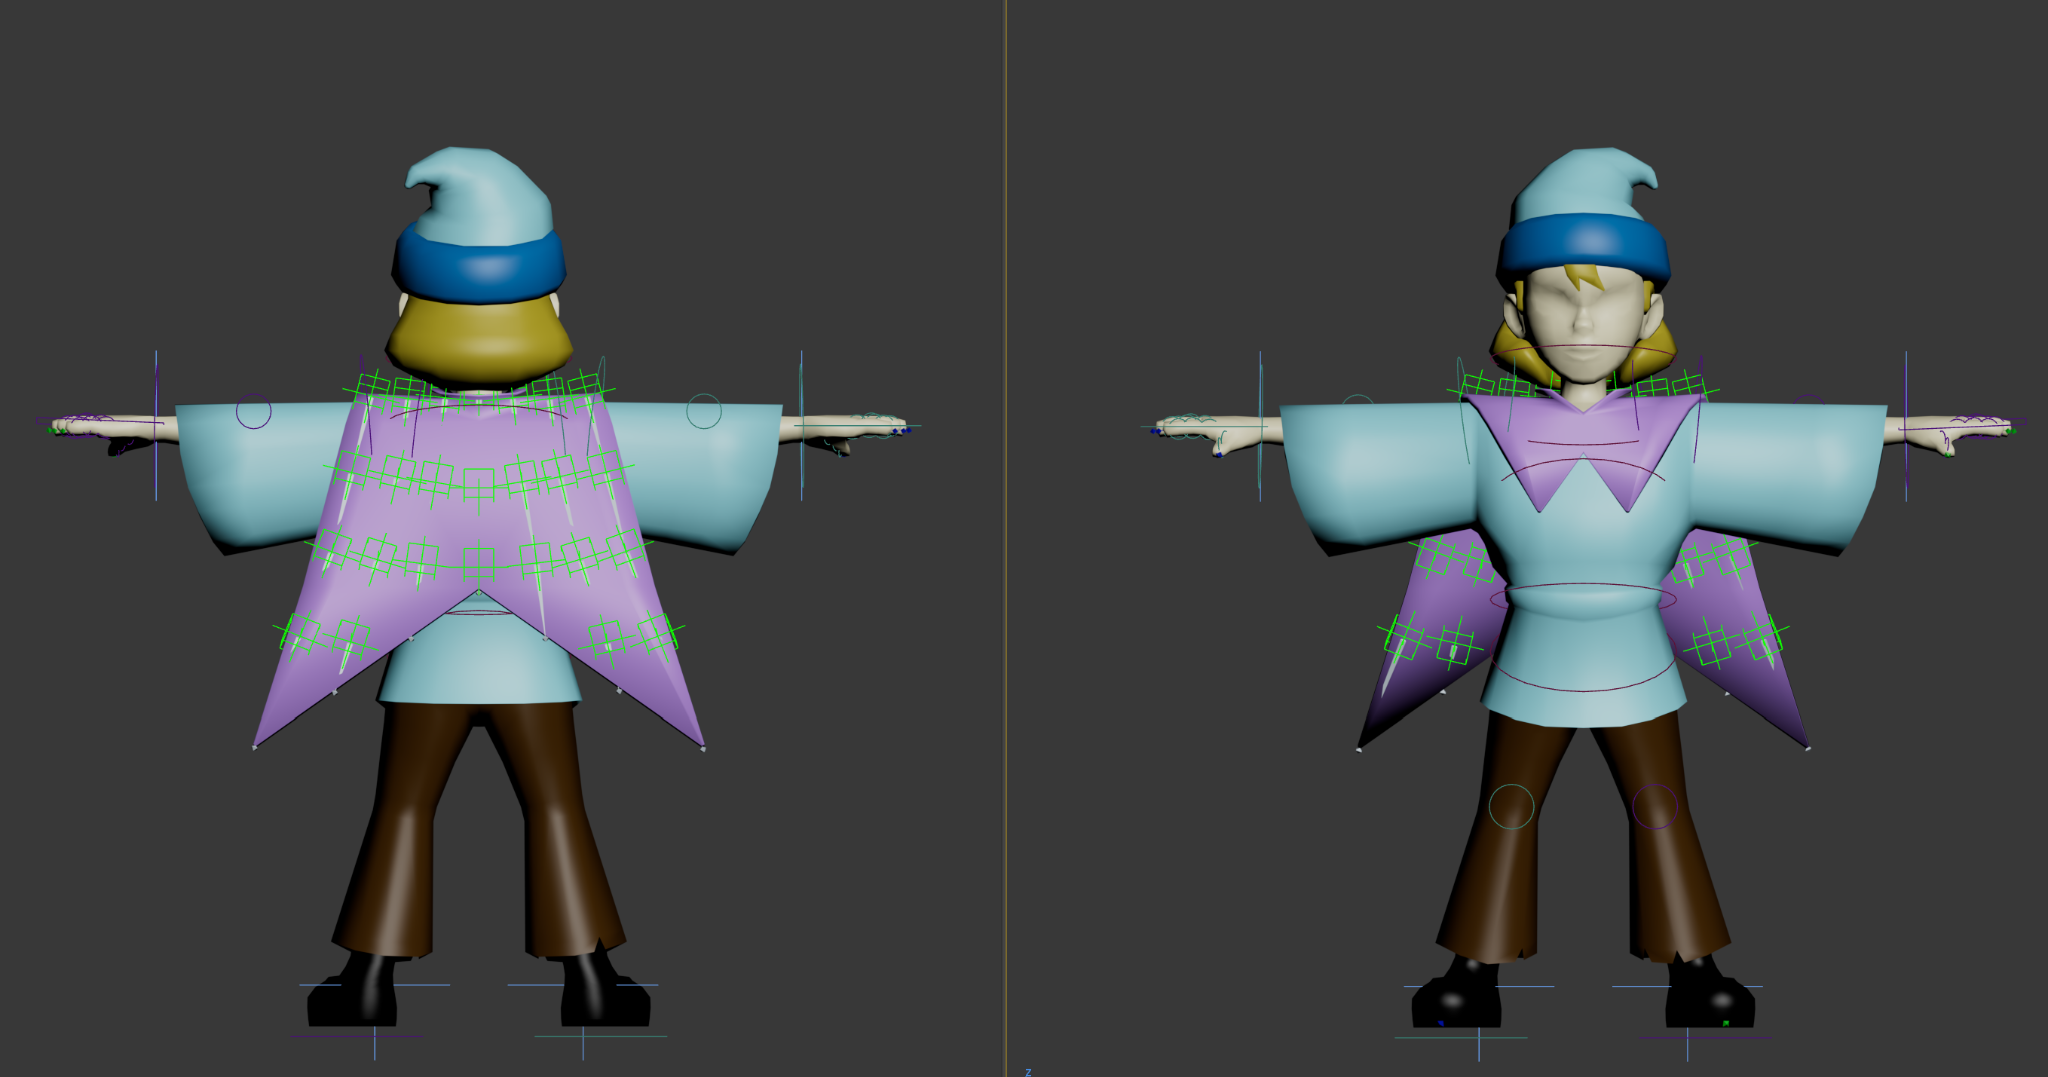
Wizard rig
Wizard bone view
Wizard rig
Wizard bone view
Wizard rig
Wizard bone view
1 / 3

Overview

The Wizard was one of the game's two primary playable characters. I assumed responsibility for the rigging and animation integration pipeline for the character, ensuring that gameplay systems and animations functioned correctly throughout development.

Rigging

I created the Wizard's rig to support the various gameplay mechanics required throughout the game. The rig included inverse kinematics (IK) systems for the arms and legs, along with LookAt controllers that allowed for precise elbow and knee placement.

  • Locomotion.
  • Combat.
  • Anchoring mechanics.
  • Shooting animations.
  • Traversal interactions.

Animation Pipeline

Once the rig was completed, it was passed to another member of the team who created the animations. After animation production was complete, I imported the character and animation assets into Unity and integrated them into the gameplay framework.

Animation Integration

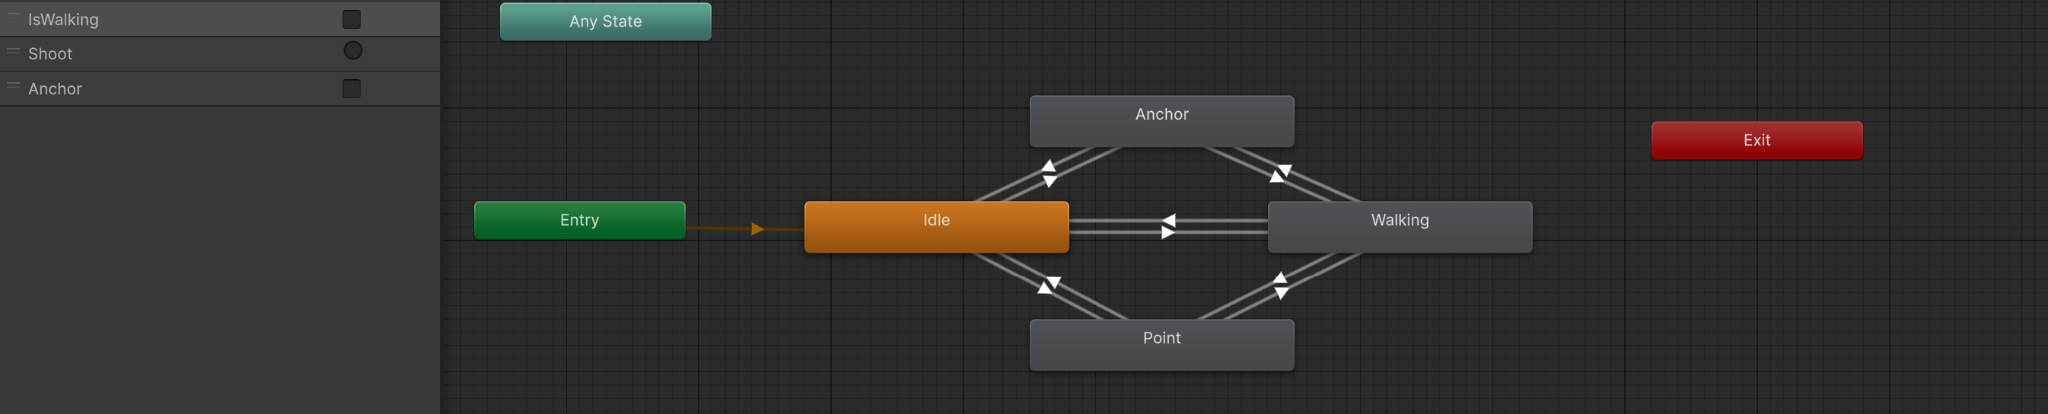
I configured the Animator Controller and implemented the connections between gameplay systems and animation states.

  • Setting up Animator state machines.
  • Configuring animation transitions.
  • Creating animation parameters.
  • Triggering animations through gameplay scripts.
  • Integrating movement and interaction states.
IdleMovementShootingAnchoringInteractions
Unity Animator Controller for the Wizard character
Unity Animator Controller showing the Wizard animation state machine (click to view full size).

Monster

Overview

The Monster served as one of the game's two playable characters. While another team member was responsible for rigging and animating the character, I was responsible for integrating the animations into Unity and connecting them to the gameplay systems.

Asset Review

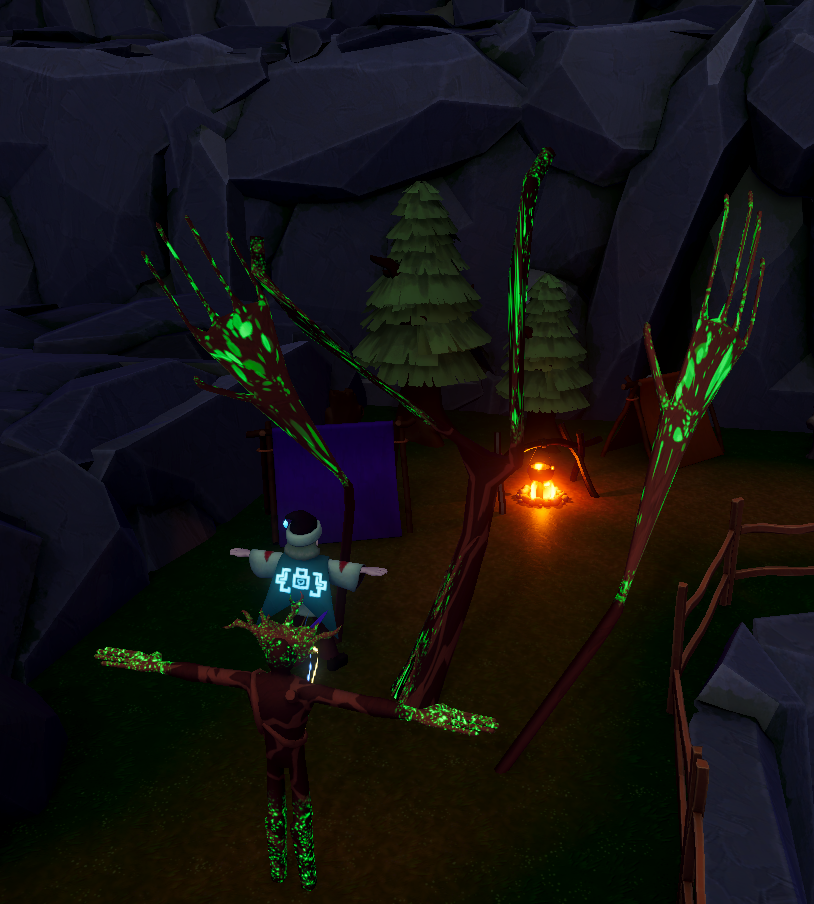
During the export and import process, I identified several issues that prevented the character from functioning correctly in Unity. After communicating the problems with the original creator and correcting the affected assets, I proceeded with integrating the character into the project.
Animation Integration

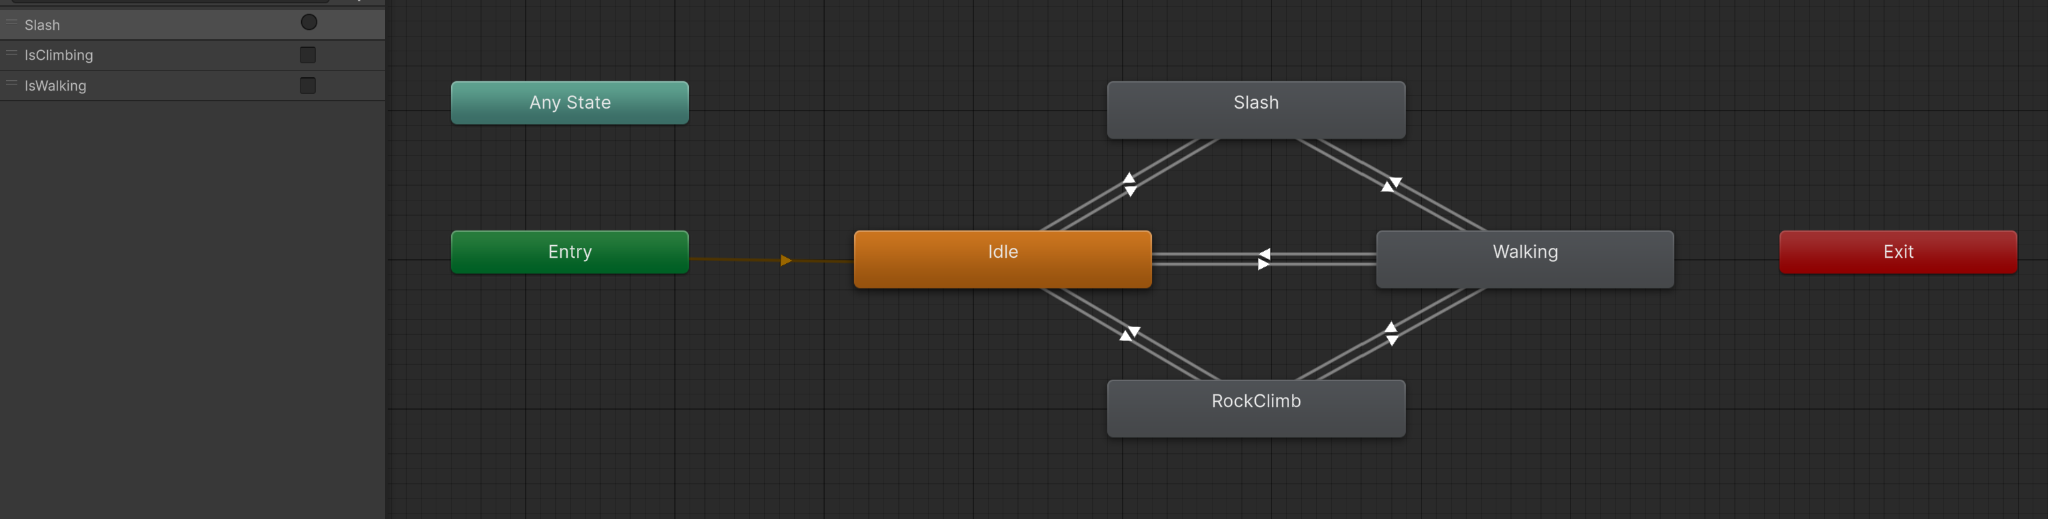
I configured the Animator Controller and connected animation states to the player controller and gameplay systems.

IdleWalkMelee AttacksRock ClimbingMantling

This required setting up animation transitions, parameters, and triggers so that the correct animations would respond to player actions and gameplay states.

Unity Animator Controller for the Monster character
Unity Animator Controller for the Monster (click to view full size).
Monster animation issue visible during Unity integration
Example of an animation import issue identified during Unity integration and resolved before implementation (click to view full size).

Team Contributions

Cursed Friendship was developed as part of a multidisciplinary student team. While this portfolio focuses on my individual contributions, the following collaborators were responsible for the areas listed below.

Philip Tomaszewski

External Programming Support

Assisted with the redesign and implementation of the Curse mechanic by helping replace the original Spring Joint solution with a custom C# implementation.

Thanh Gia Nghi Ngo

Level 1 Developer • 2D Artist • 3D Modeler

Responsible for the development of Level 1 and creating supporting 2D artwork and 3D assets.

Joseph Lu

Level 2 Developer • 3D Modeler • Texture Artist • Animator

Responsible for the development of Level 2, including 3D asset creation, texturing, and animation.

Cameron Smith

Level 4 Developer • Programmer • VFX Artist

Responsible for the development of Level 4, gameplay programming support, and the creation of visual effects.

Erik Pajak

Level 6 Developer • 3D Modeler • Animator • Rigger

Responsible for the development of Level 6 and supporting character modeling, rigging, and animation.